

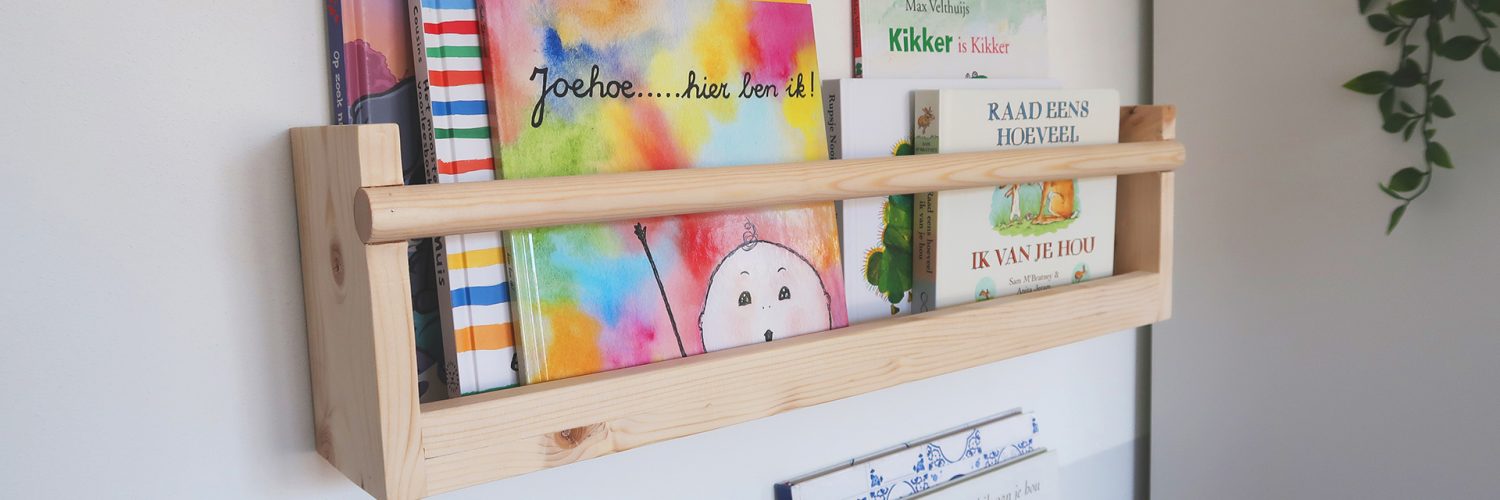
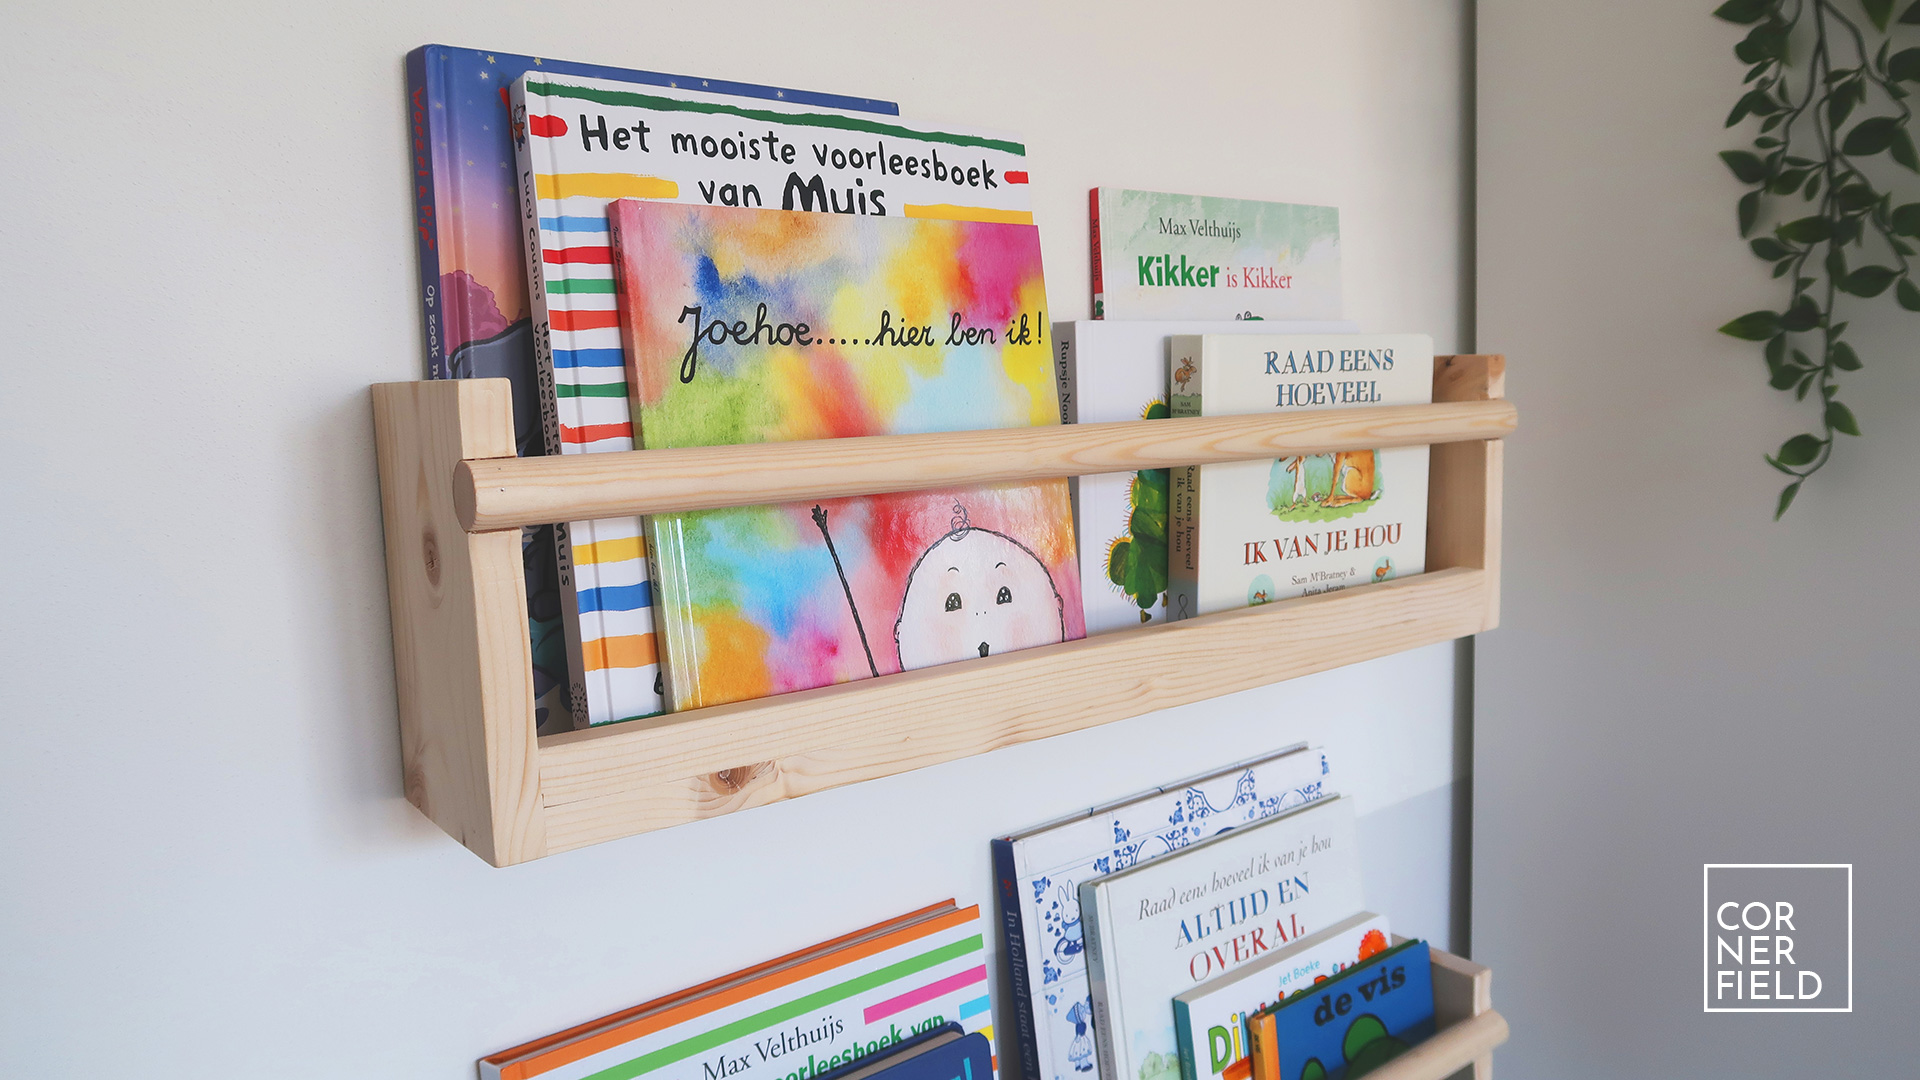
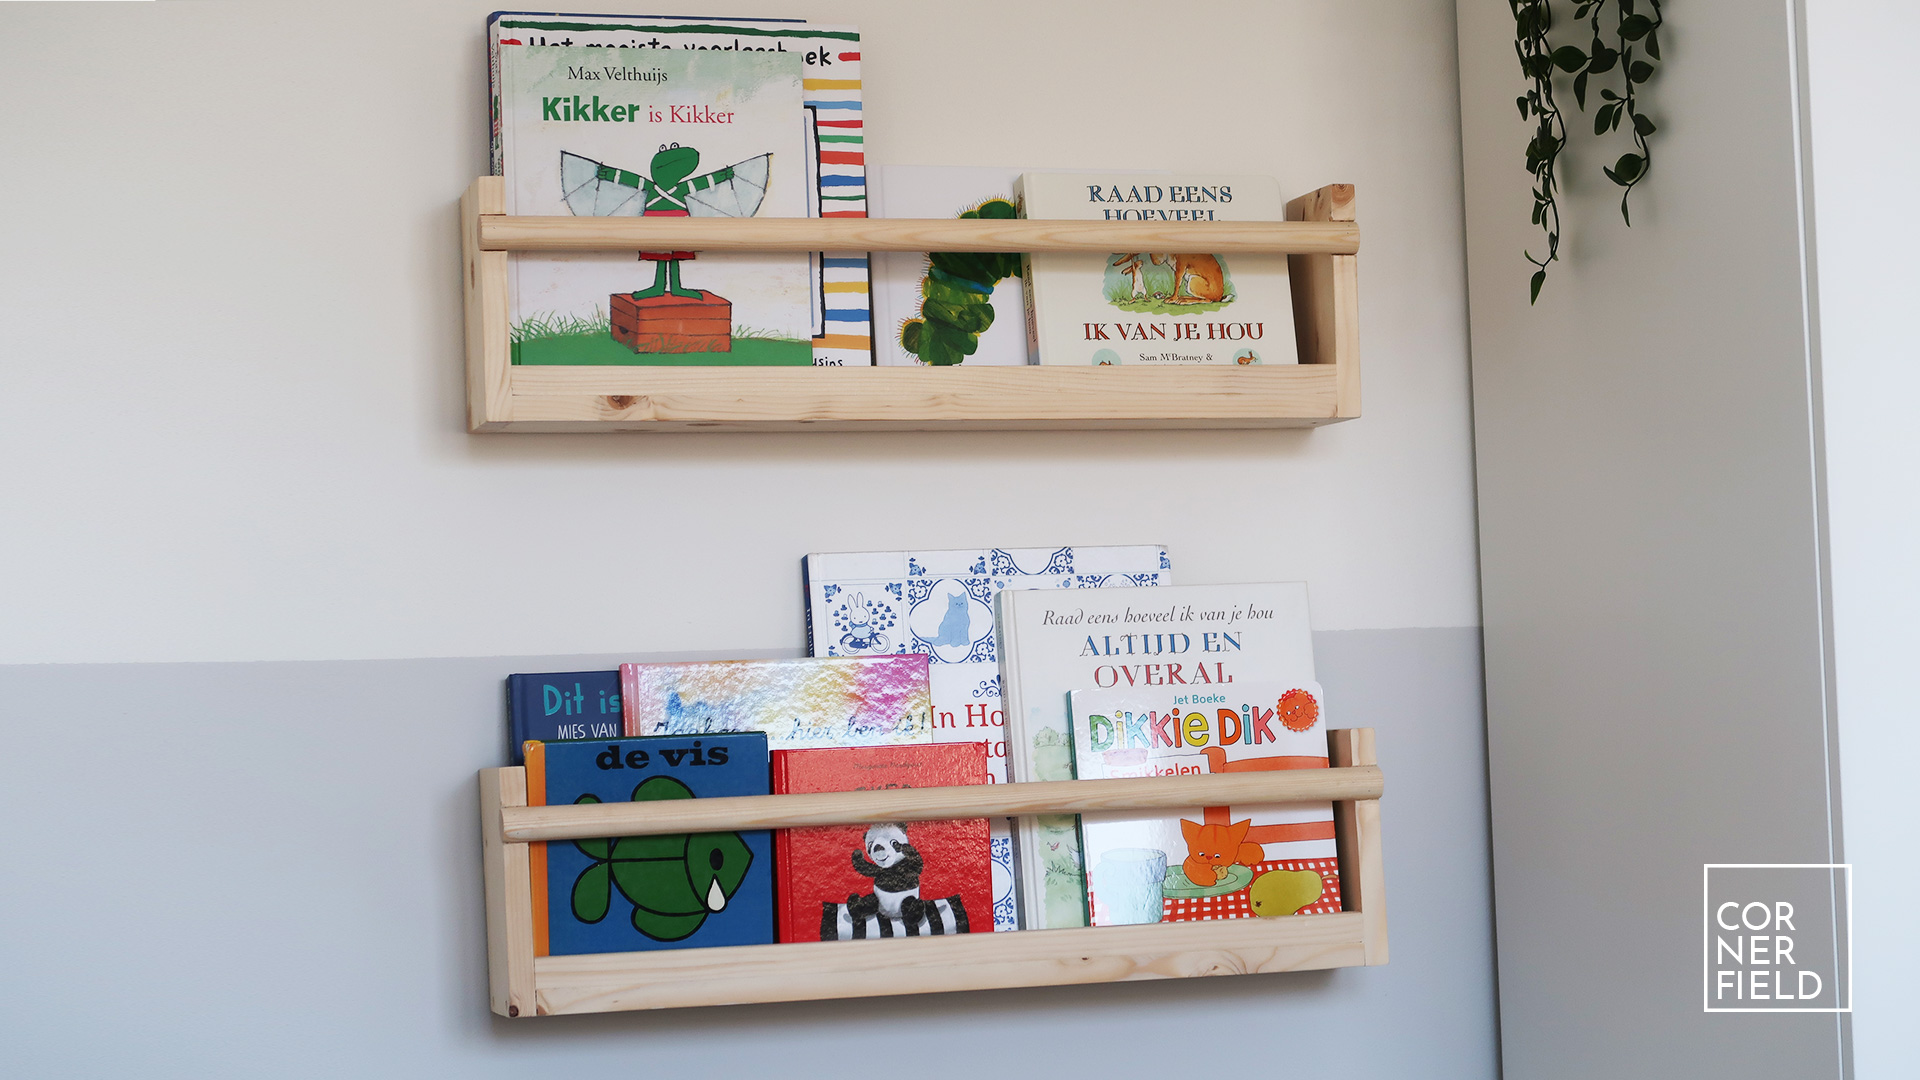
A bookshelf was a must-have for our daughters’ bedroom. Her books were piling on with no place to put them. Let’s change that!
Design
While walking through IKEA my wife noticed a bookshelf that she liked. After some inspection, I concluded that I could make this myself. The construction is fairly basic and the look is nice and clean. I made some alterations to the construction, like omitting the back pieces between the sides and I used different dimensions.

Build
Material
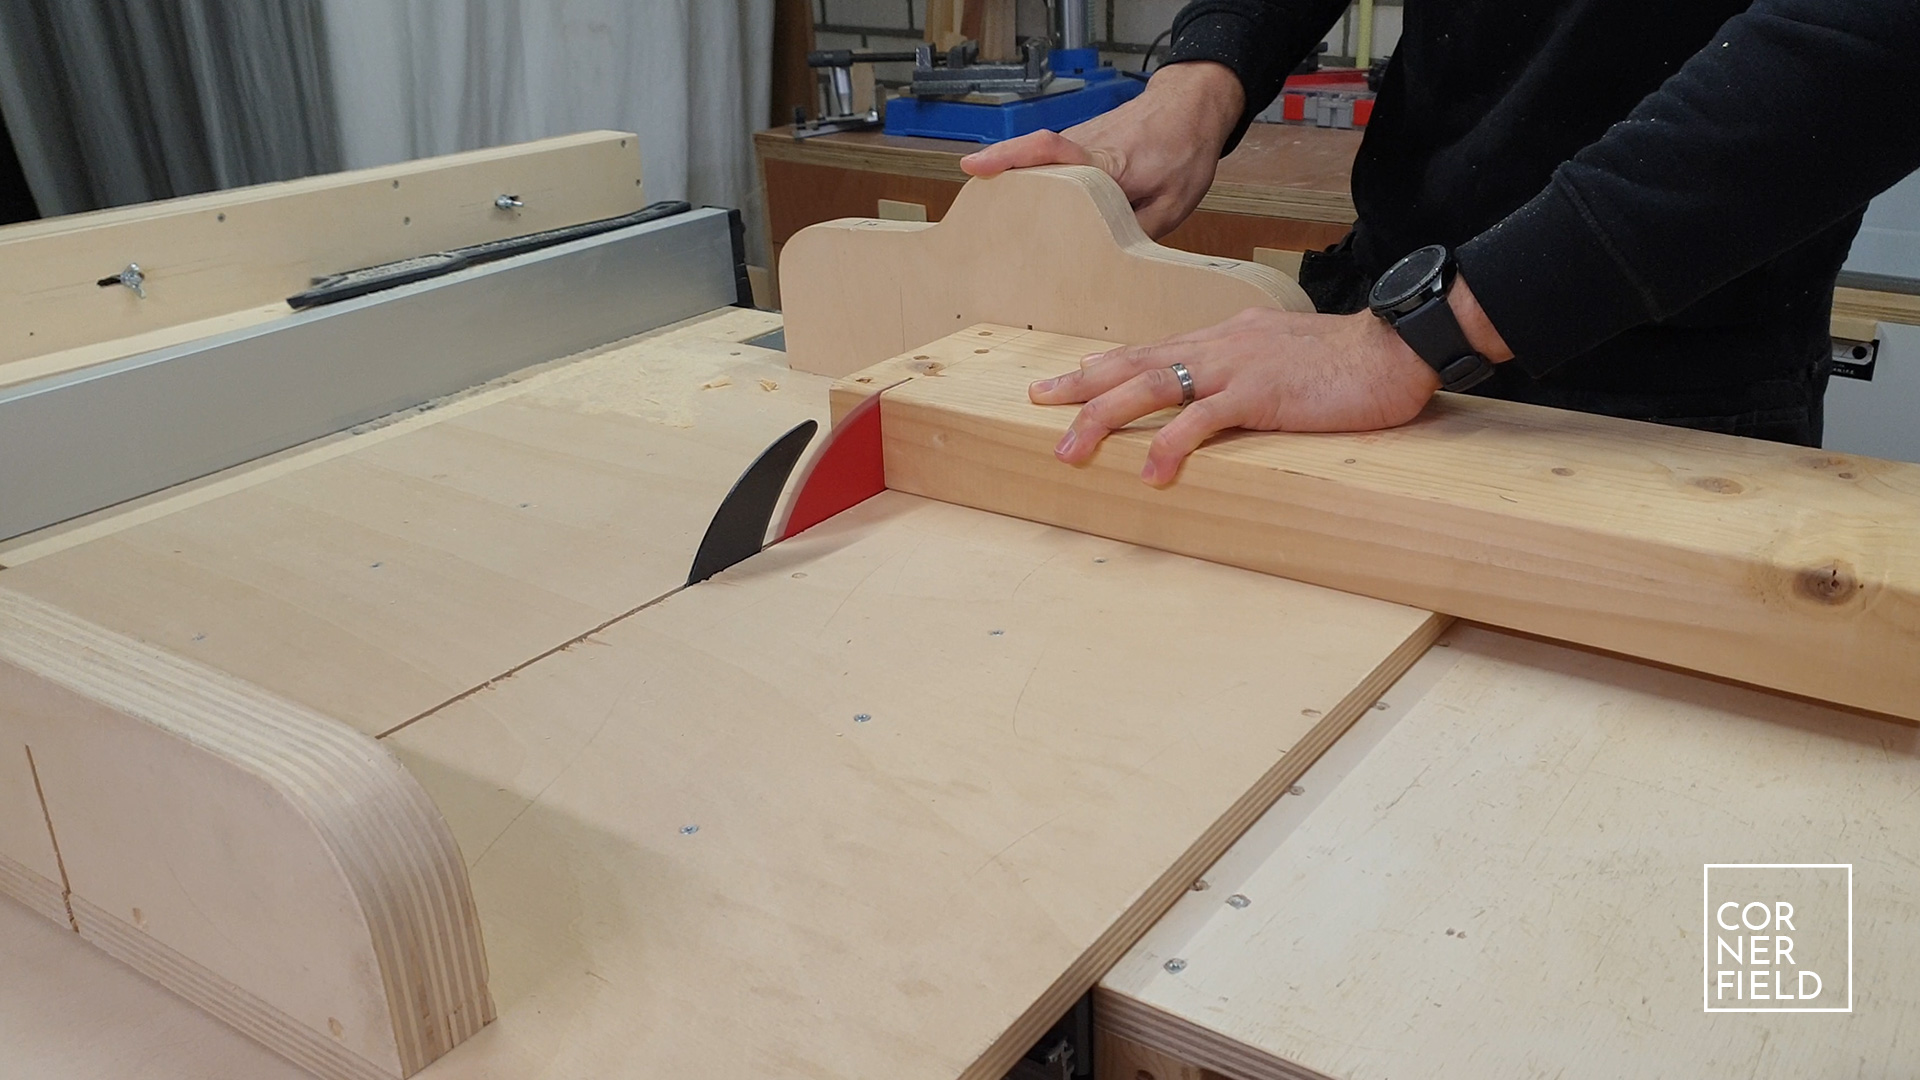
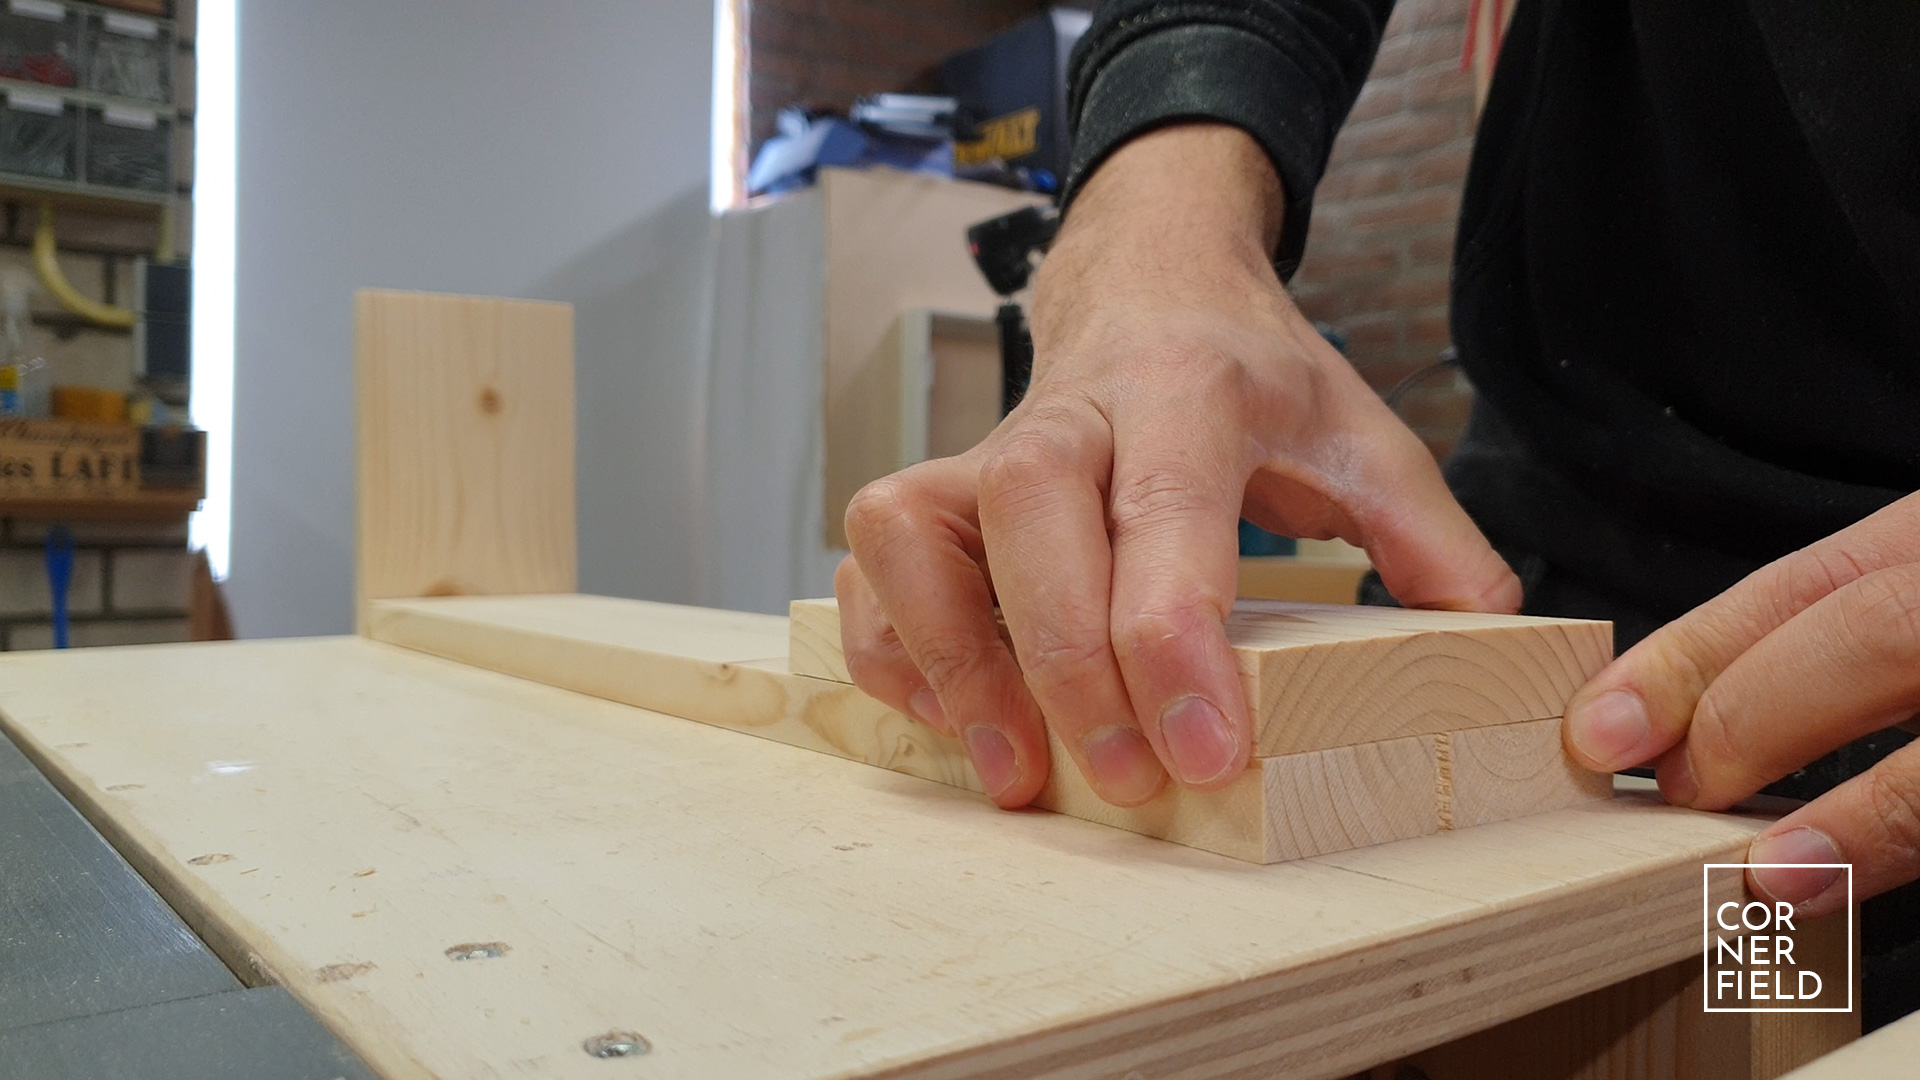
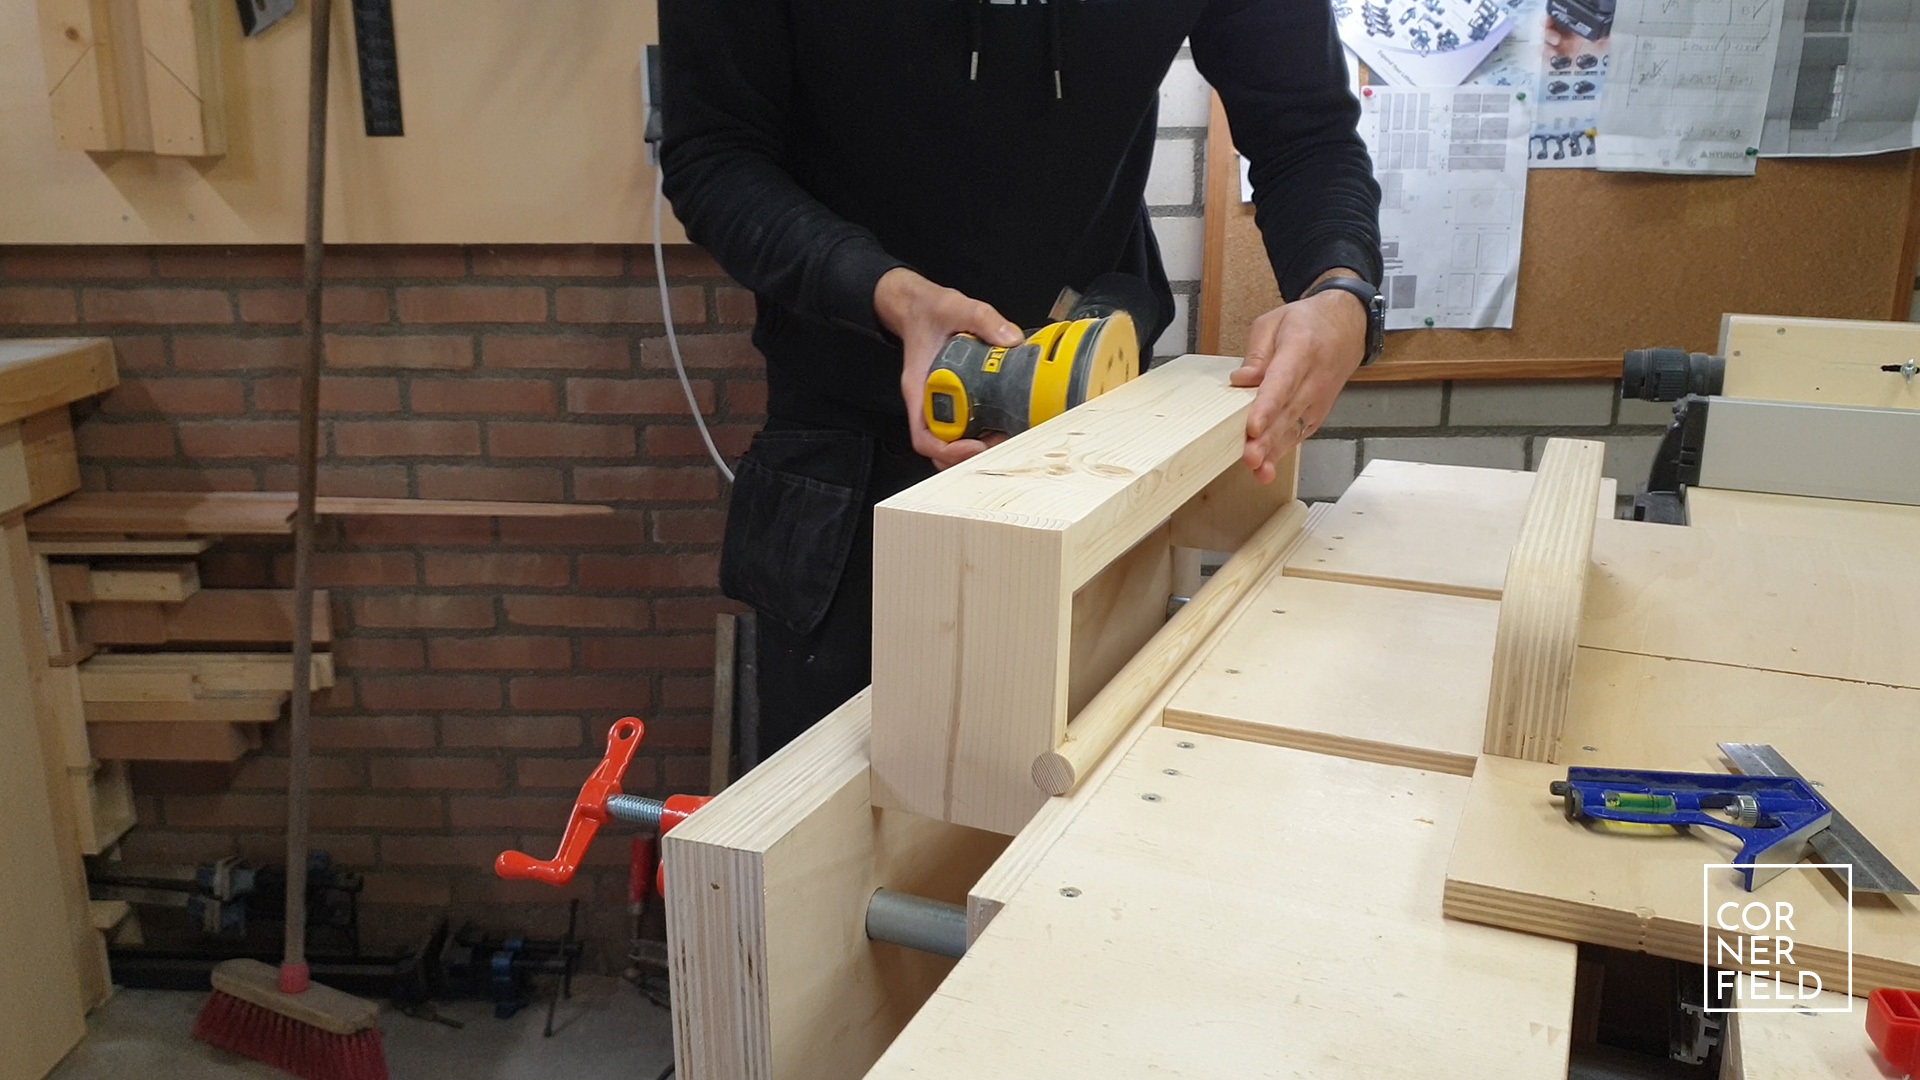
For the bookshelf, I did not want to buy any wood. Especially since I have a lot of construction grade lumber left from disassembled projects. The first step for me was to cut down all of my required pieces to rough size. I used my table saw and crosscut sled for this. There are 3 components required. A bottom shelf with 2 sides that have the same width, a dowel that serves as a front stop and a small lip that is attached to the front of the bottom. This prevents the books from sliding off.


Construction
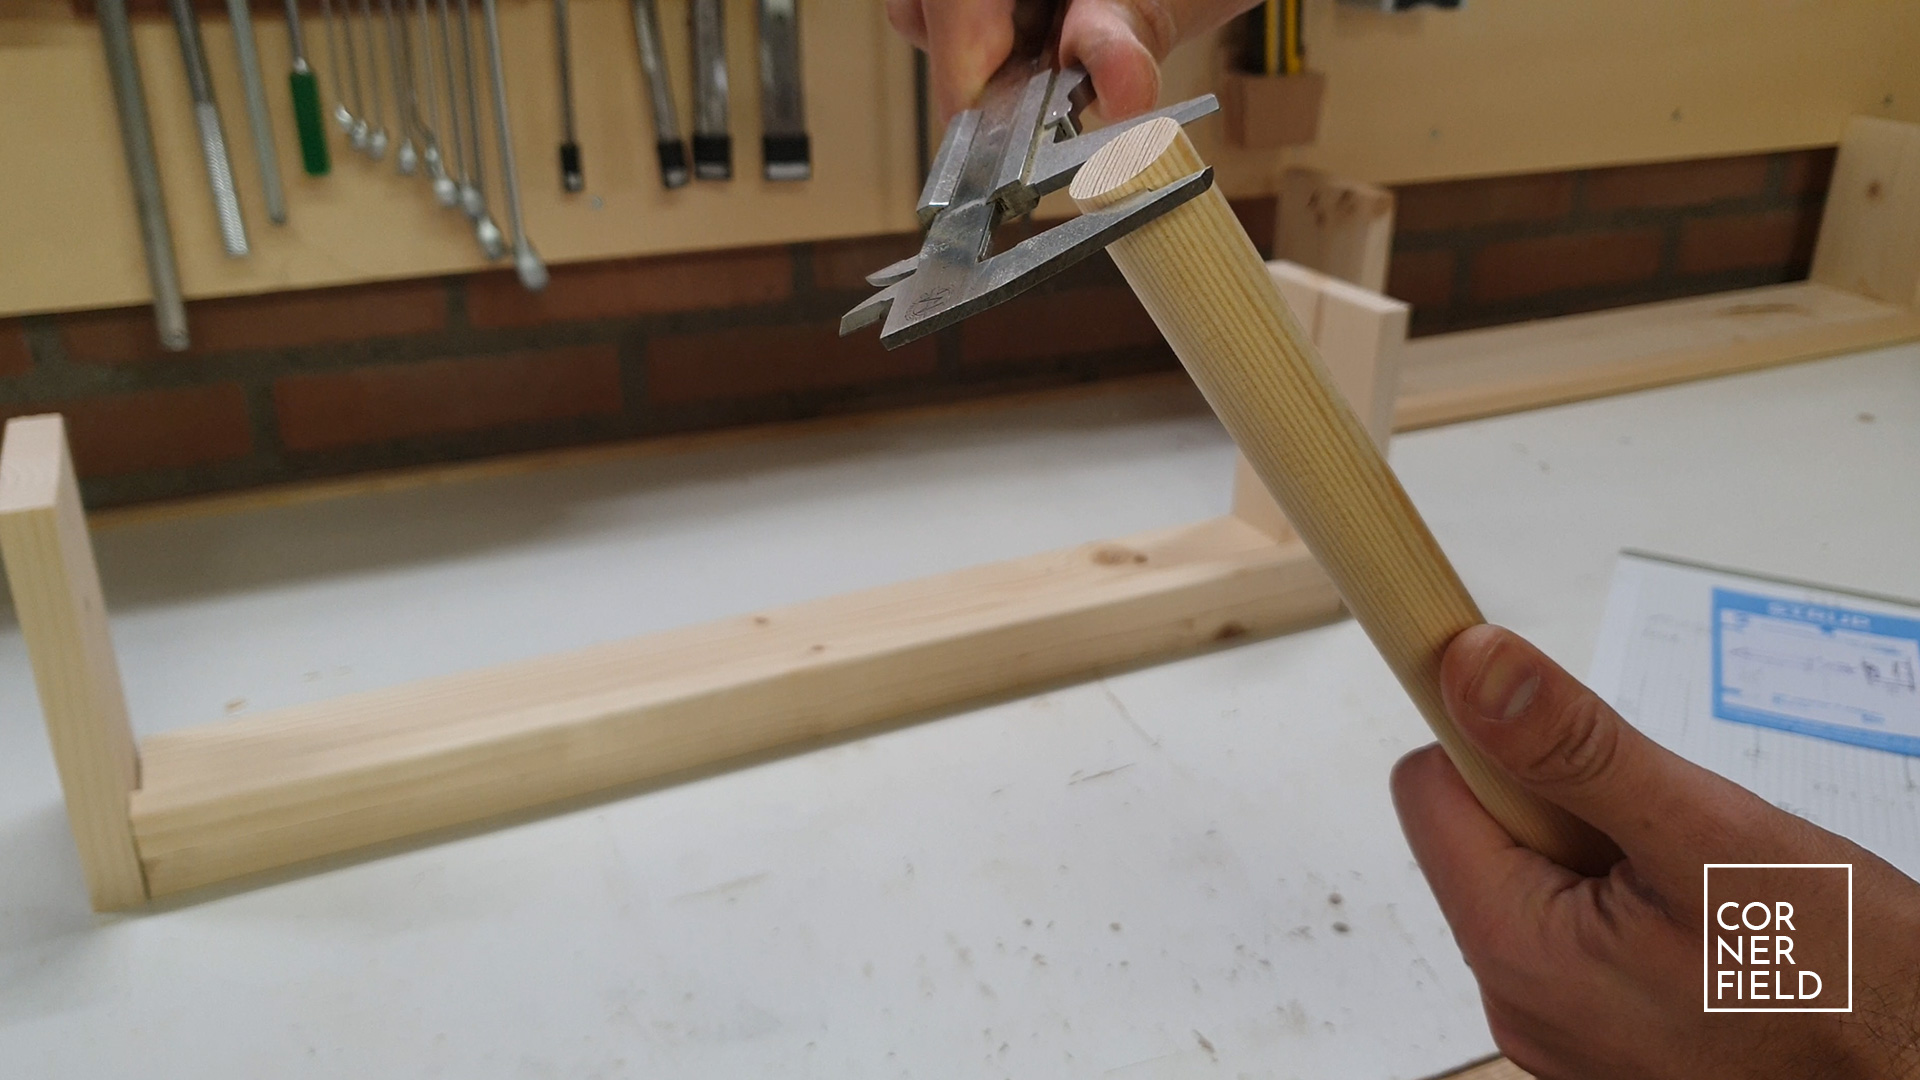
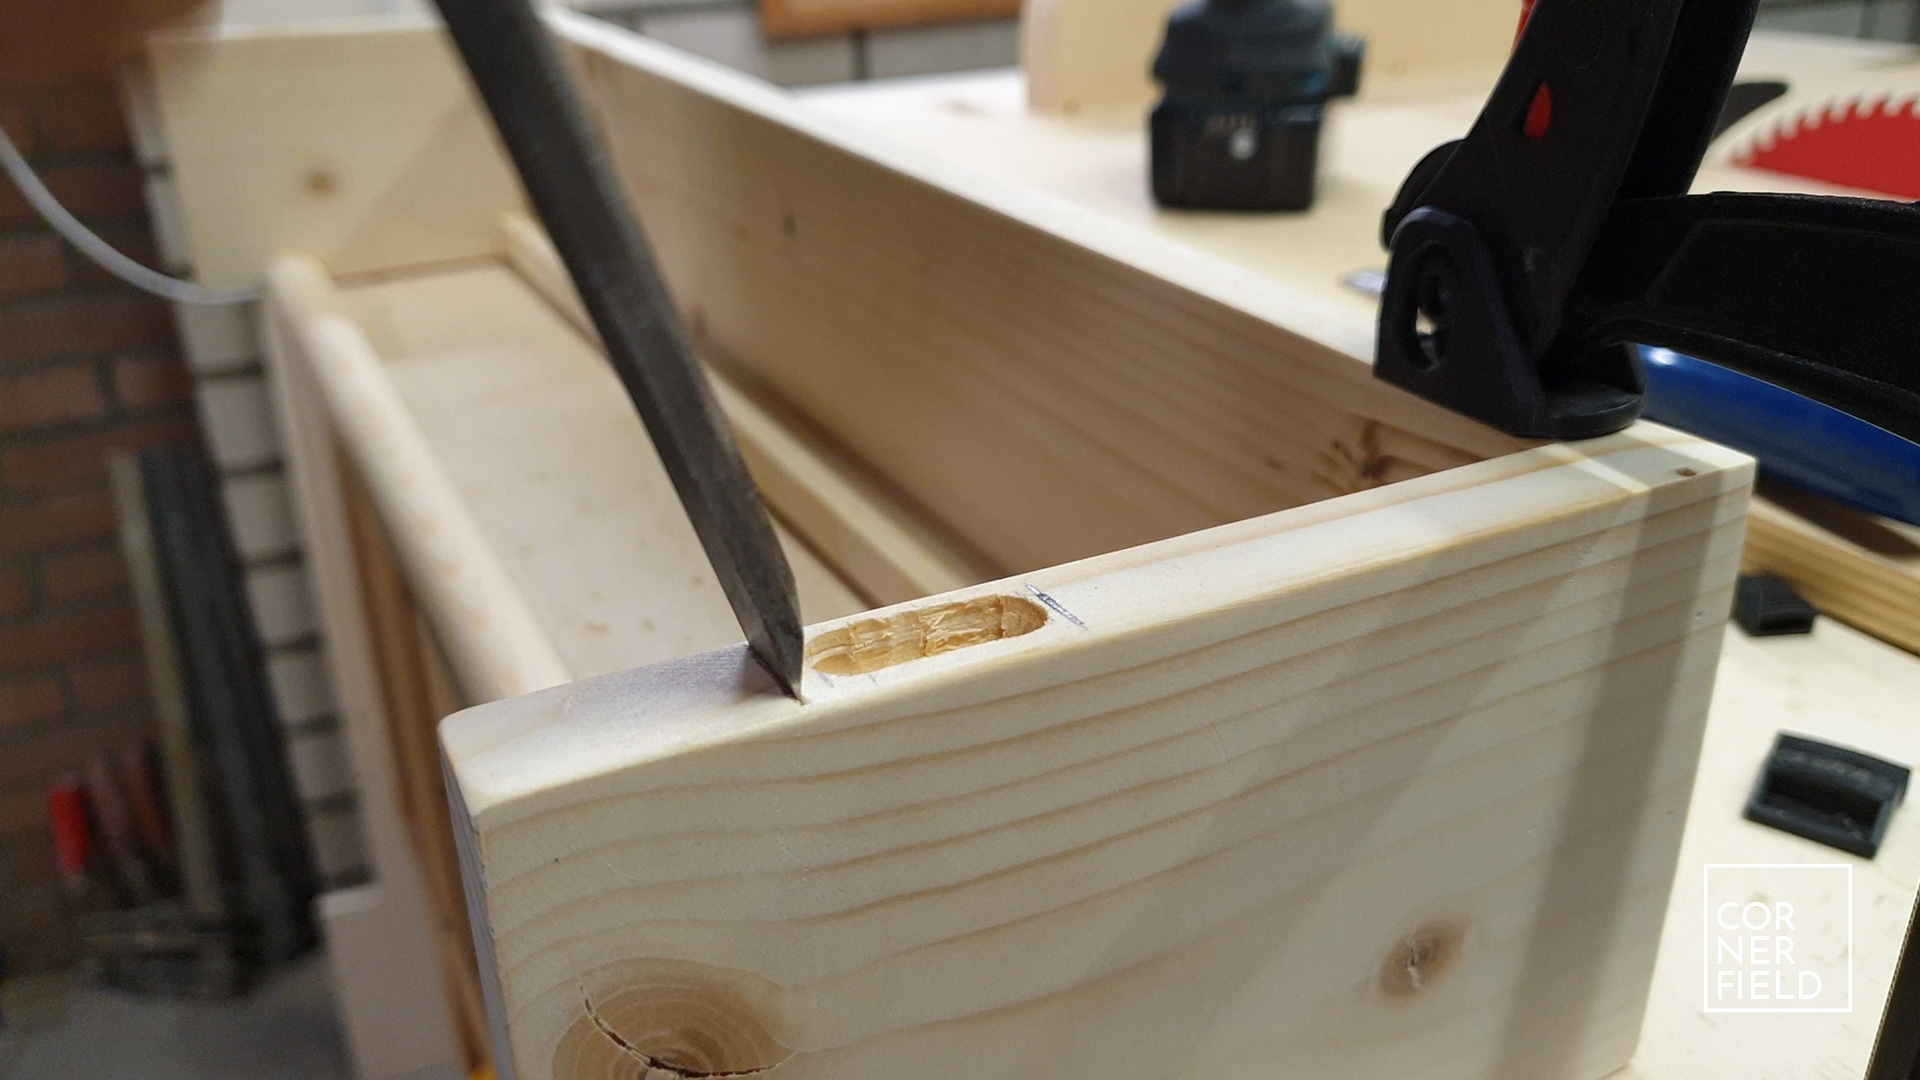
Once all of the pieces are cut to rough size I could lay-out the final assembly and cut everything down to its final dimension. All the pieces go together once cut except for the front dowel. This needs a recess to fall into.
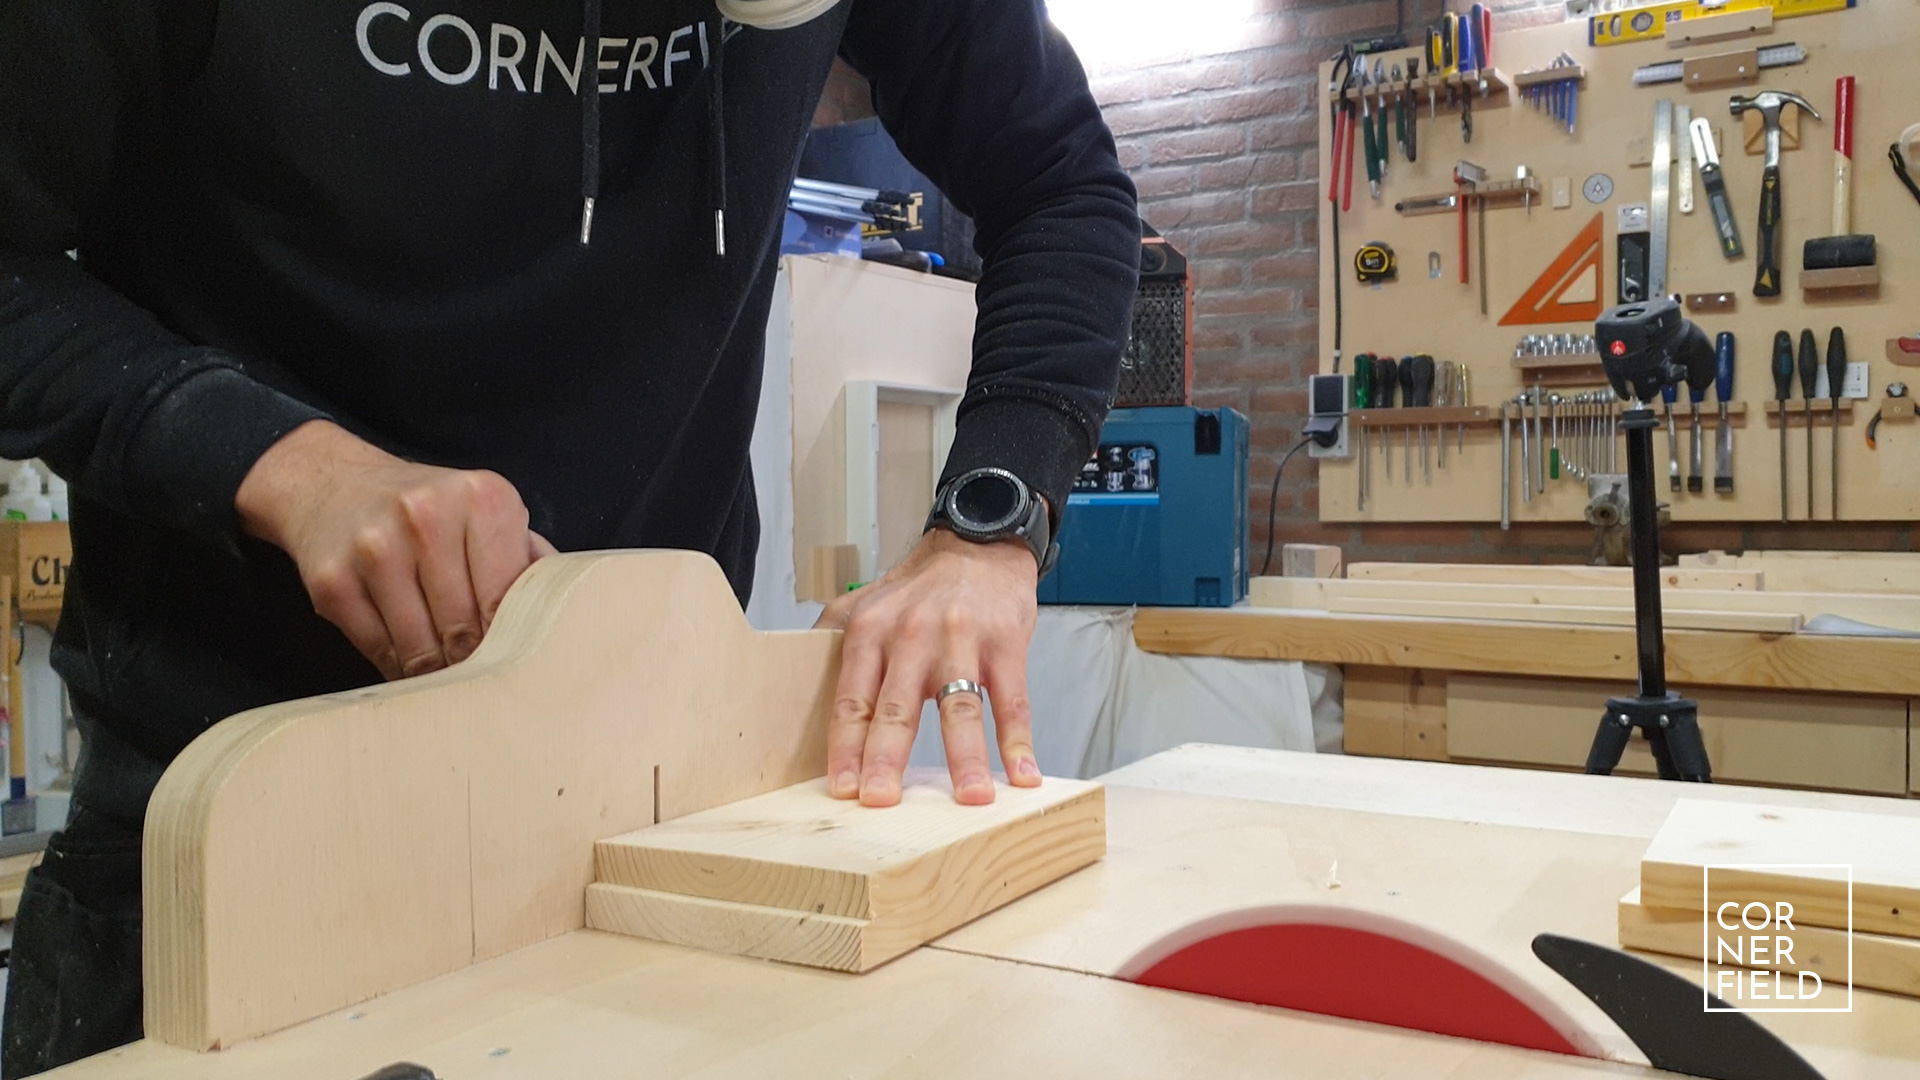
To make it easy to cut this I mark out where I want to dowel to be on both sides. Then I clamp them facing the fronts to each other. With a drill that is the same size as the dowel, I drill a hole. This gives two half circles that match the dowel exactly.
Assembly
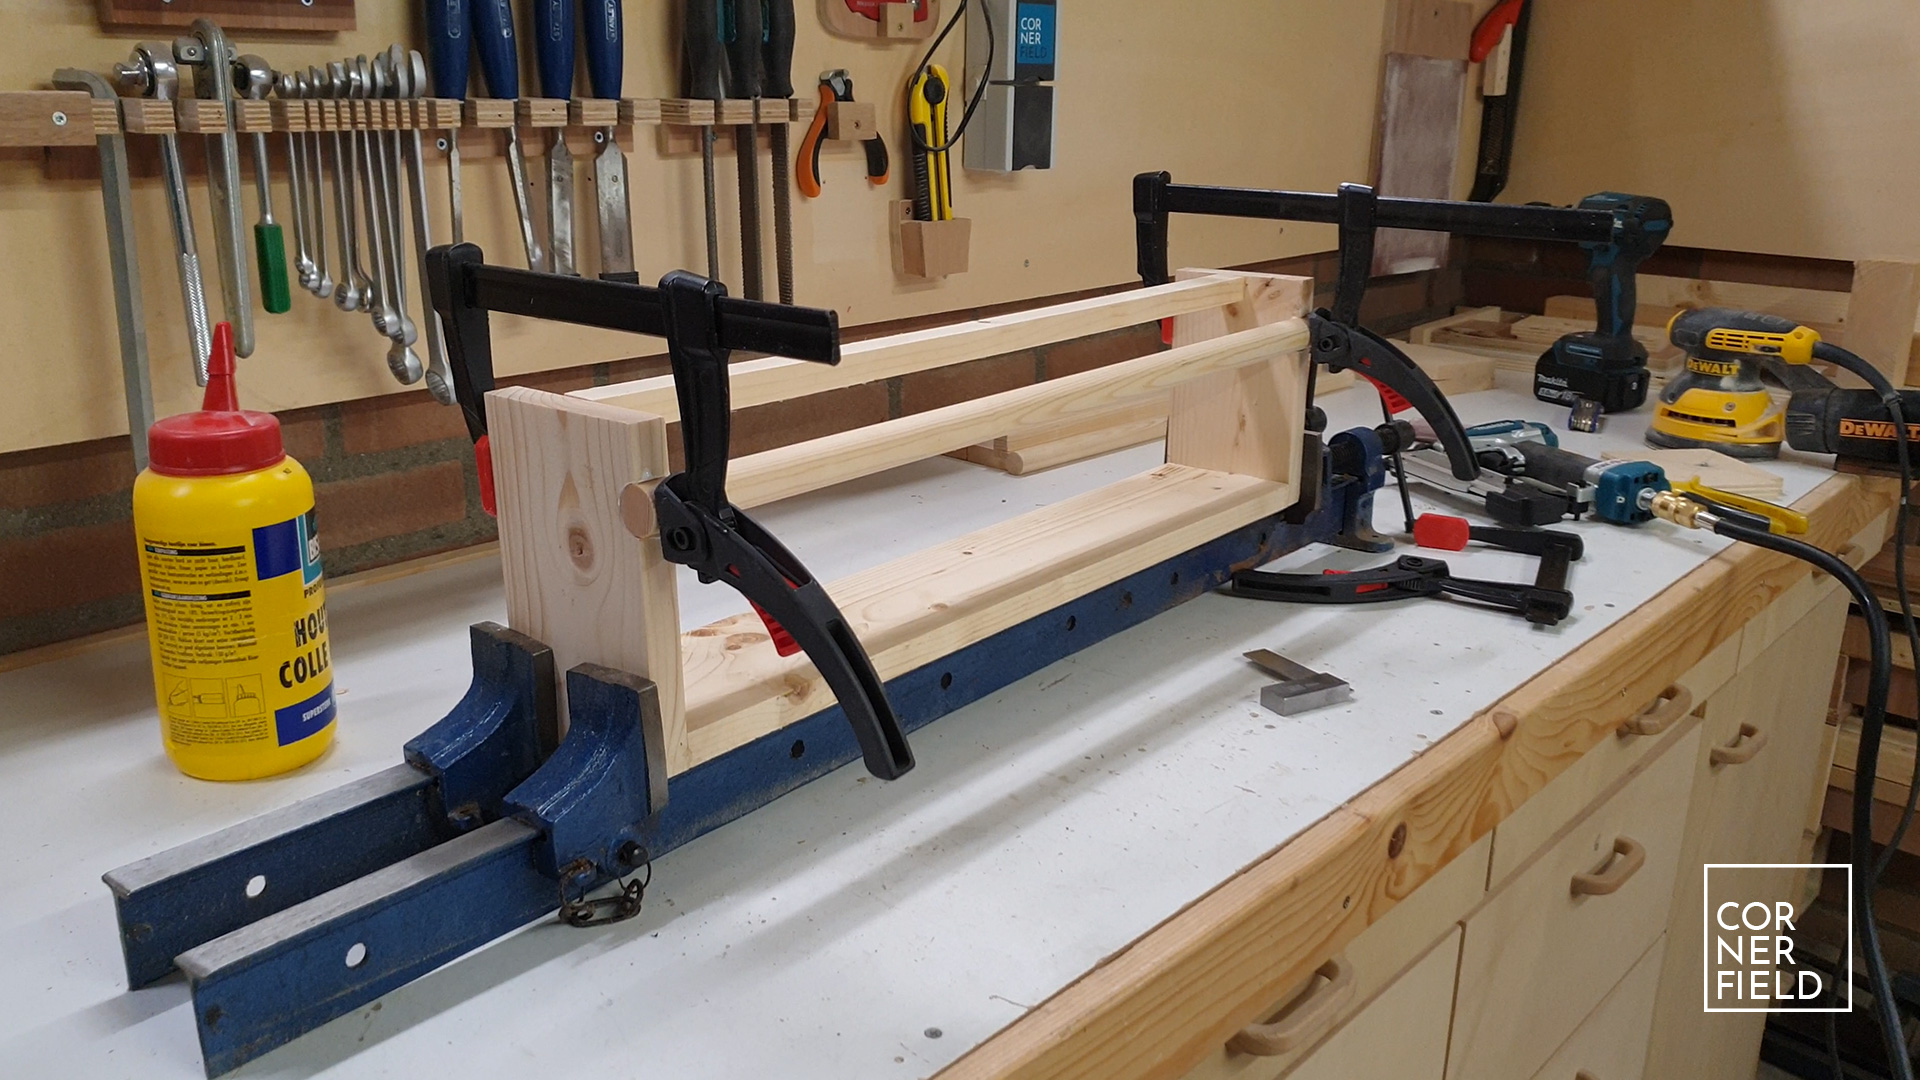
For assembly, I did not want to use any visible fasteners. This meant glueing everything. Luckily I have some large clamps to make this possible. To make the process a little easier I used some brad nails to keep everything in place while I put the clamps on. I did this for the sides, the front lip as well as the dowel. Once the glue is dry I sand everything nice and smooth.
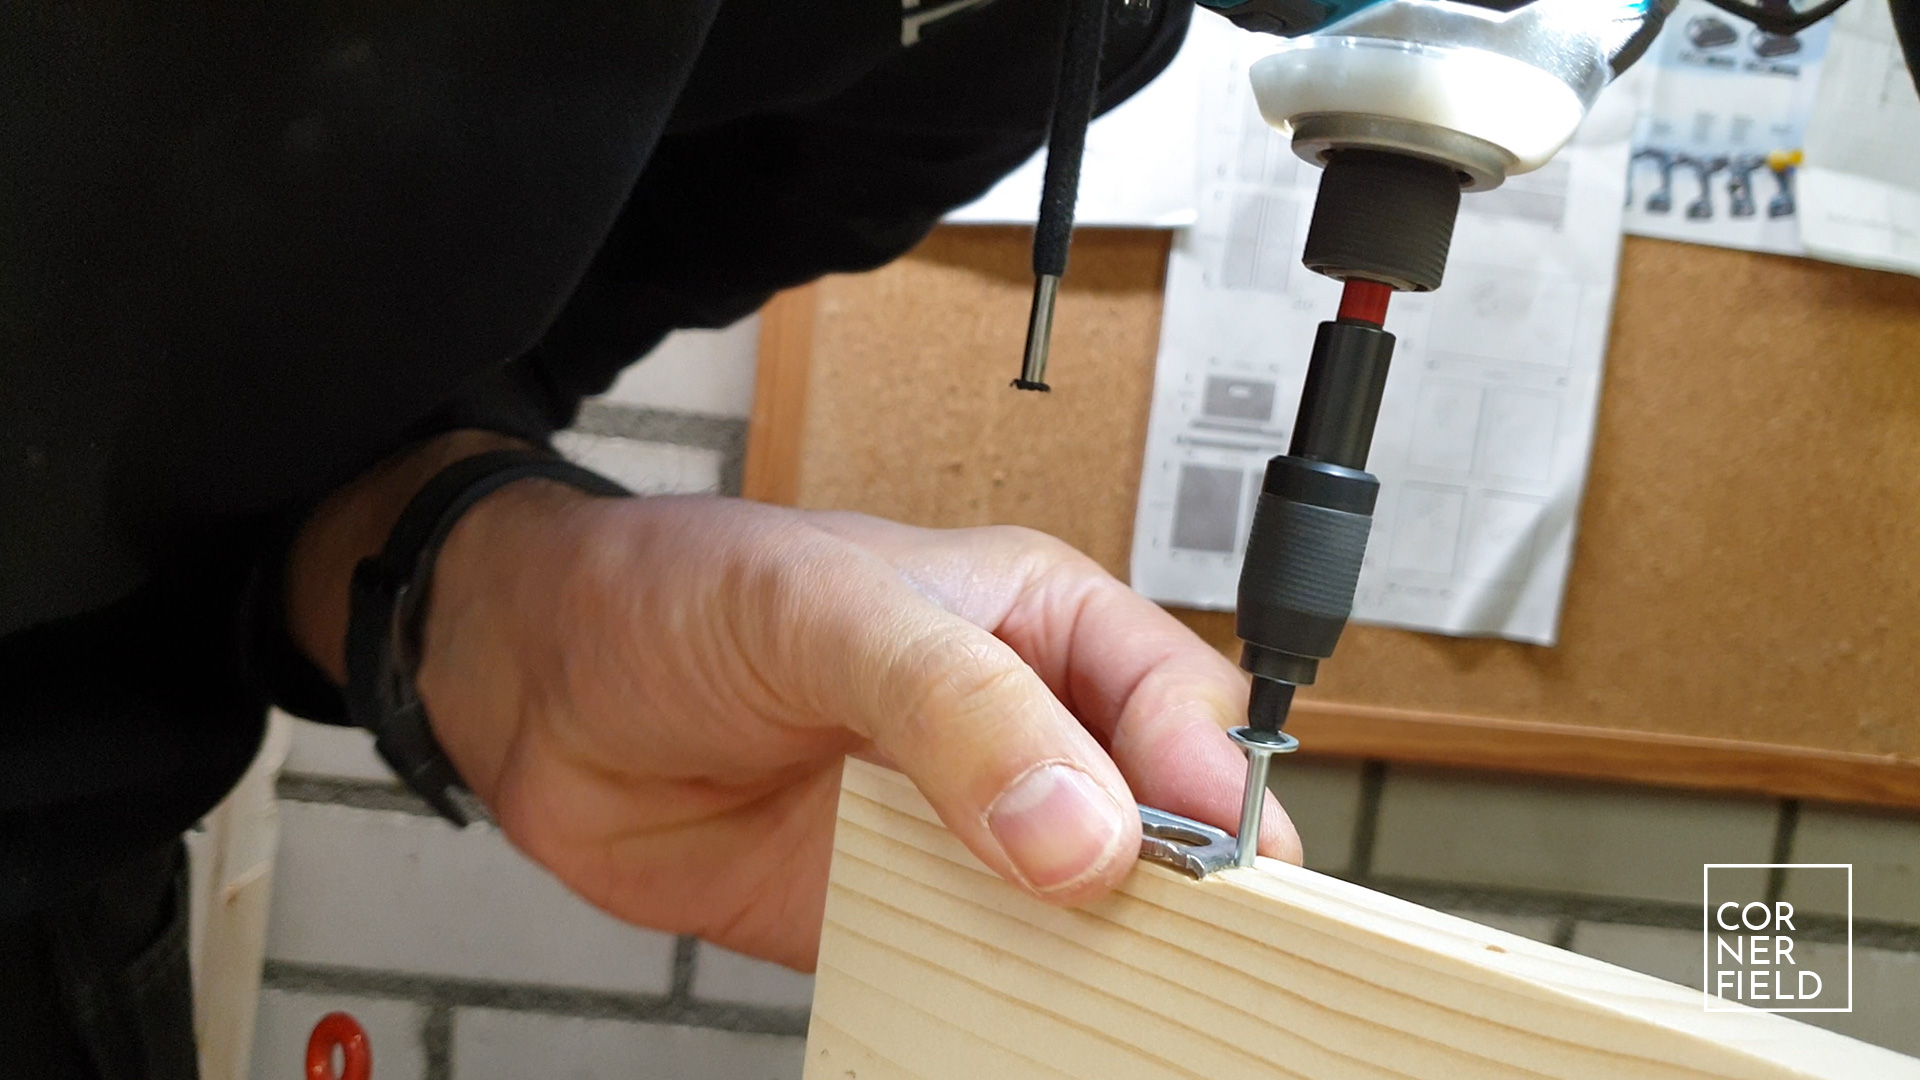
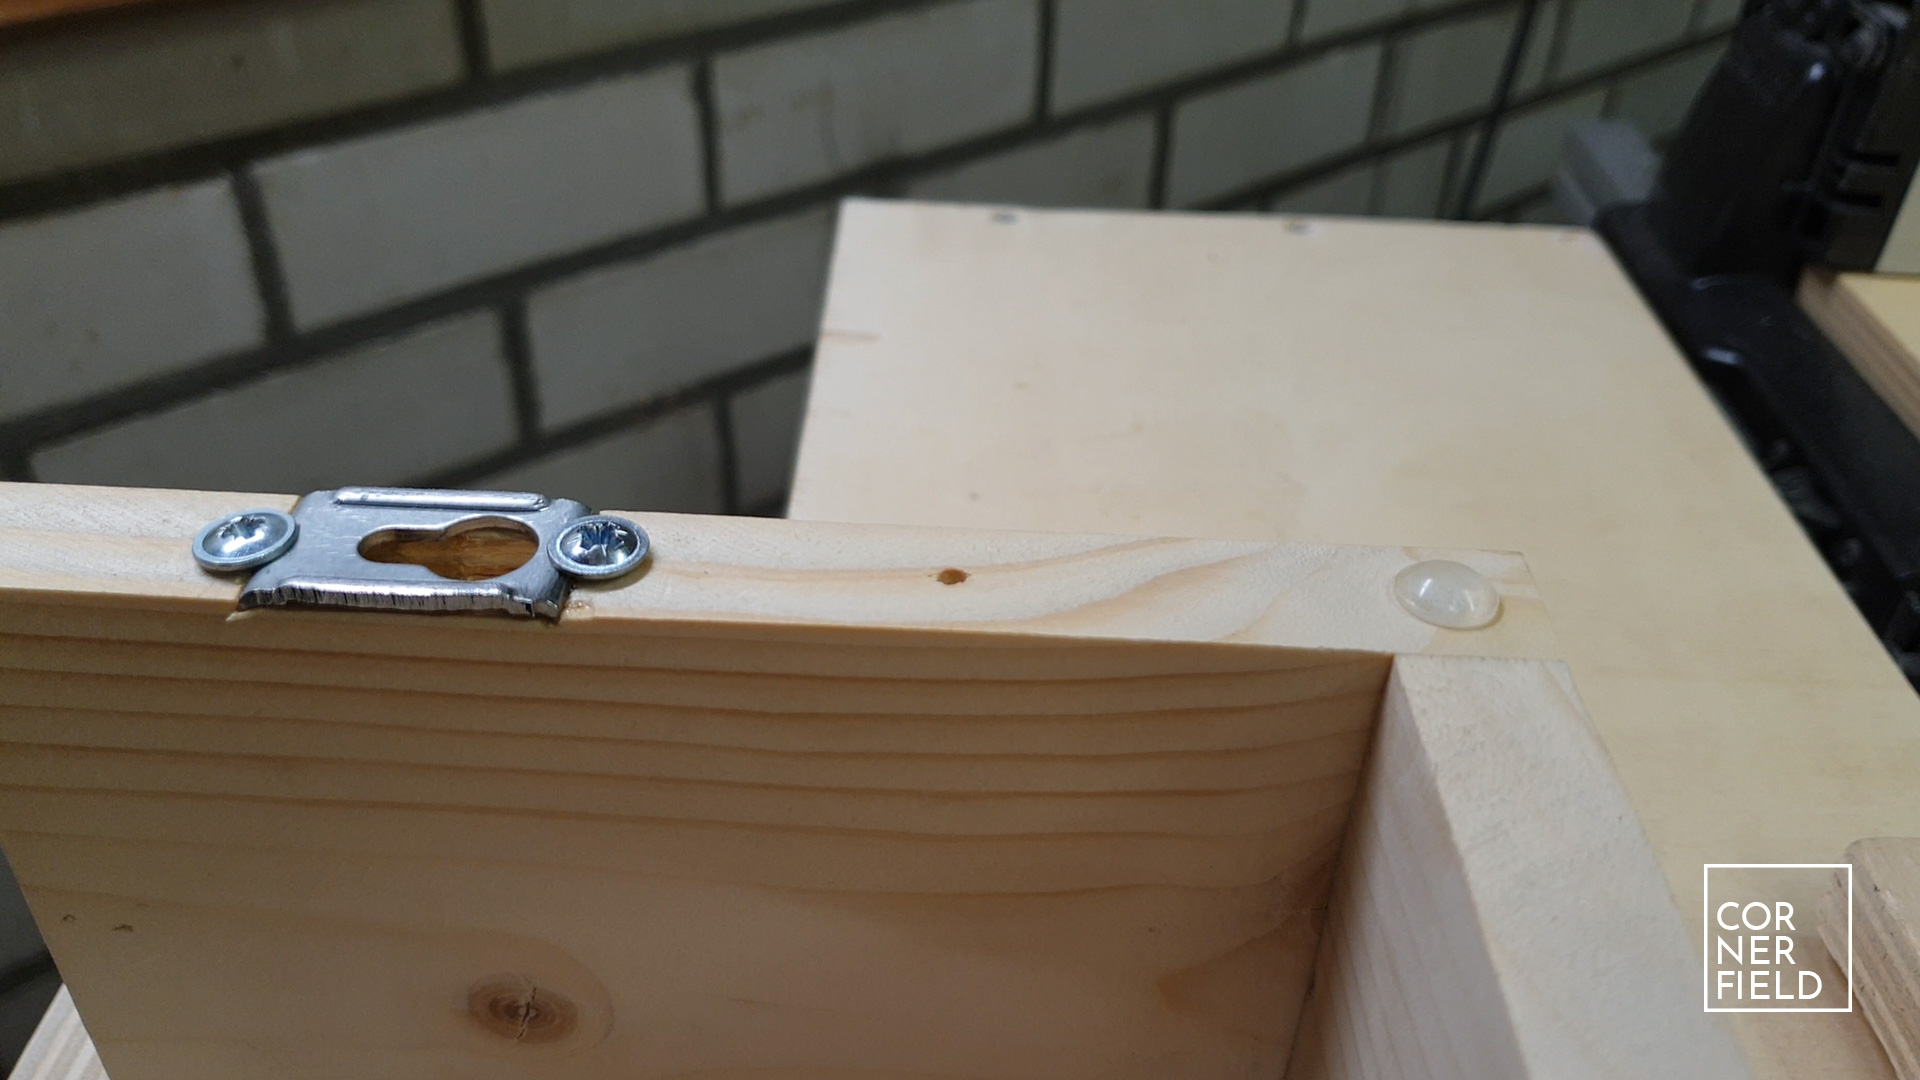
Keyhole
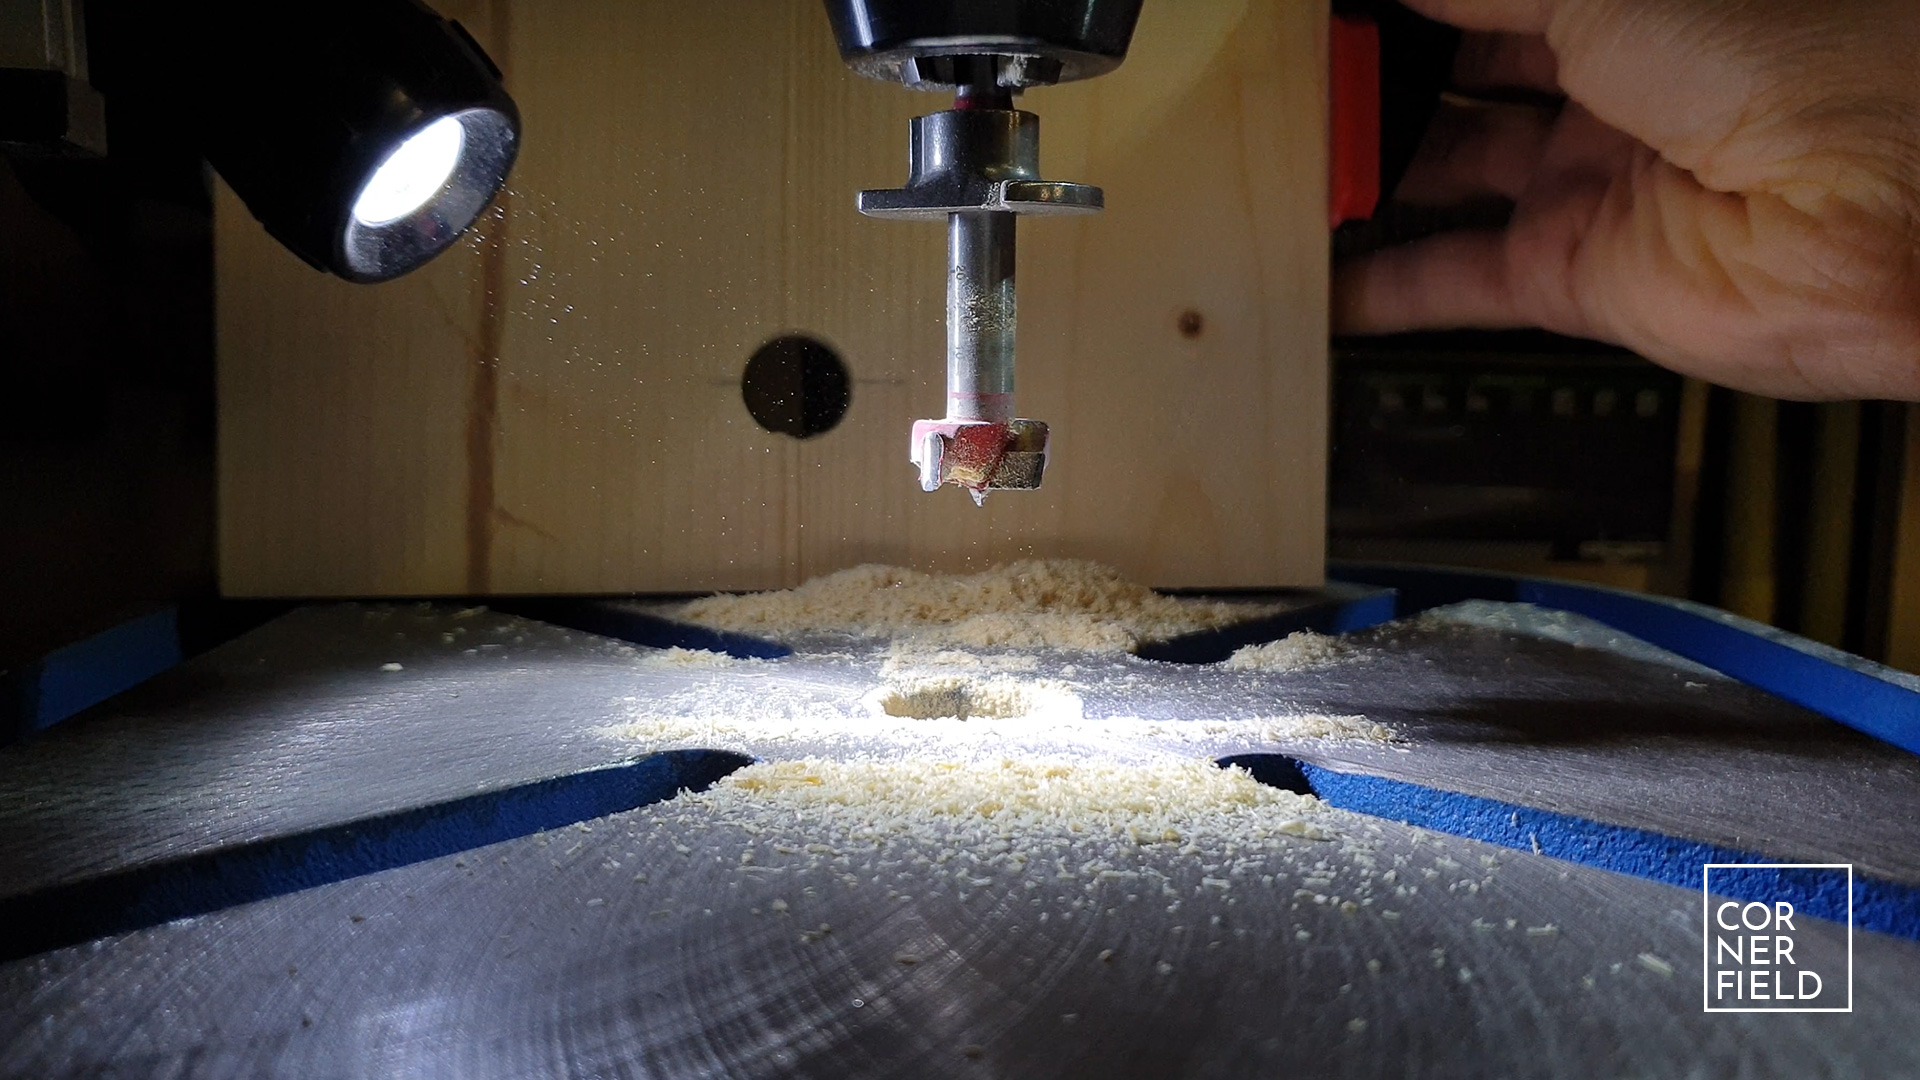
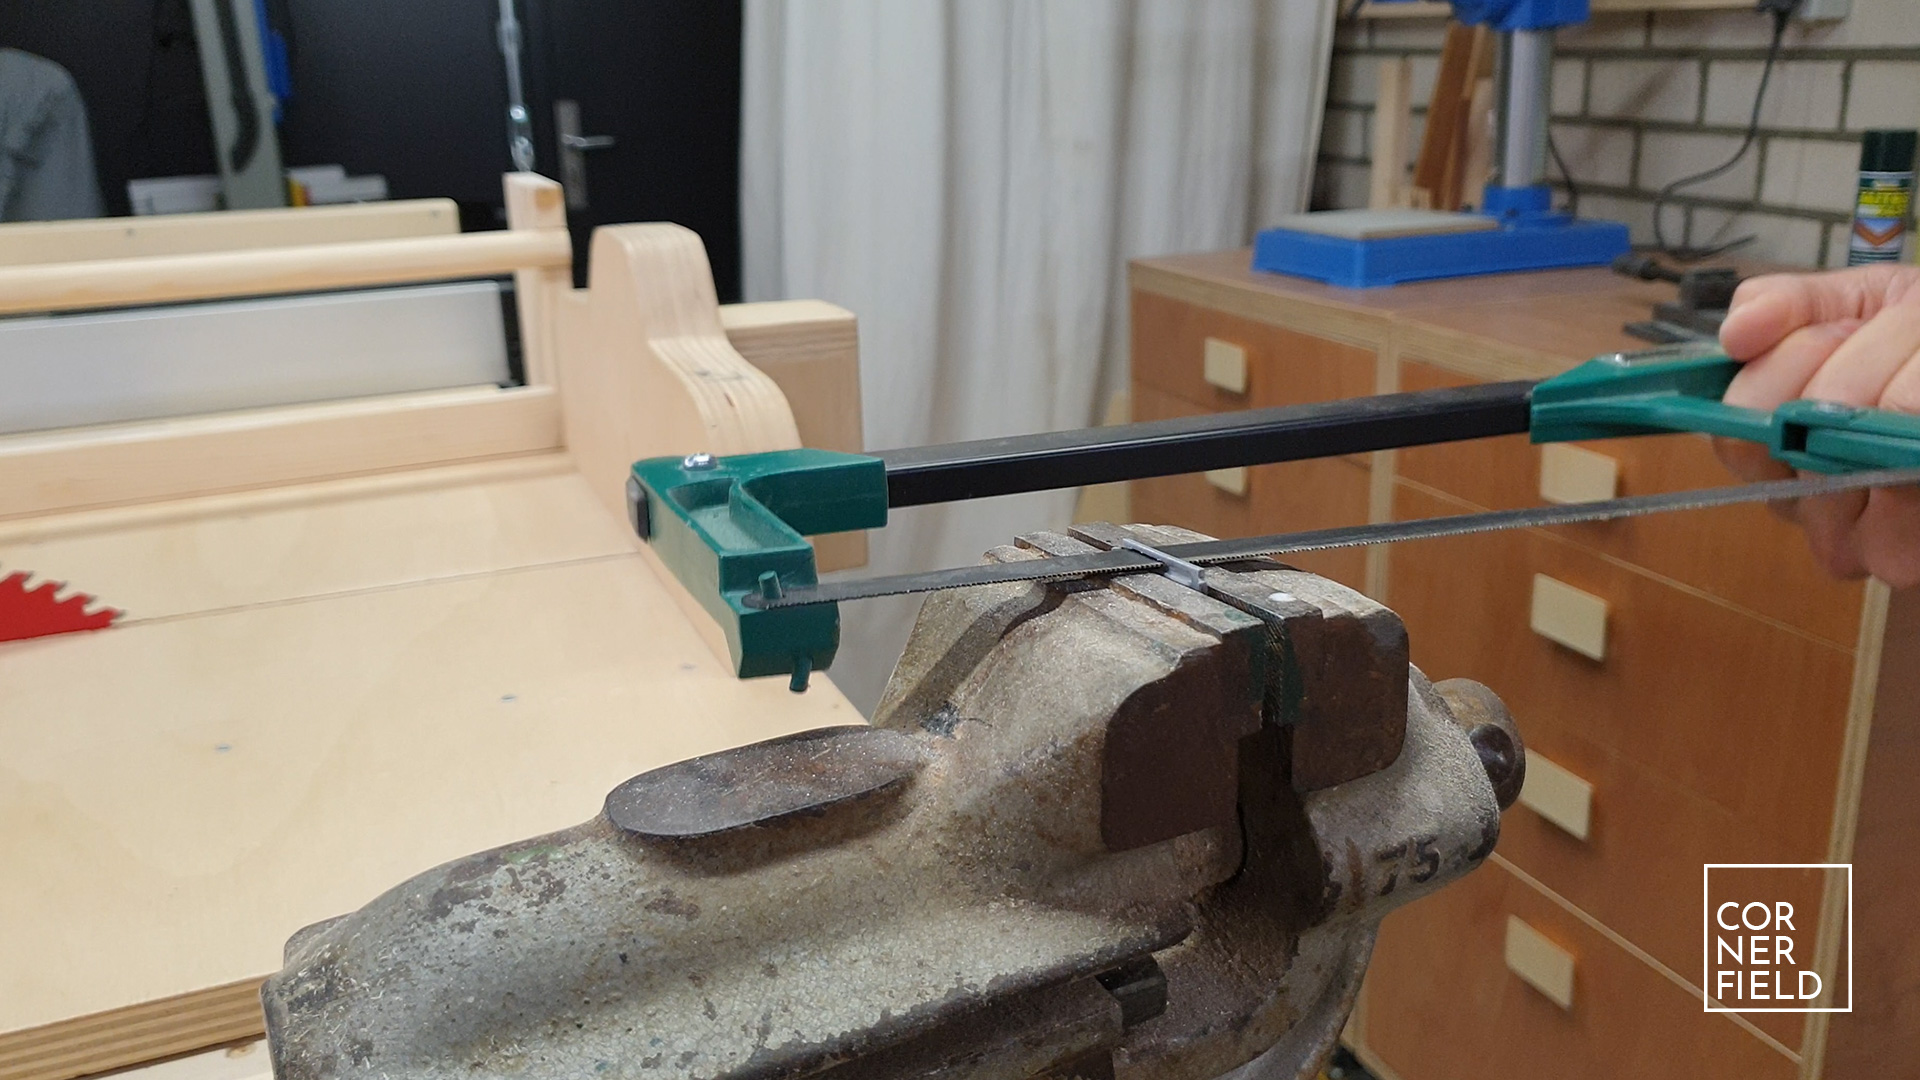
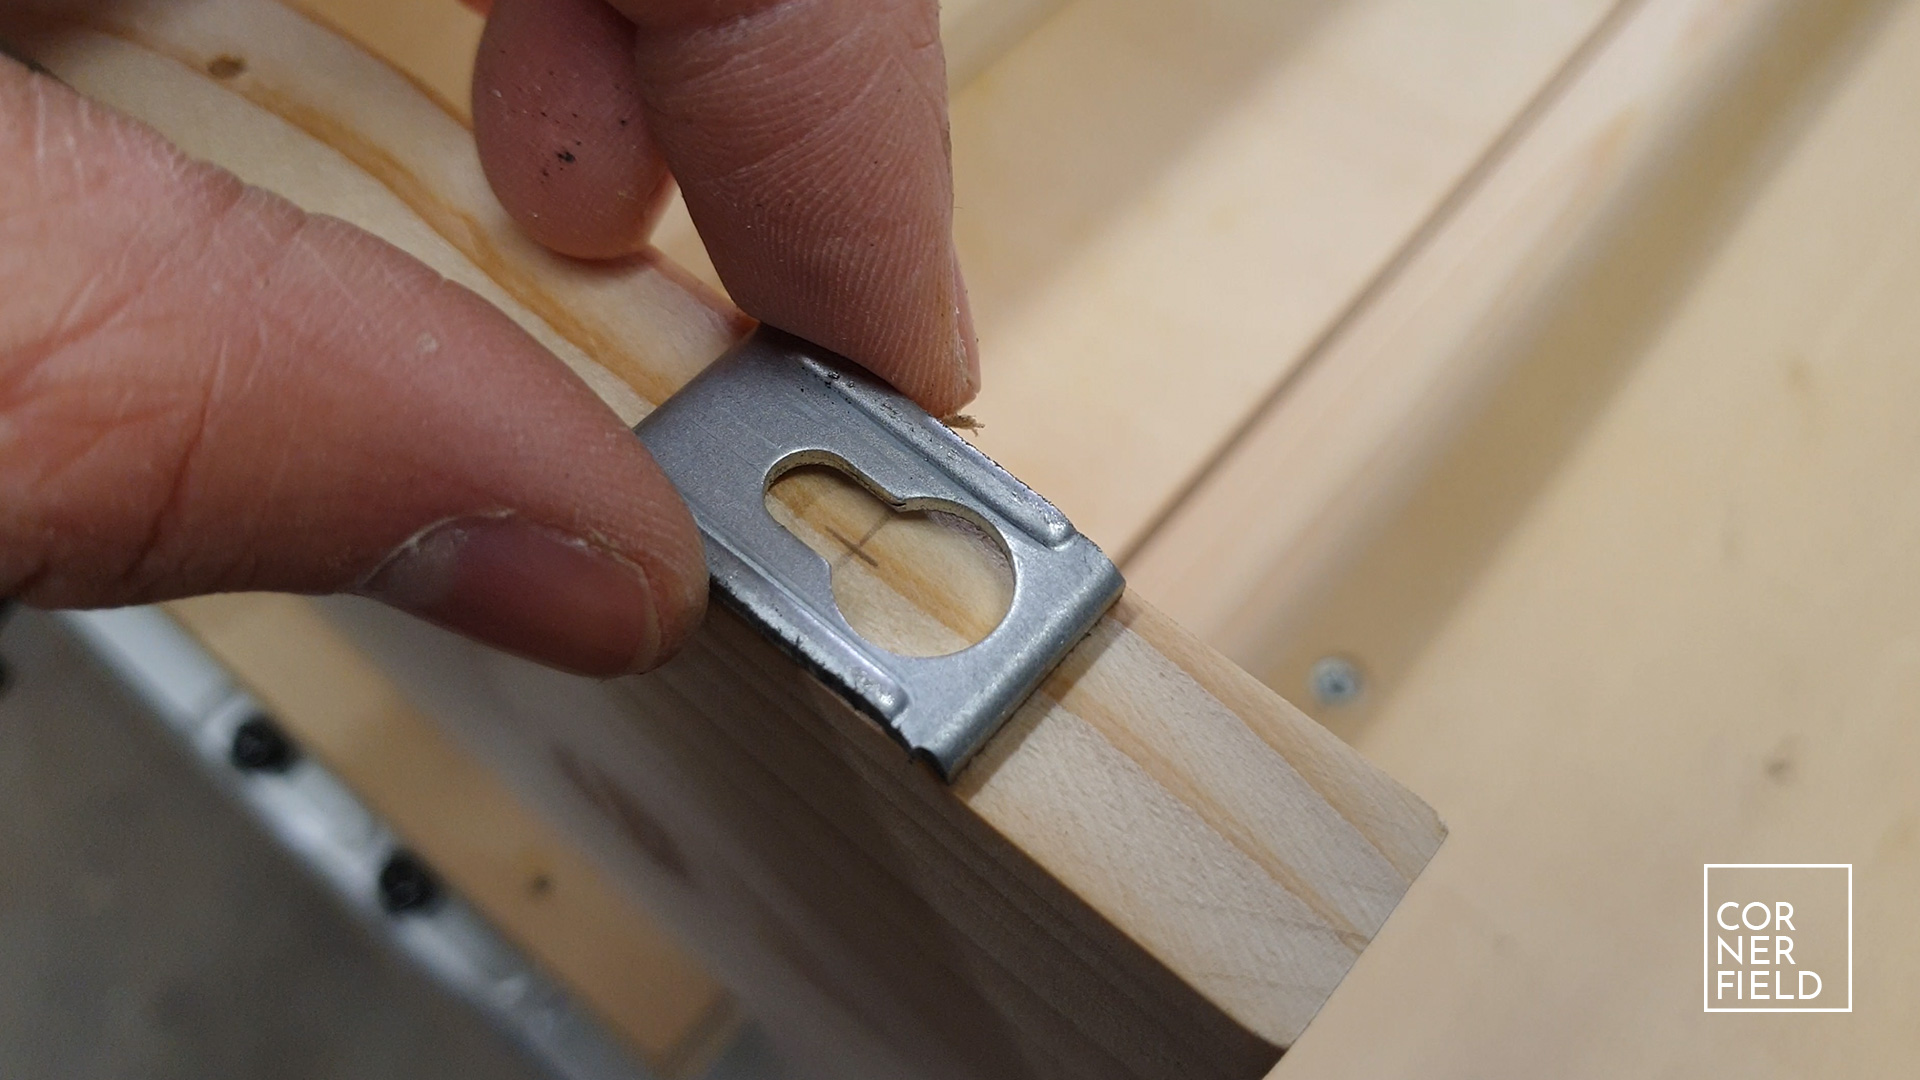
The last step for this bookshelf is making a keyhole in the back of the sides to hang the shelf from. If the correct hardware is purchased this is a piece of cake. You can just drill a few holes and screw down a piece of metal. Unfortunately for me, I didn’t have the correct hardware but something close to it. That meant I had some additional steps to take but nothing too complicated. I had to saw a piece of the hardware to match the width of the side. Then I drilled a few shallow holes and fastened my hardware. I first did this with some glue and later reinforced it with a few screws.
Result
Our daughter loves her bookshelves and we love the additional storage it provides. On top of that, I had a fun project to make and fewer scraps in the shop!
Links
The IKEA inspiration can be found here.
Instagram 1
I hope this post has inspired you to make something!
And don’t forget to follow your excitement 

Add comment