

To use the shallow wall space I have above my sink I’m going to build this cabinet with sliding doors.
Design
The requirements for this cabinet were simple. It had to have sliding doors to not lose any space in front of the cabinet and it should have a few shelves and dividers. Besides that, I also had to deal with a fixed amount of space available for the cabinet. What I came up with is this.

While building I decided that I wanted some hooks on the bottom so I added a small strip to attach those too. On the inside of the cabinet, it’s pretty much up to you how you want to divide it. It can be some shelves, boxes or even a peg board to hang things from. For me, it ended up being a single shelf and a divider to support it. But enough about the theory, let’s get into the build!
Build
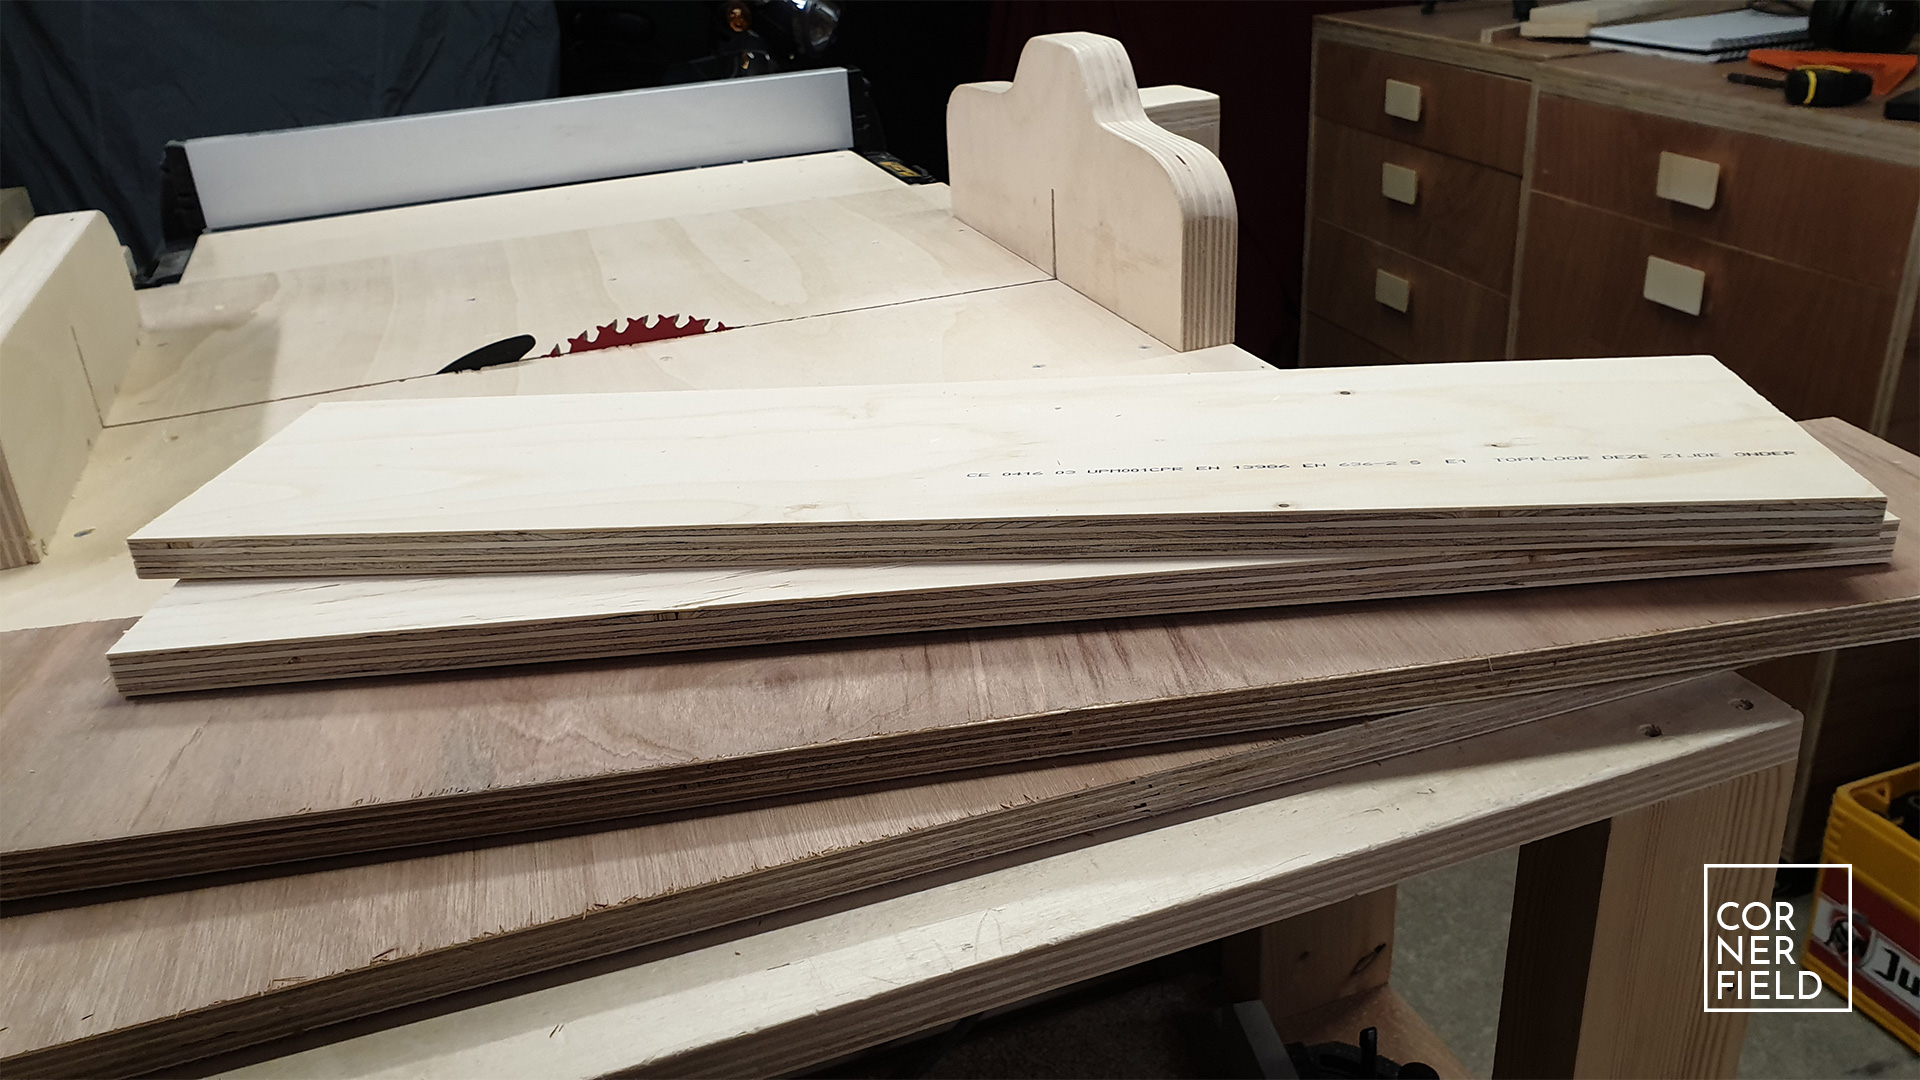
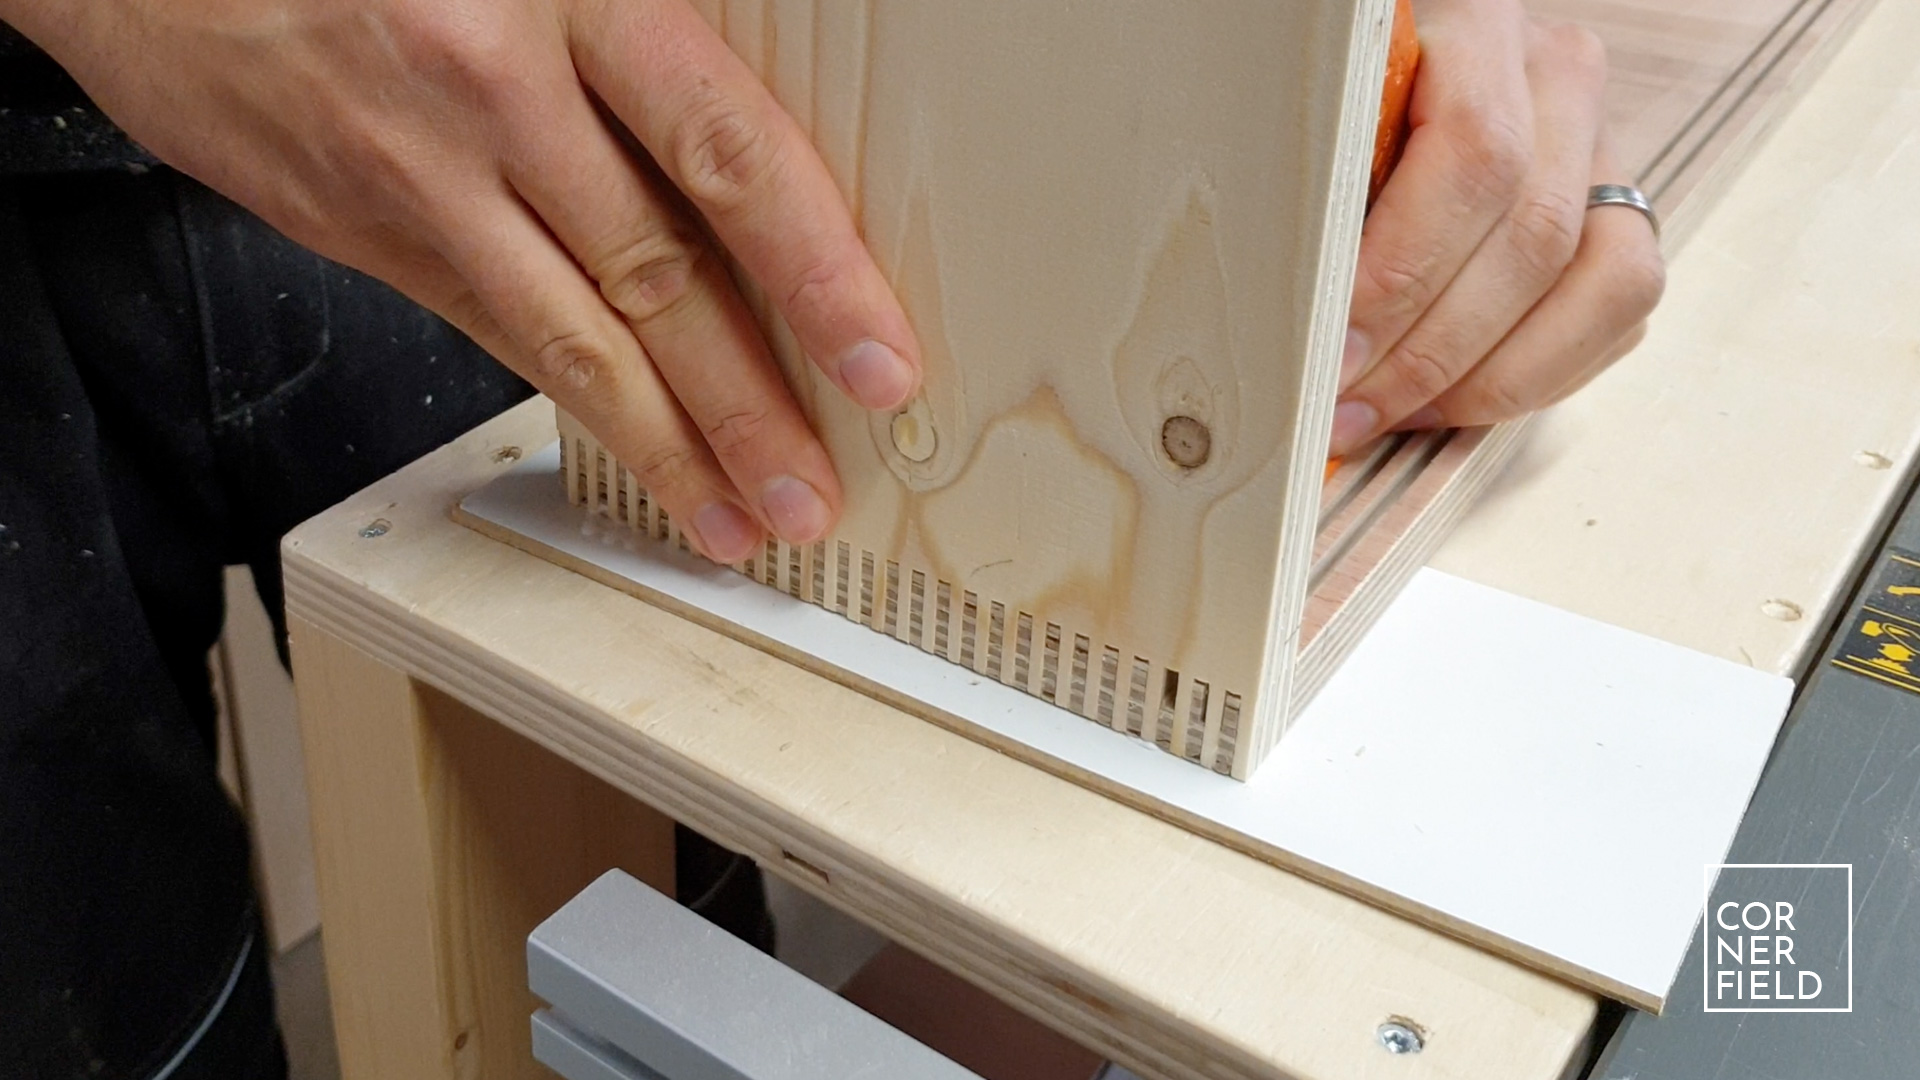
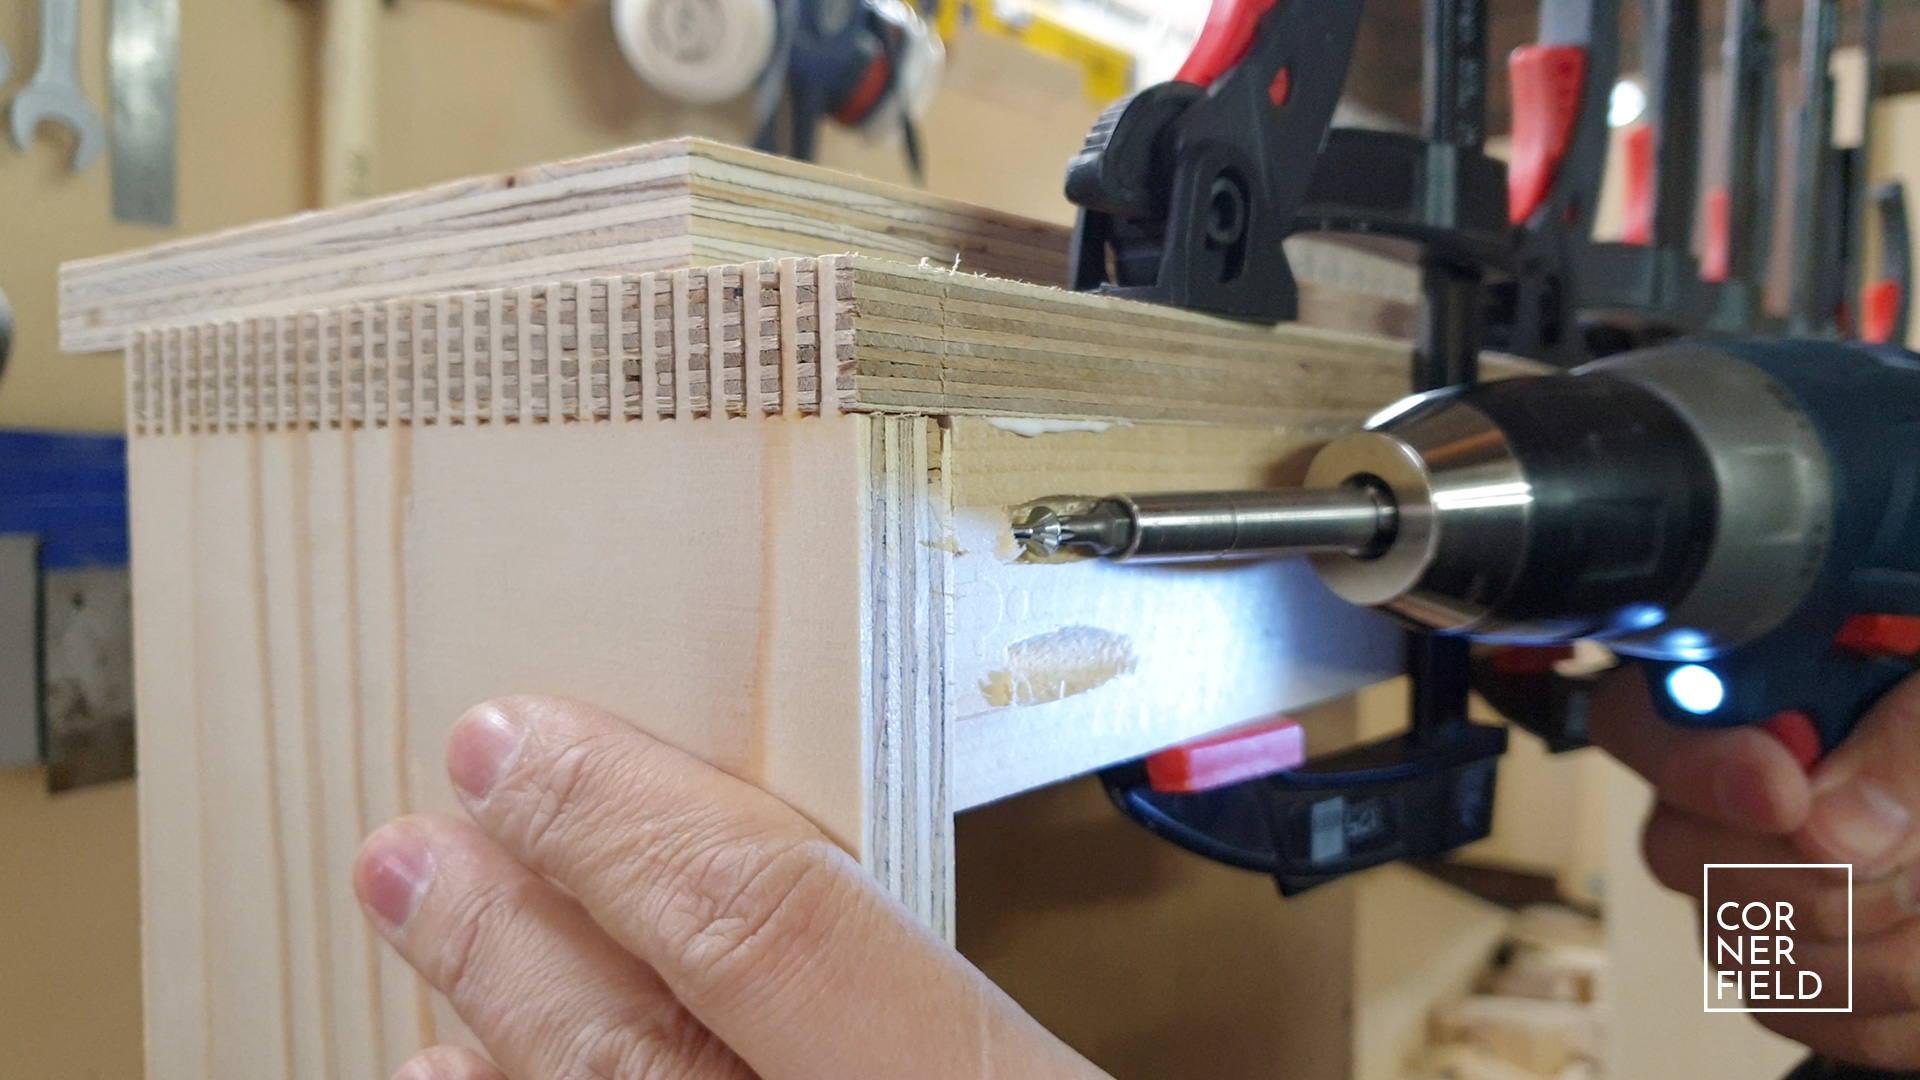
The first step in any build or project is making an inventory if I have all the required material. Next up is cutting the pieces that form the box of the cabinet to length. For this project, I wanted to experiment with a new kind of joinery for me. Box joints, more specifically finger joints.
Joinery
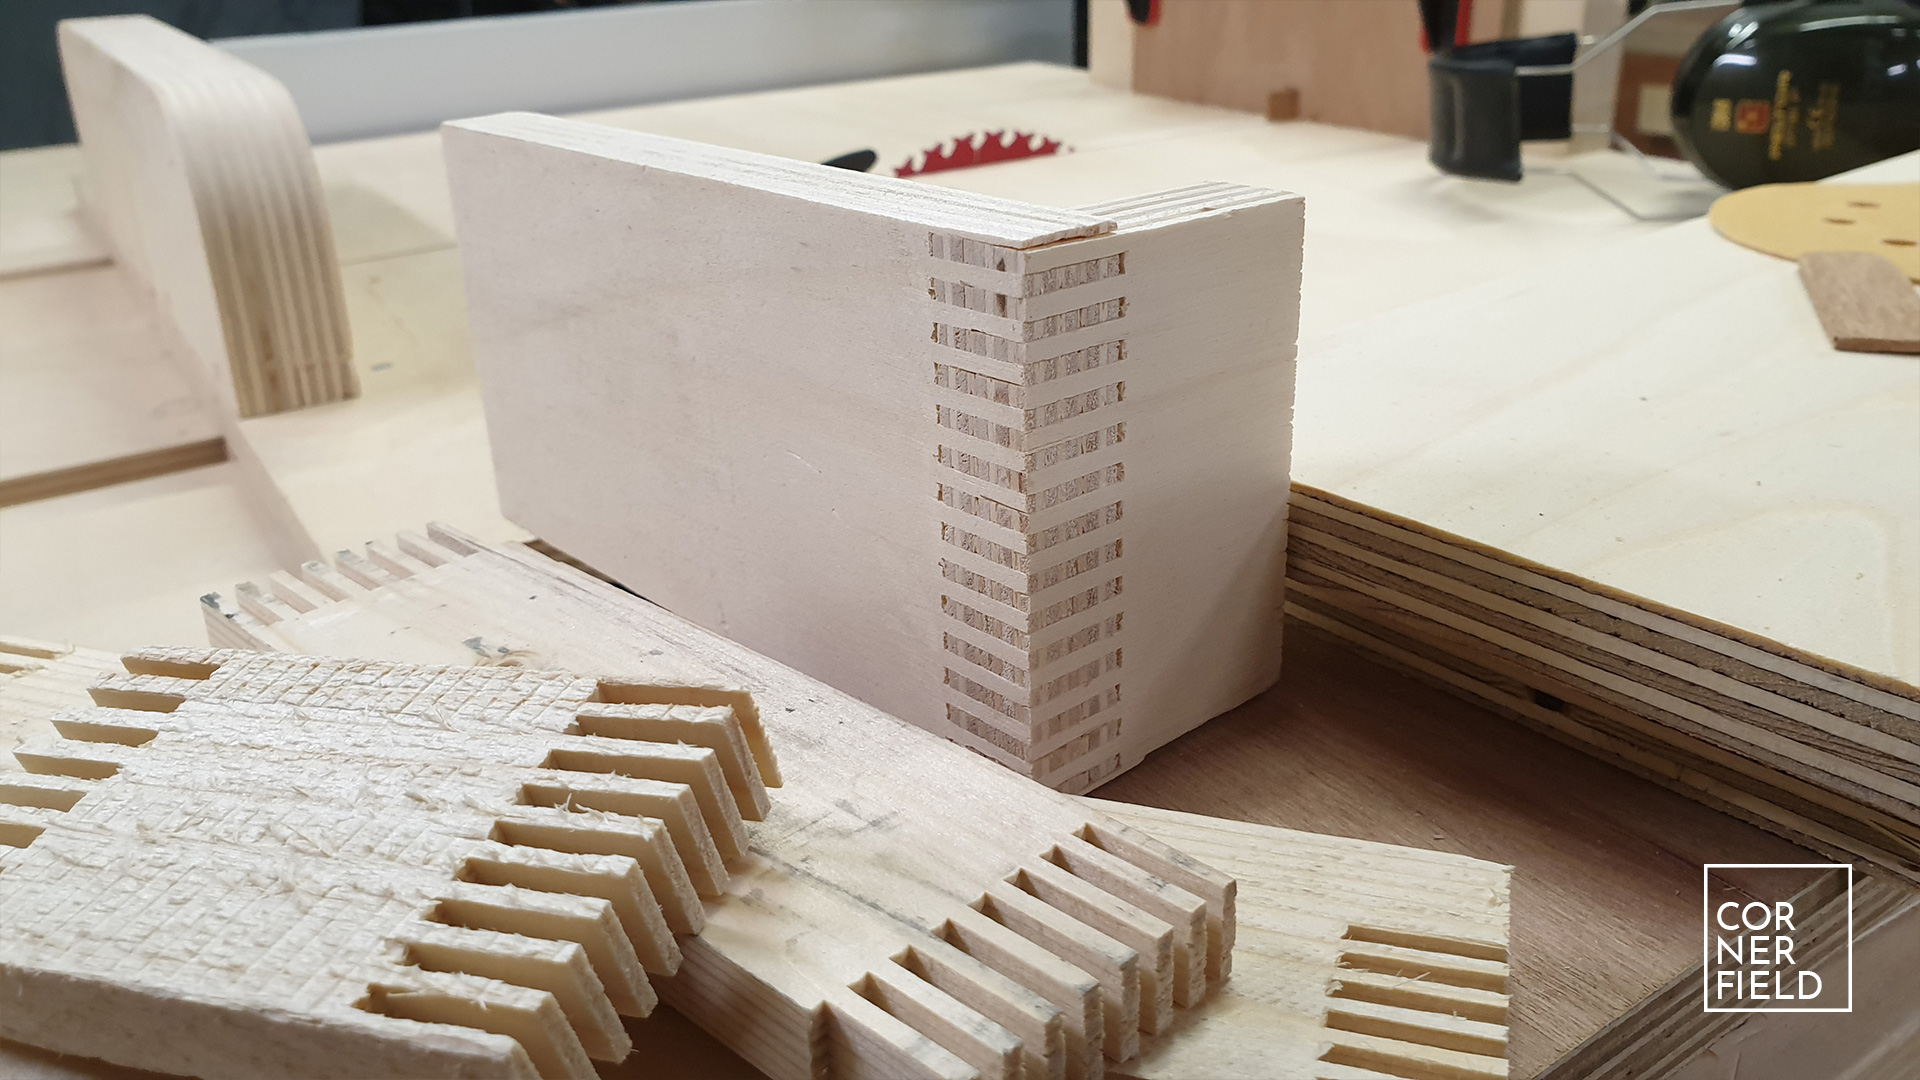
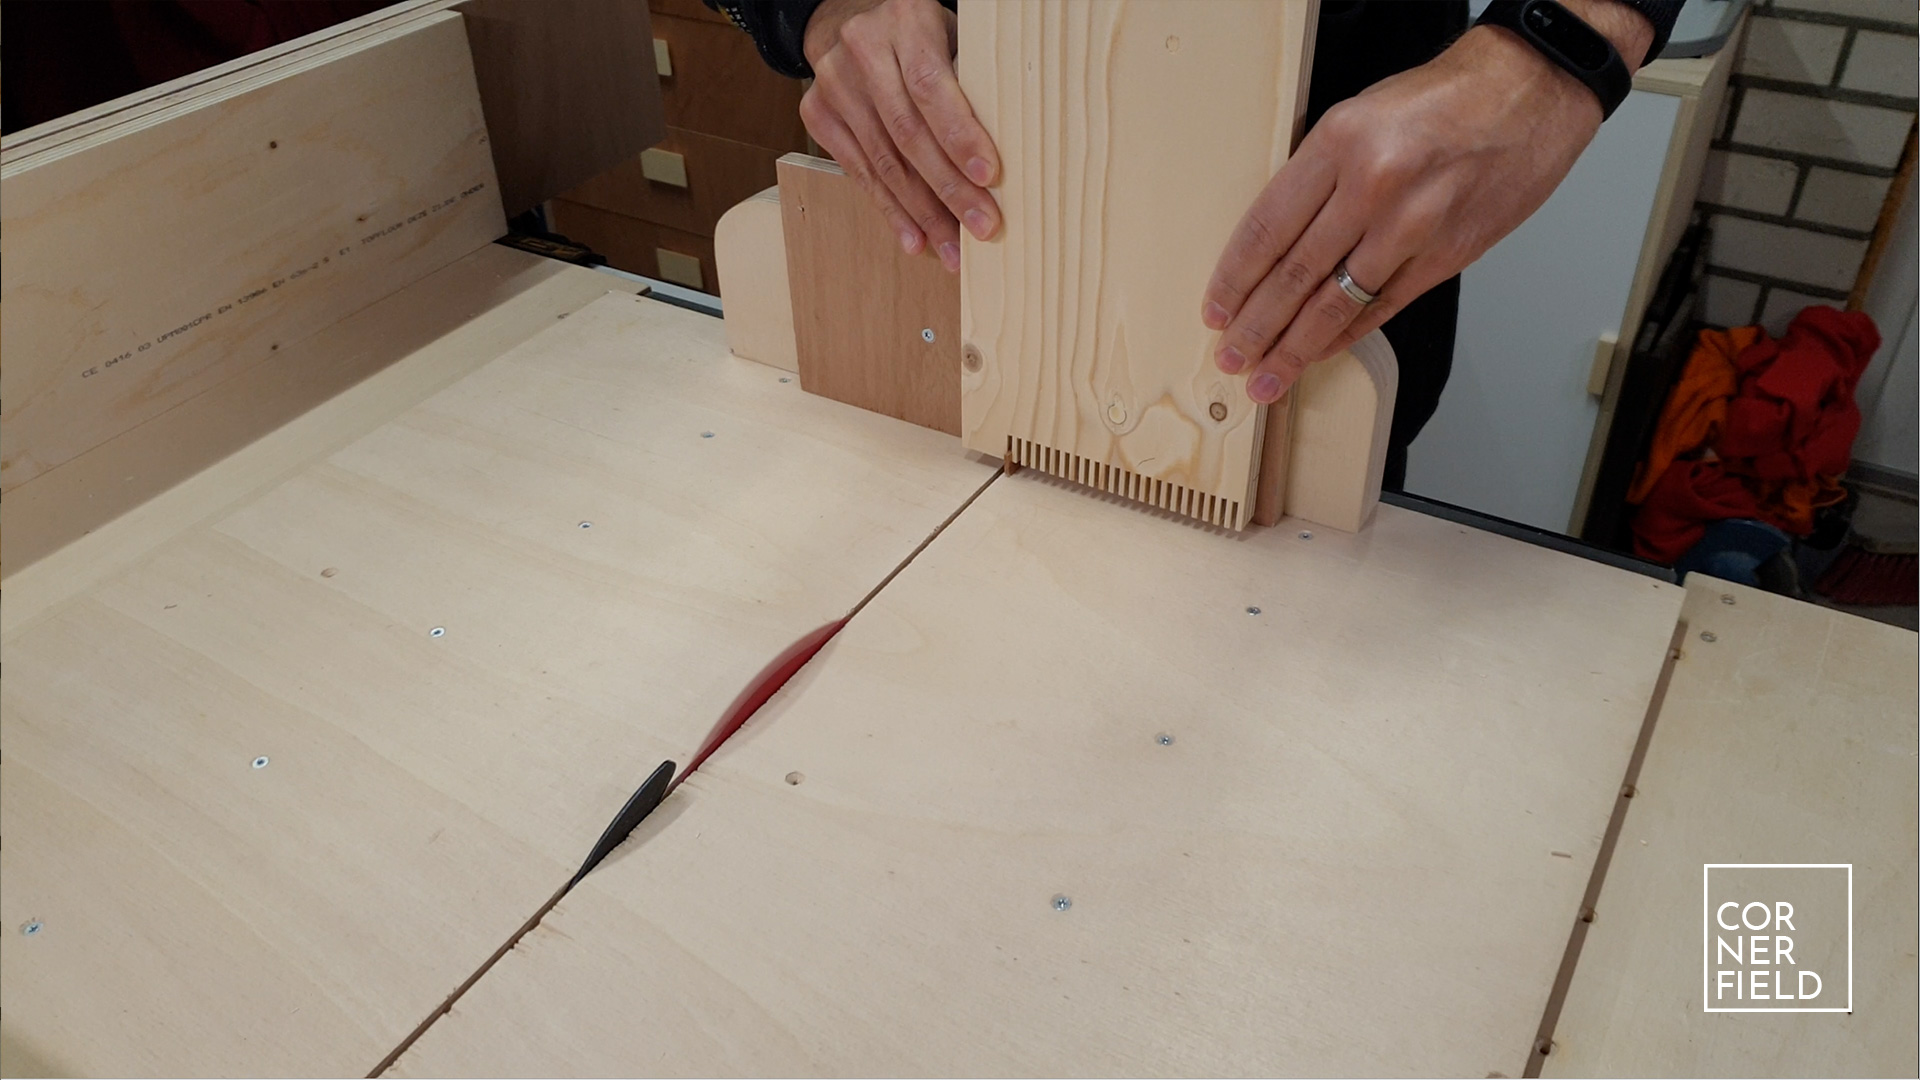
To make the joints for the cabinet I needed a jig. This is because it is impossible to manually space the cuts in such a way that the pieces mate properly. The jig I’m using is one I picked up on the Make Something Channel, linked here. If you want to learn more about this specific jig and how to use it check out his video. In short, the jig helps to make fixed spaced cuts on all the pieces so that they fit together just right. Important to add is that trying your setup with a test piece is crucial. With this jig, there is room for adjustment. Use that and make sure the fit works before you cut your actual work. Once I was happy with the test fit, I could glue up the cabinet but not before I made slots for the doors to slide through. That’s up next.
Sliding doors
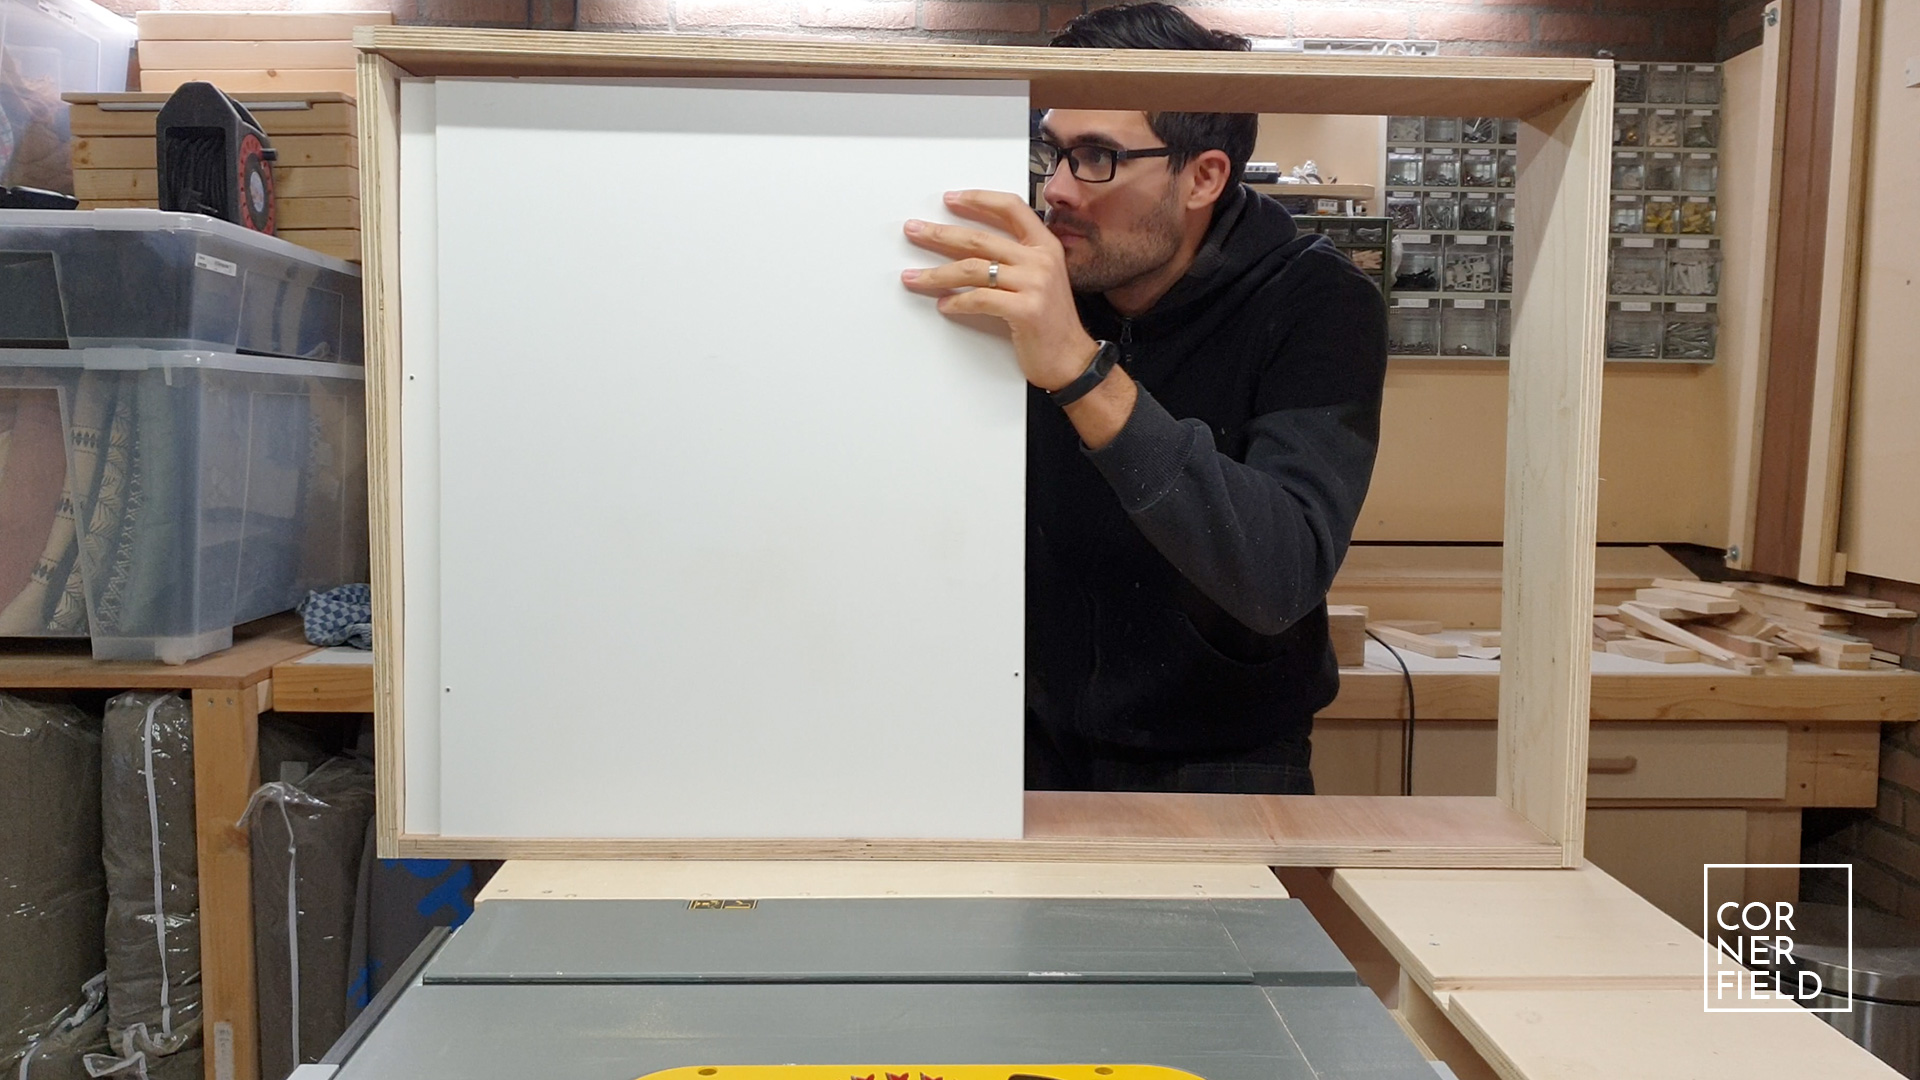
To have sliding doors you need ‘tracks’ or grooves for the doors the slide through. These need to be cut before gluing up the frame. My doors are 3mm thick which is just a hair thicker than my saw blade. What I did was make a cut in the top and bottom of the bottom about 5mm from the edge. Then I moved my table saw fence just a bit over and made another cut. When the door could slide through easily I made the same cut on the top. Important to mention here that if you want removable doors you need to cut the top slot deeper then the bottom one. Otherwise, you need to install the doors before the glue up. I decided to do the last because it’s a little faster but the obvious downside is that replacing the doors is difficult.

Shelf
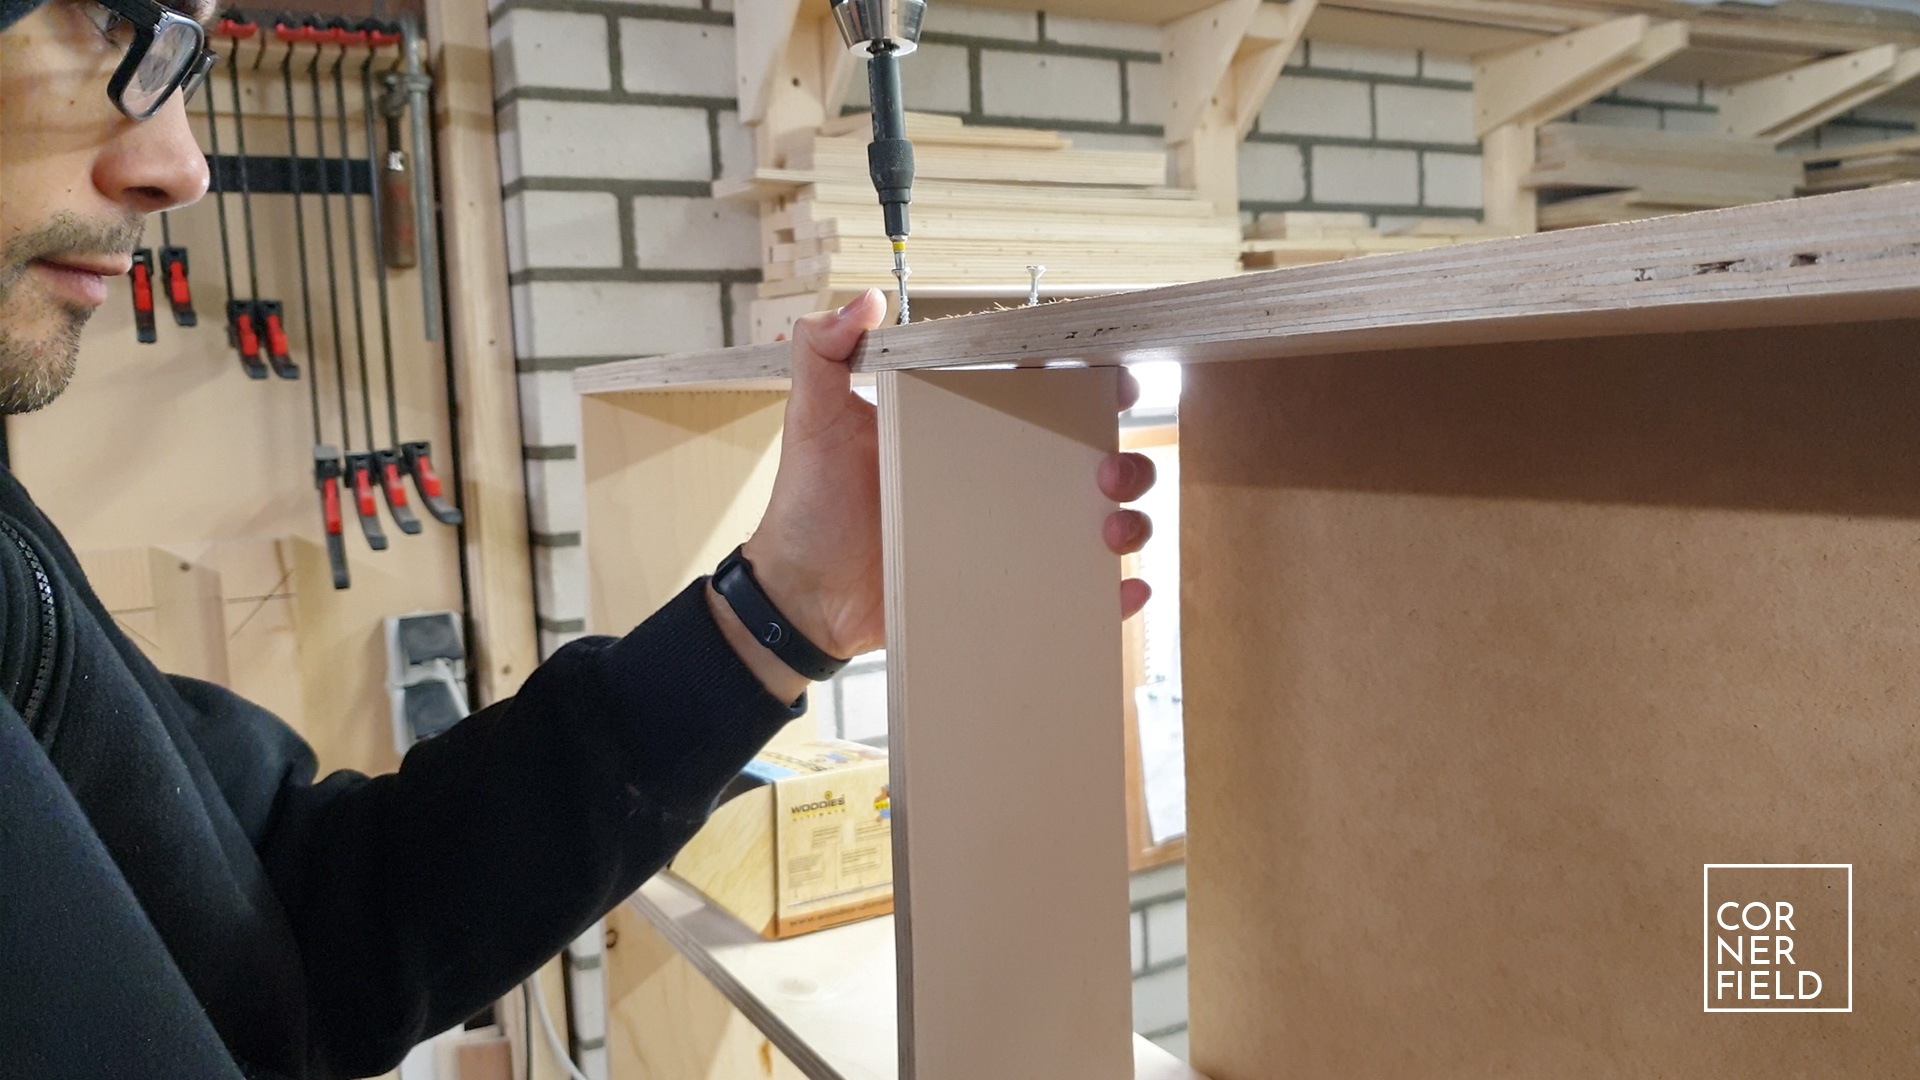
With my doors installed and the frame glued up, I could make the shelf. I waited to cut this because now I can measure the exact depth and length that is available for it. Installing the shelf is made a little easier by cutting some scraps to hold it up for you while you fasten it to the sides. To keep the long shelf from sagging and to divide the compartments I install a middle piece underneath the shelf. This is simply screwed in place. Be sure that it’s square before you install this.

Installation & details
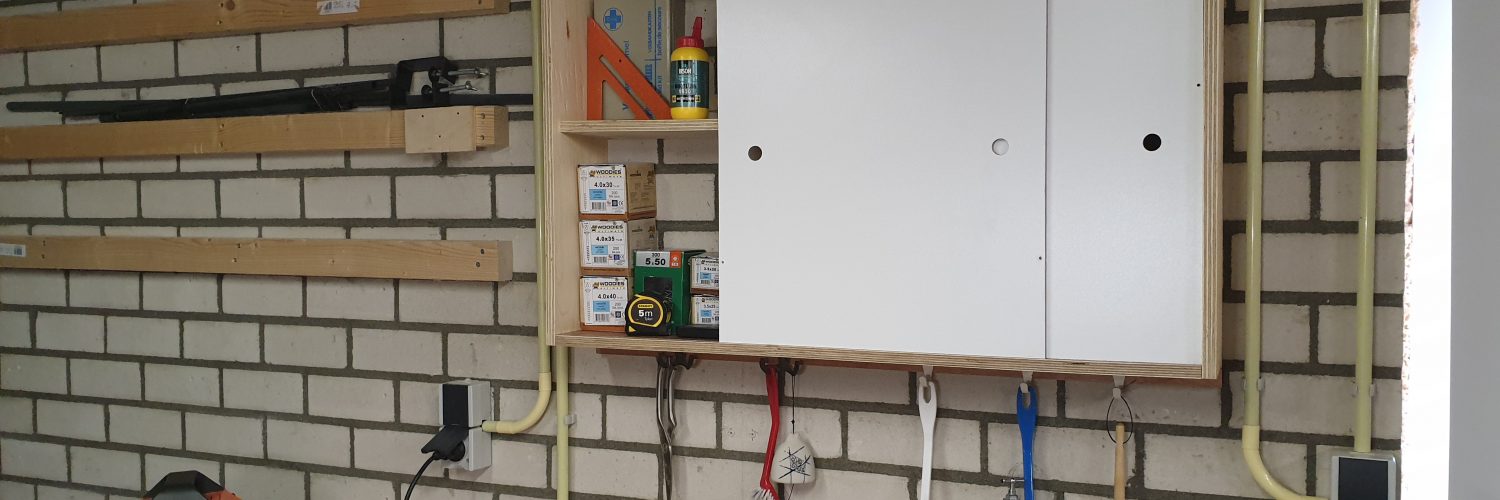
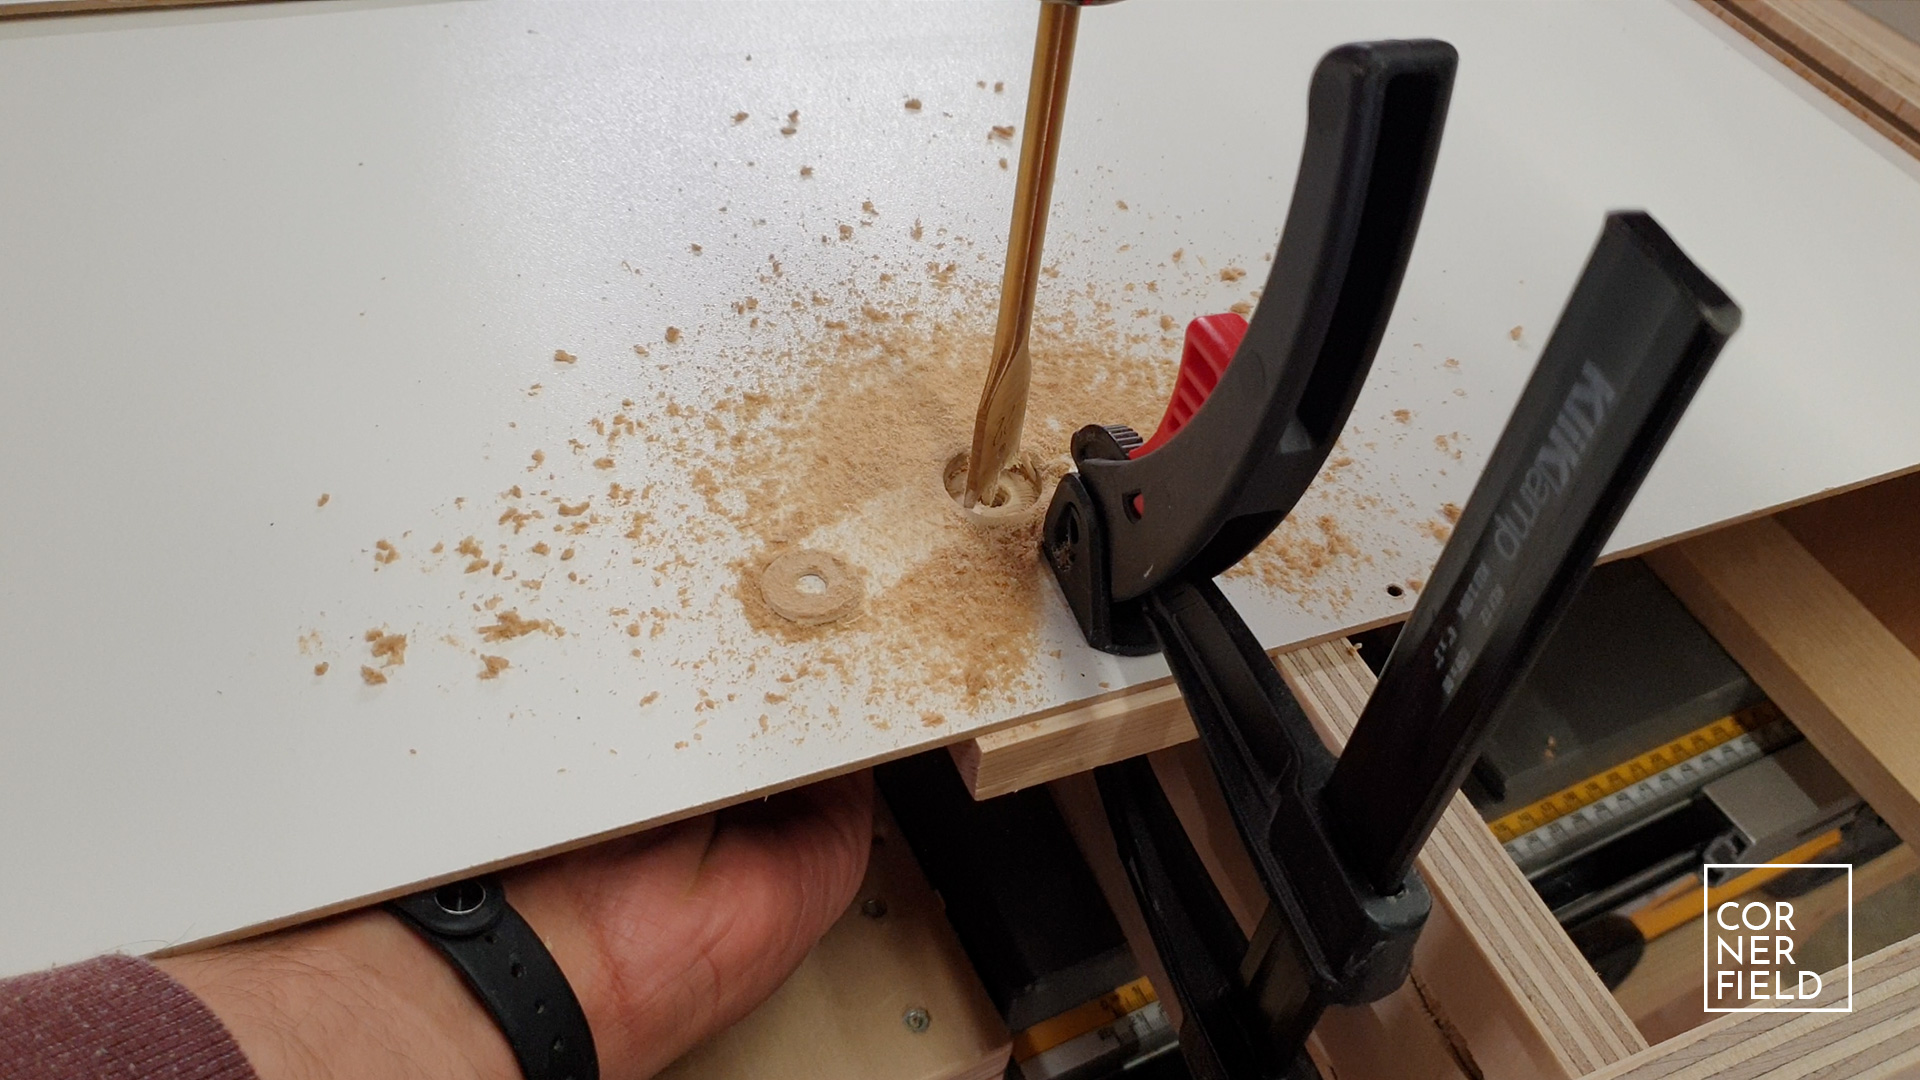
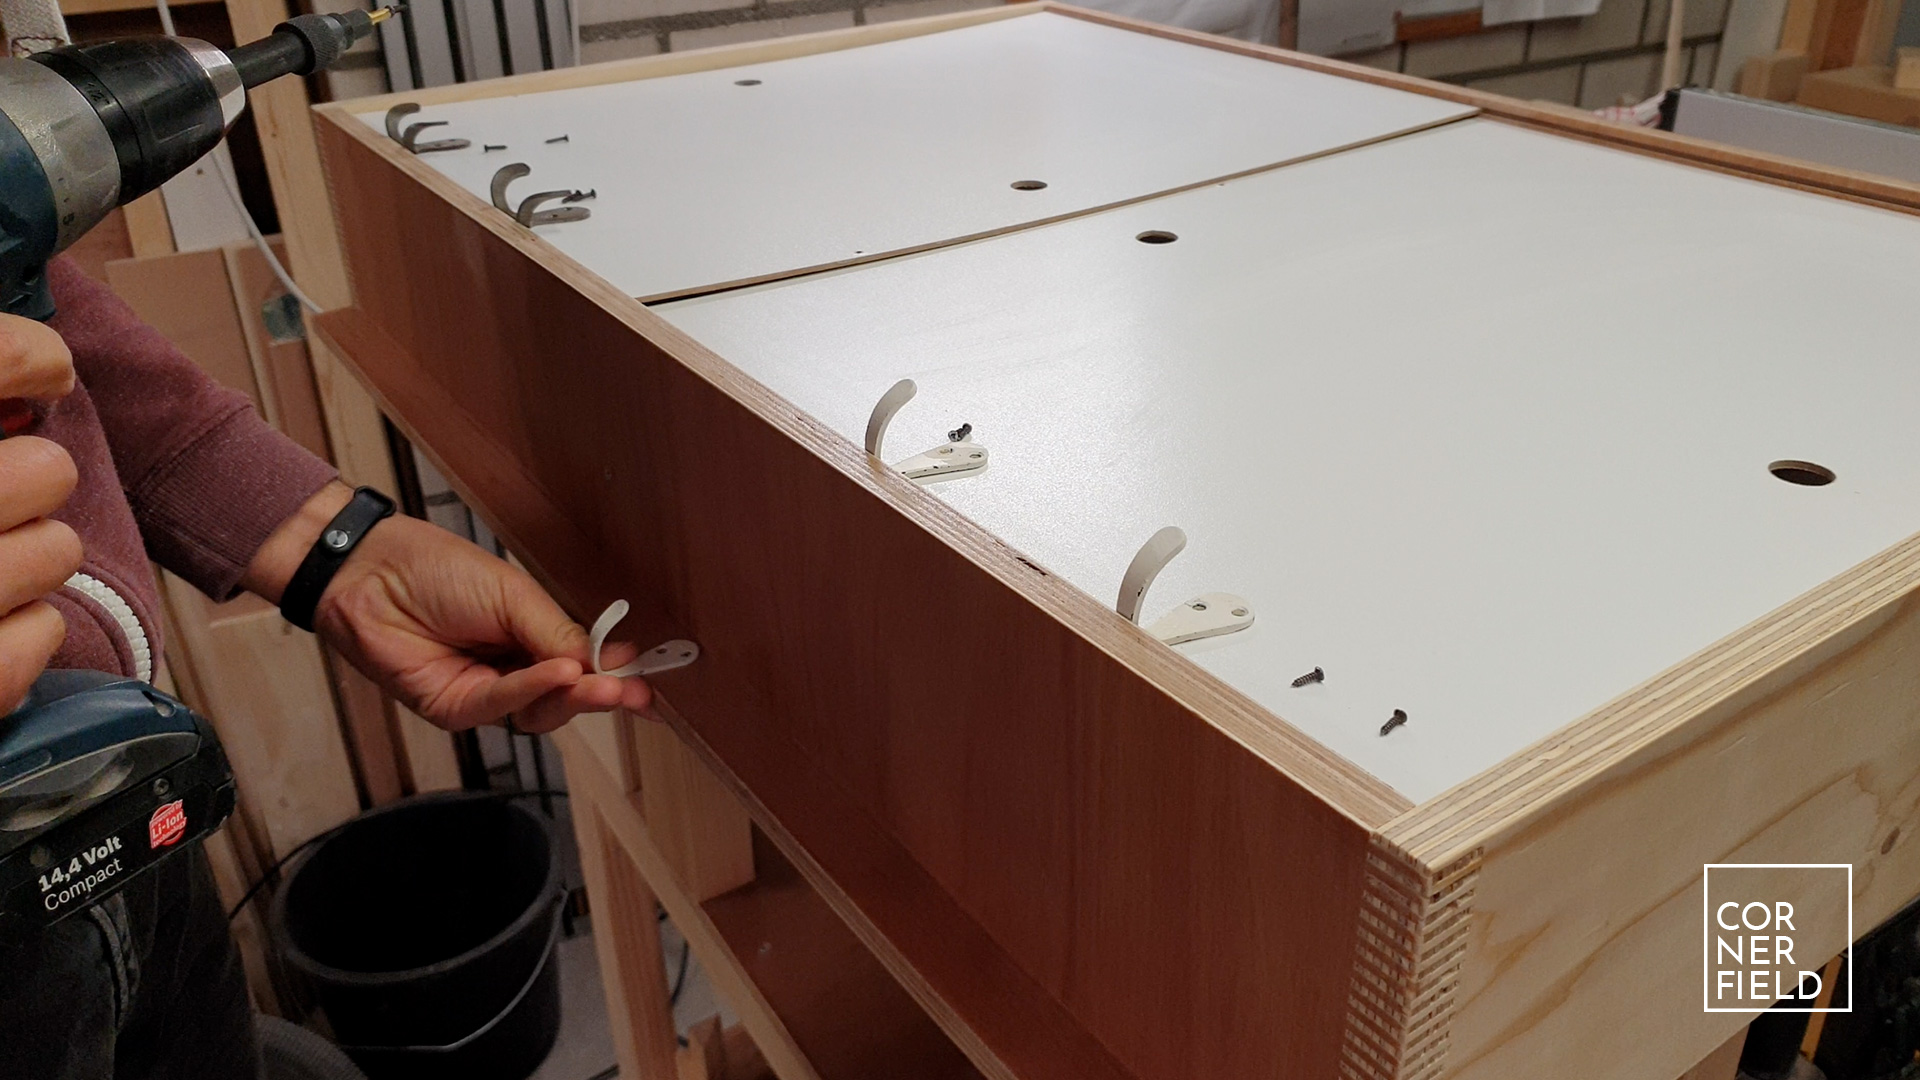
For the wall-mount that I have in mind, the cabinet needs a strip attached to the back. This is glued and screwed in place. It’s important that this strip is completely up against the top otherwise, the weight will be carried by the strip and not the frame. Some last details are drilling holes through the doors to open them and installing some hooks on the bottom. After that the cabinet is complete.
Result
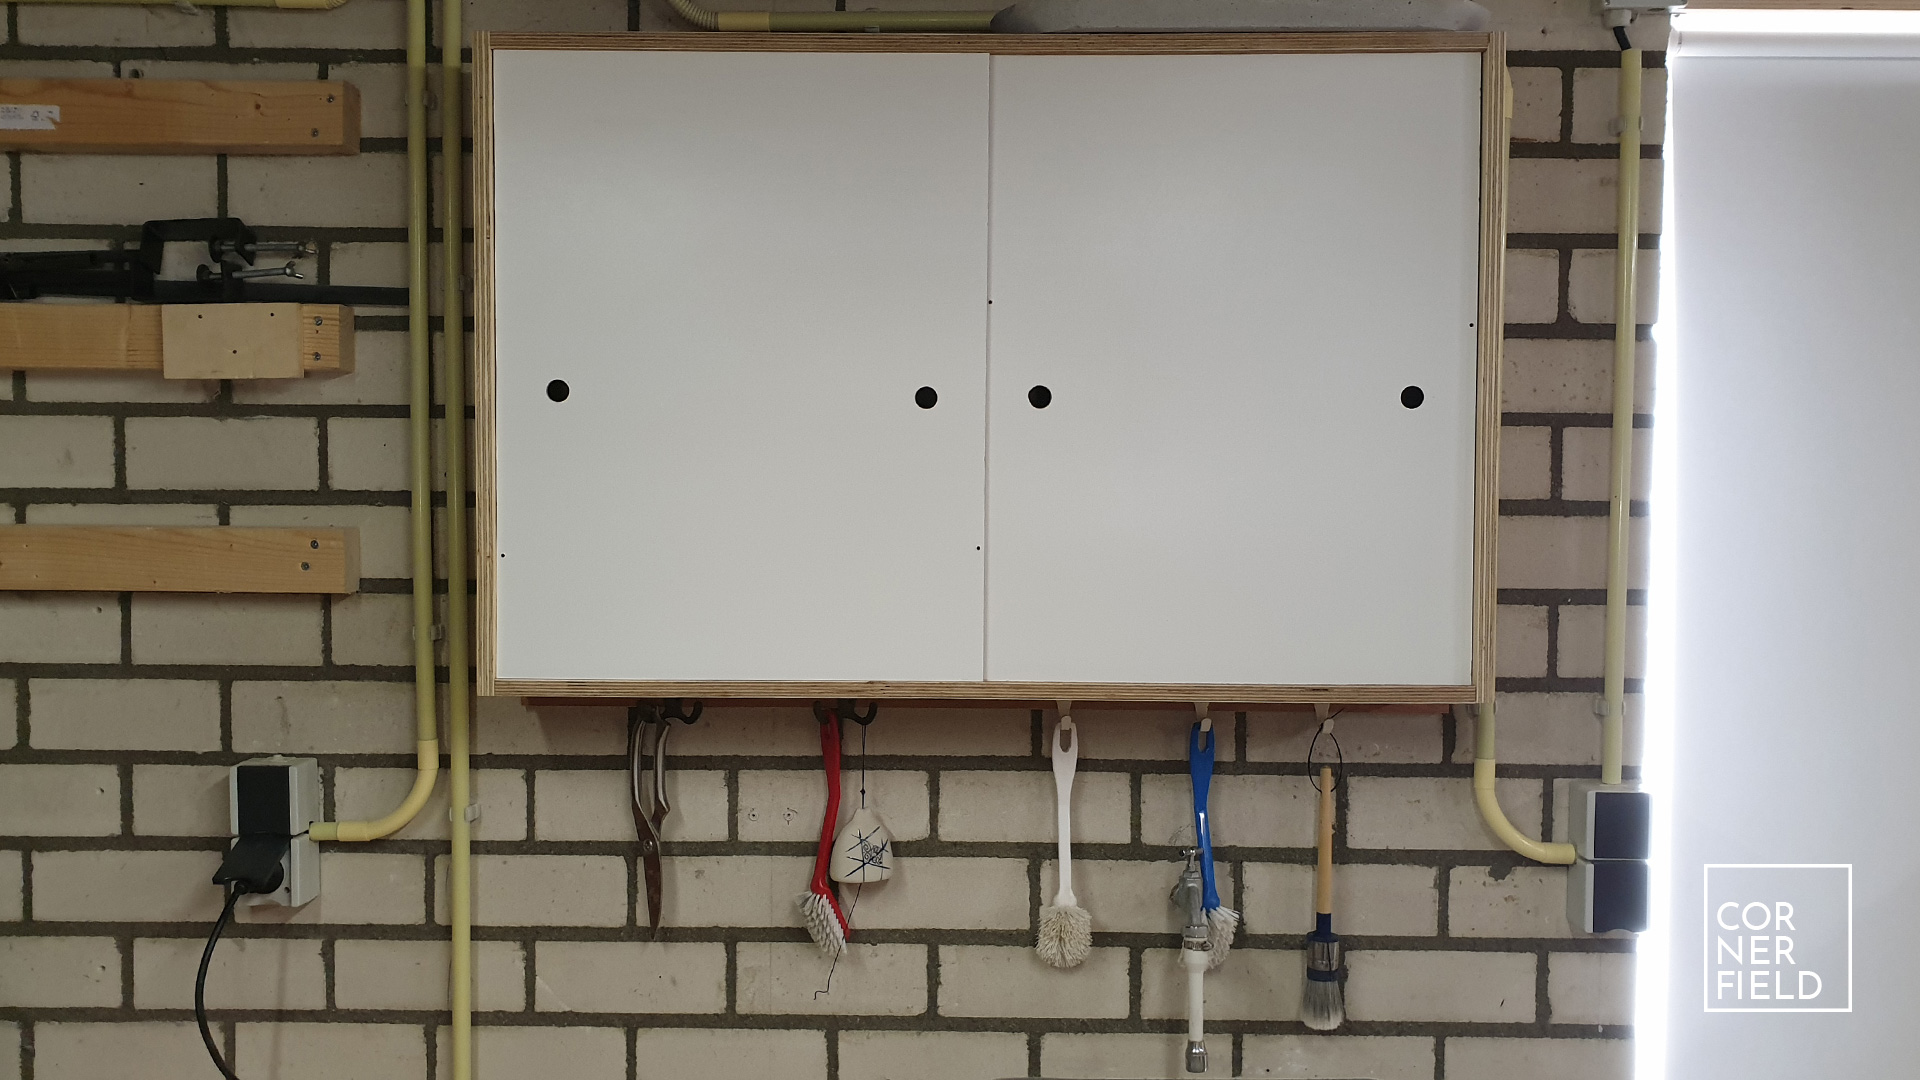
Once again the result is different then I had in mind when I started like most of my projects do. Regardless of that, I’m happy with how it turned out. It just deep enough to be useful but not too deep that it’s in the way.
Links & Download
If you want to build something similar I’ve linked my 3D model below as a download.
SketchUp 3D-model (including cut list)
Instagram 1 | 2 | 3 | 4
Hope this post has inspired you to make something!
And don’t forget to follow your excitement 

Add comment