


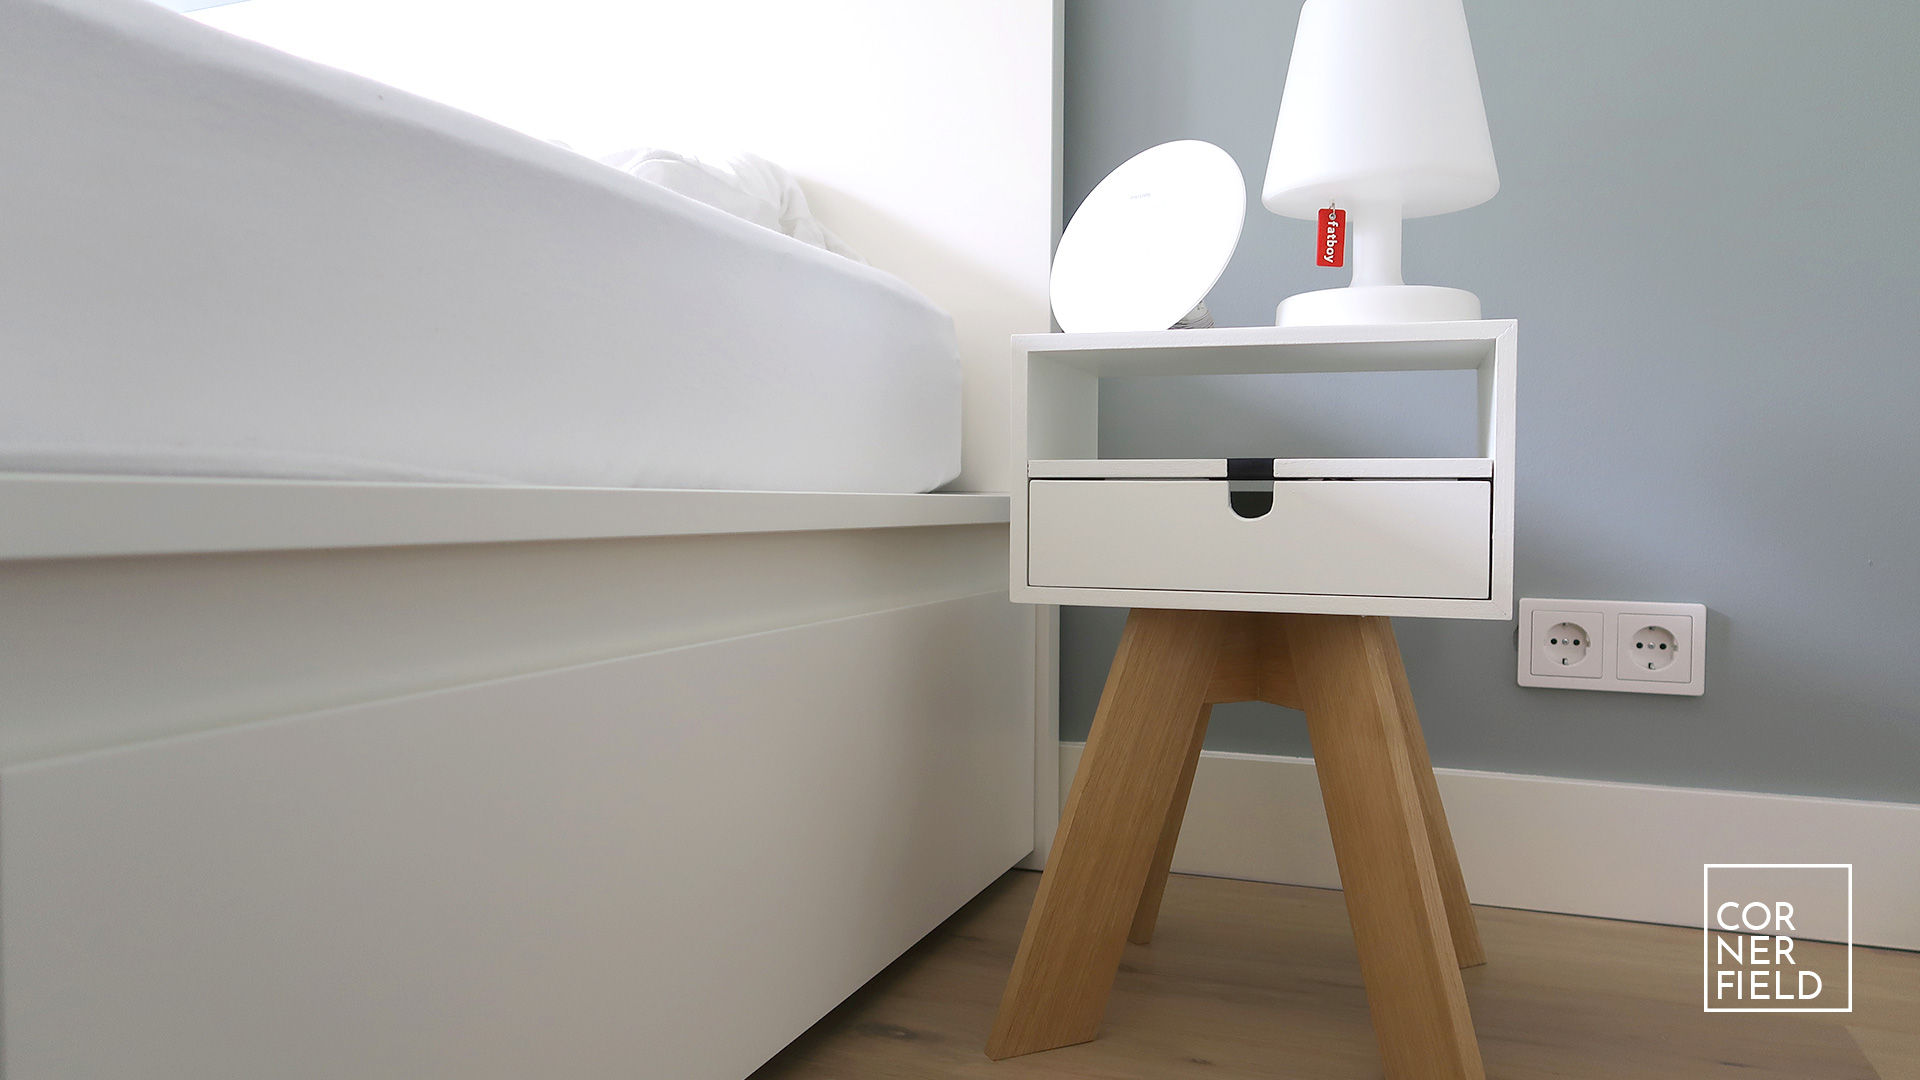
This nightstand is a quick build for me. I want to have a place to charge my phone and put my glasses on when I go to sleep.
Design
Like most of my projects, I chose to make something that has a clean and minimalistic design. The inspiration came from an image I found online that led me to make this 3D model.
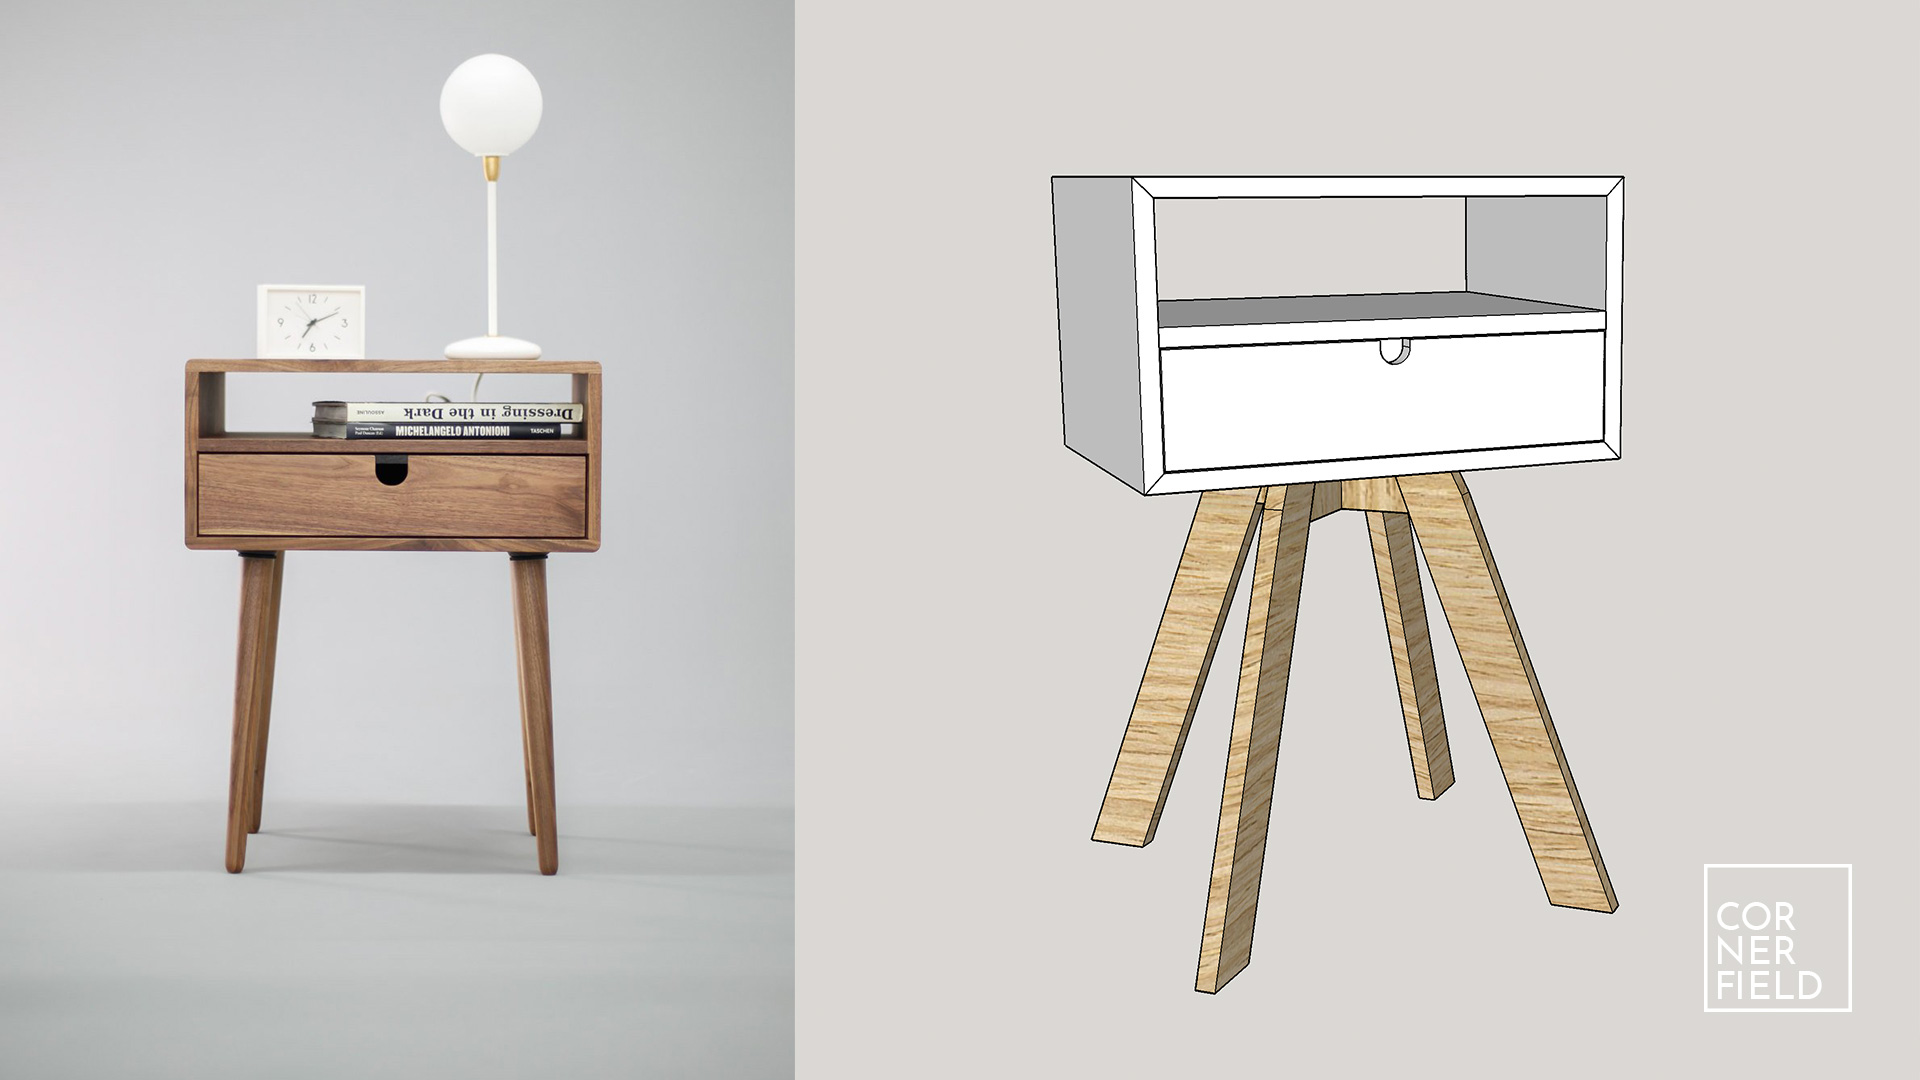
I didn’t include the cut-out for the wireless charger because I wasn’t exactly sure at this stage where and how I was going to include this in the build. But I figured it out as I was going like I usually do. Now that the design is complete, let’s get to building it.
Build
Material & legs
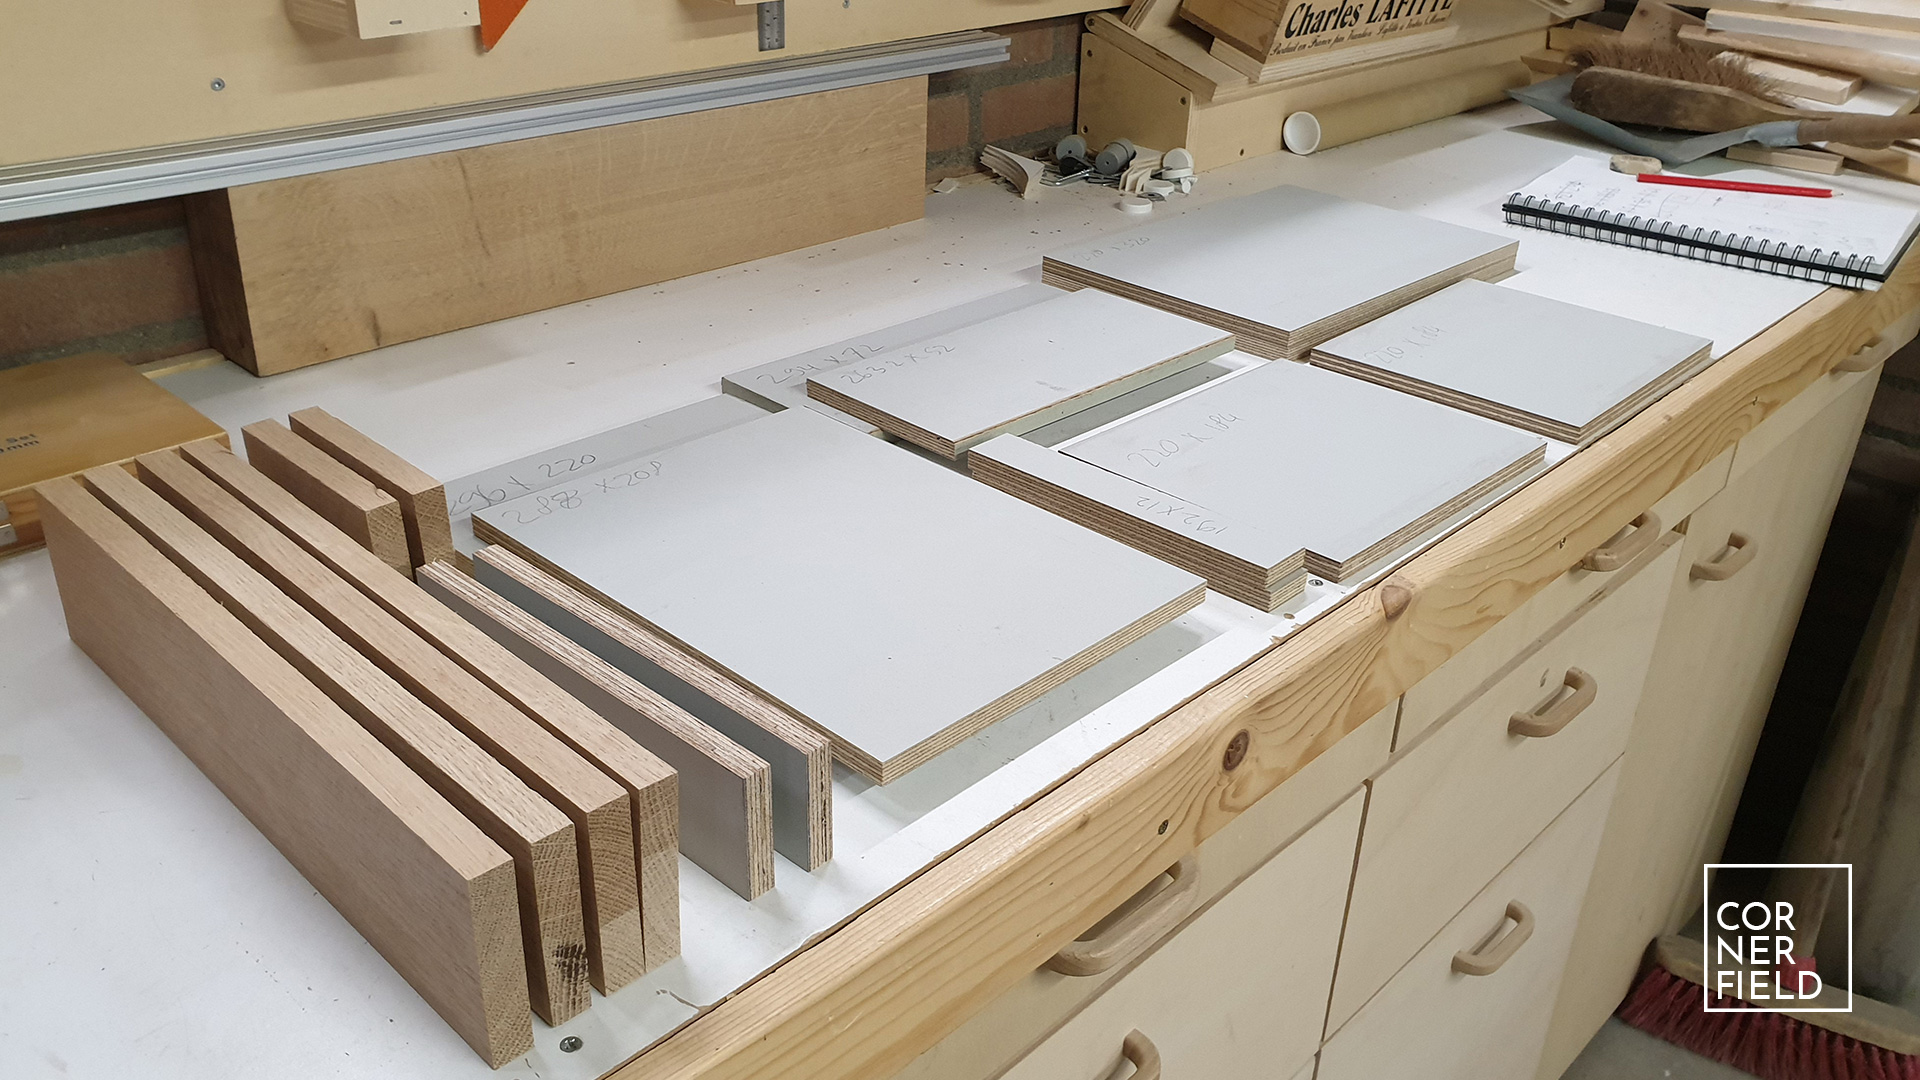
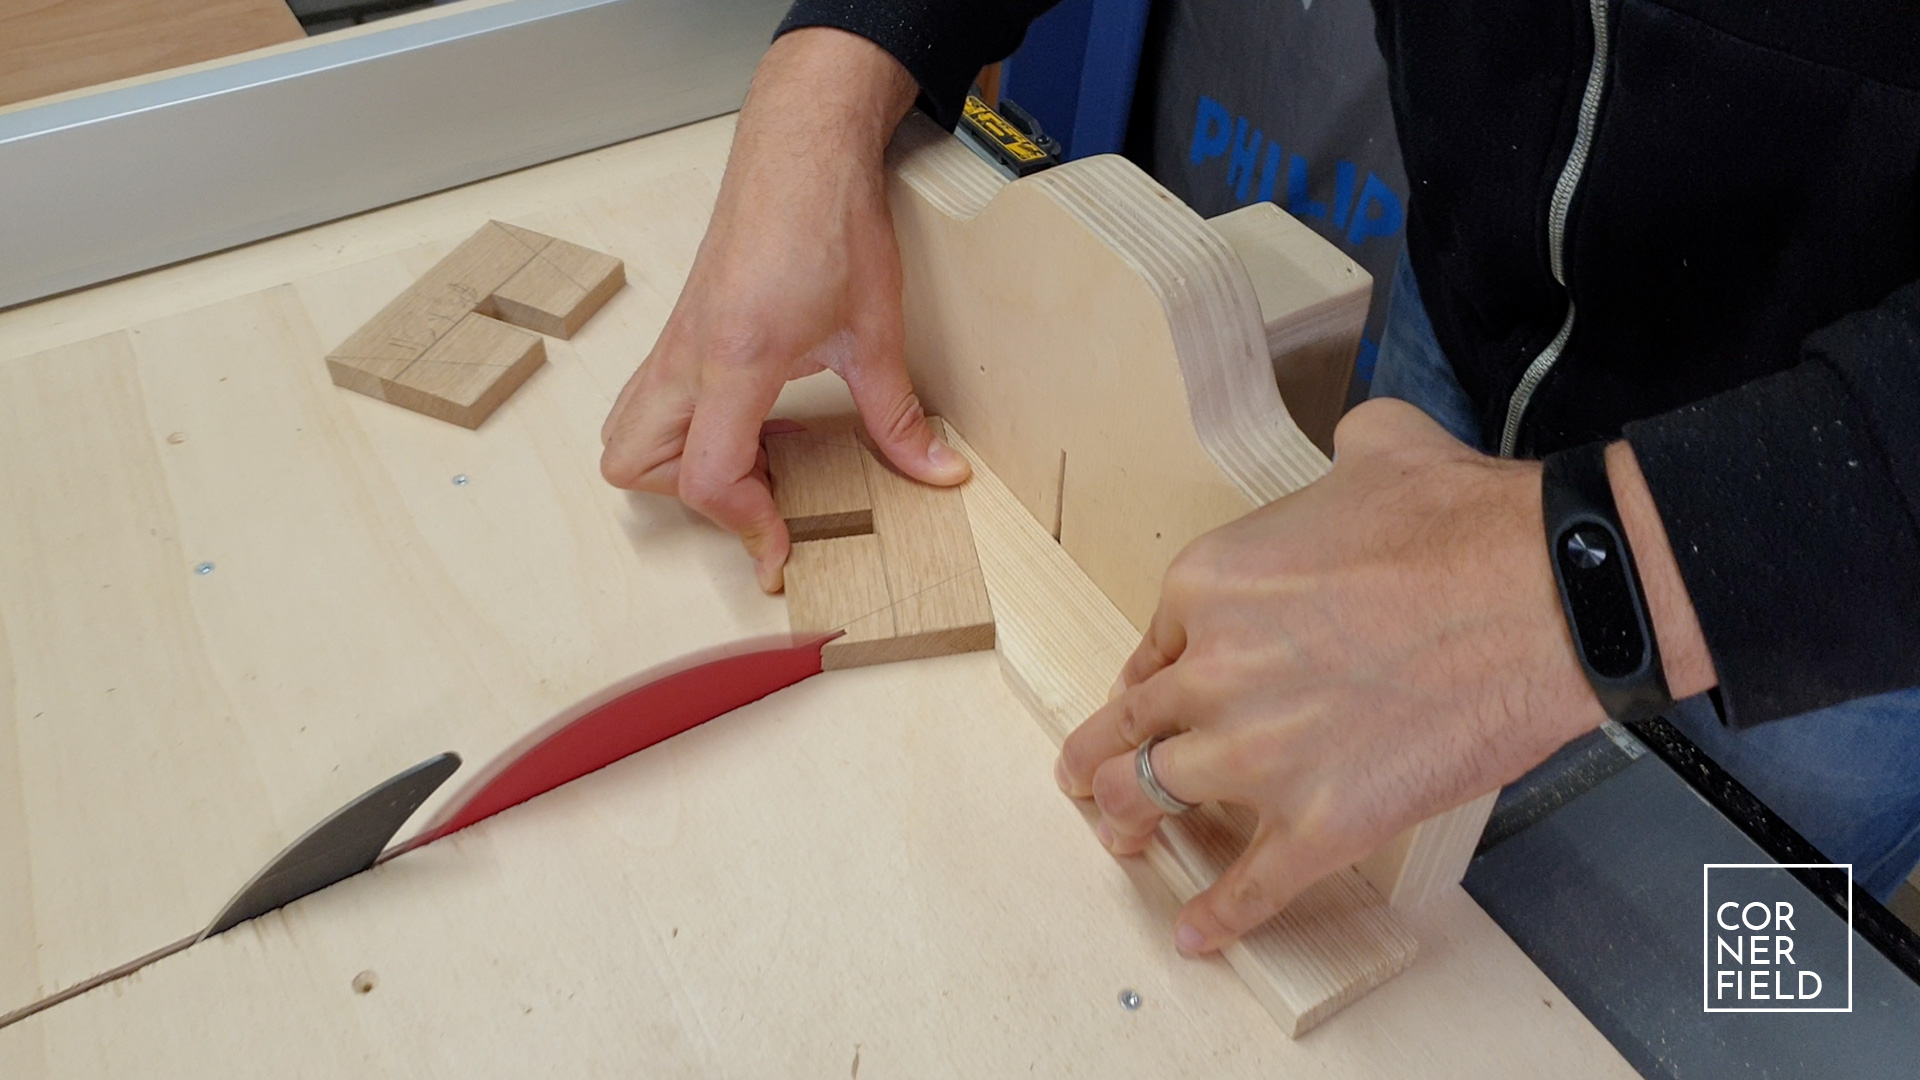
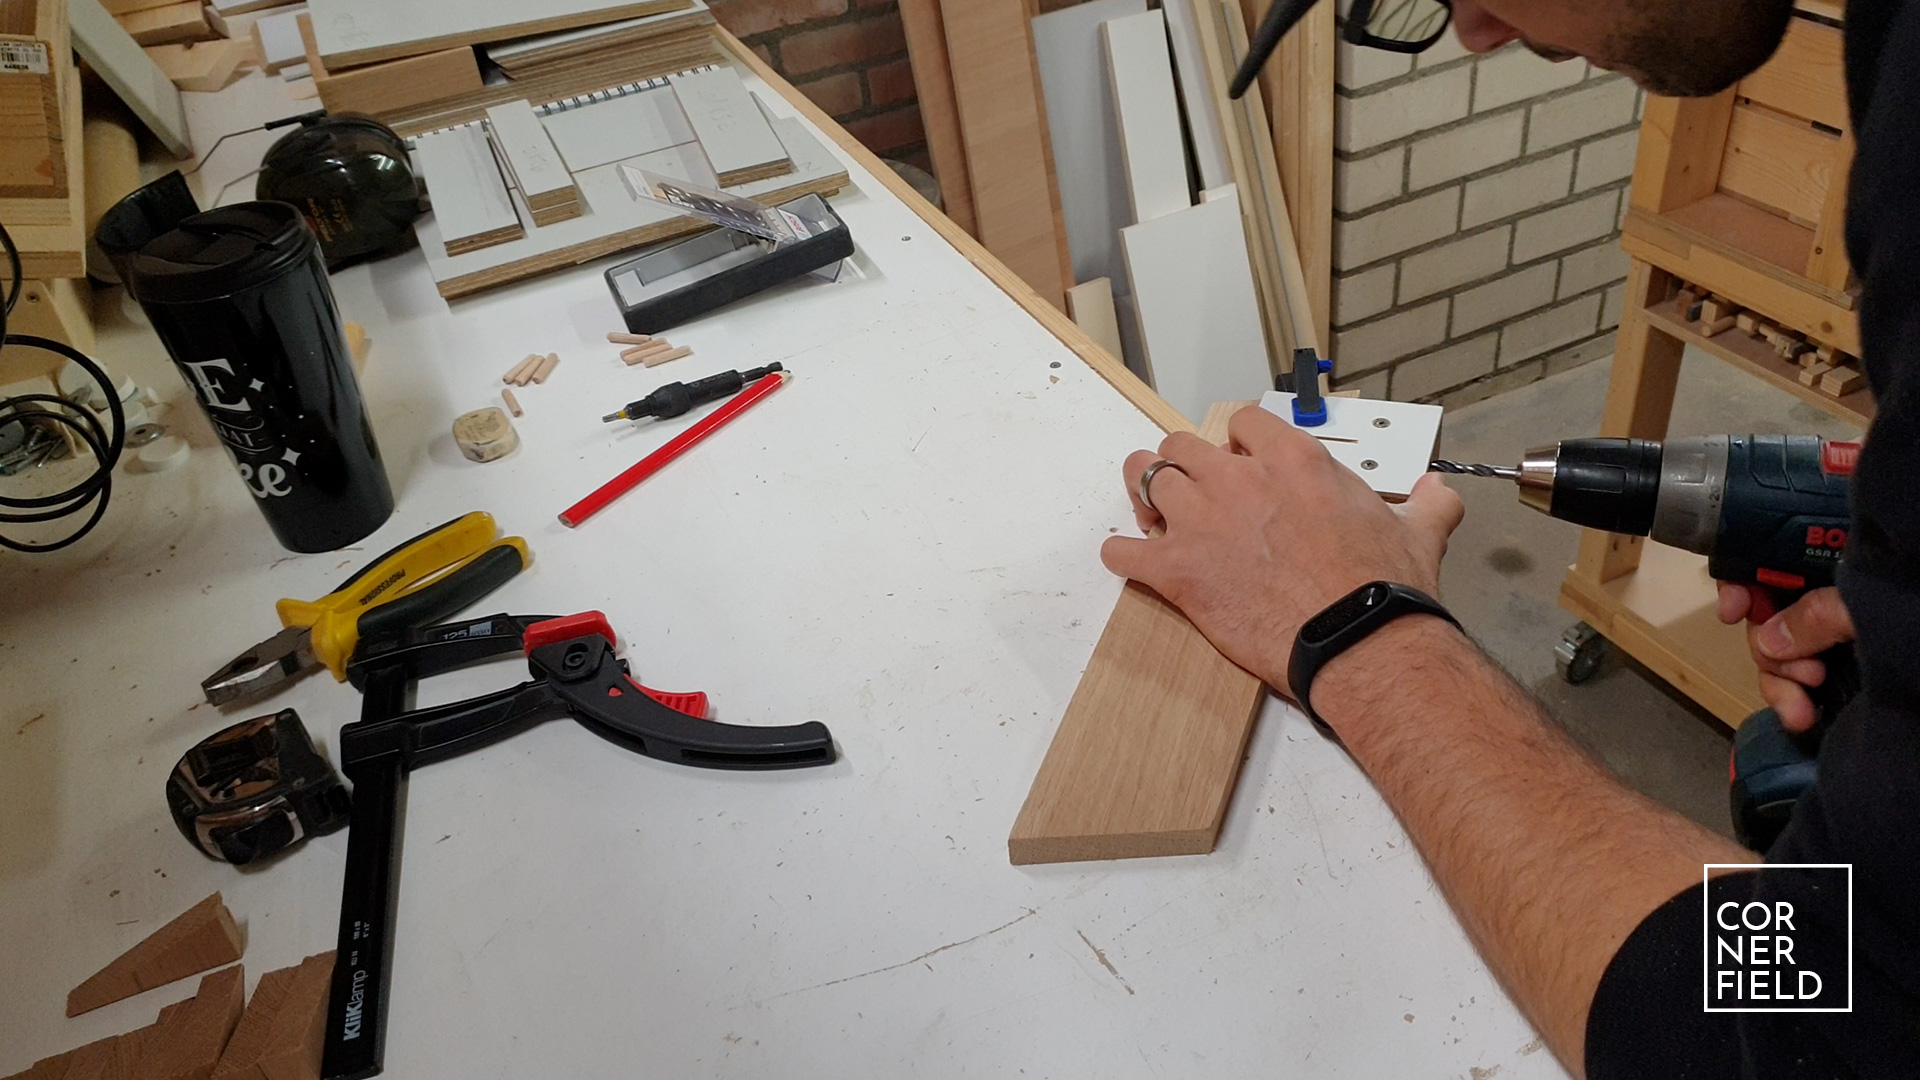
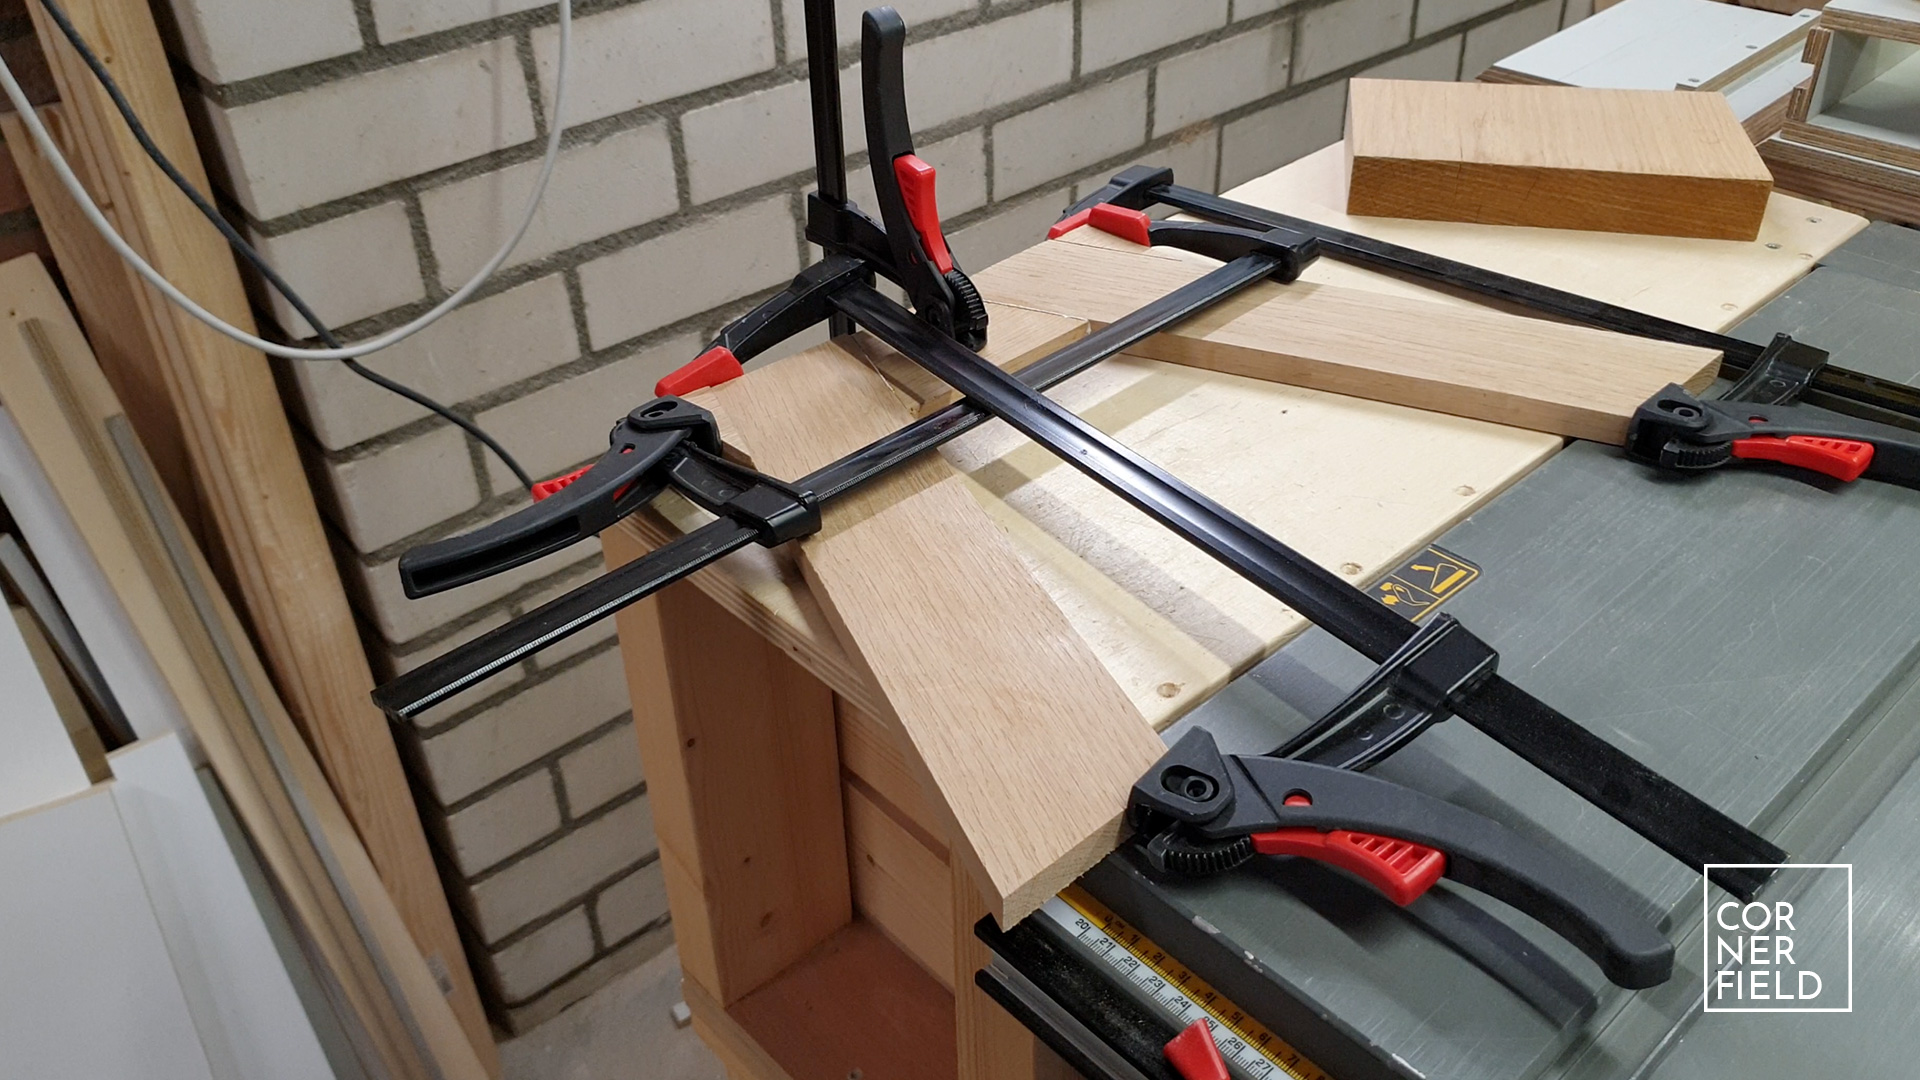
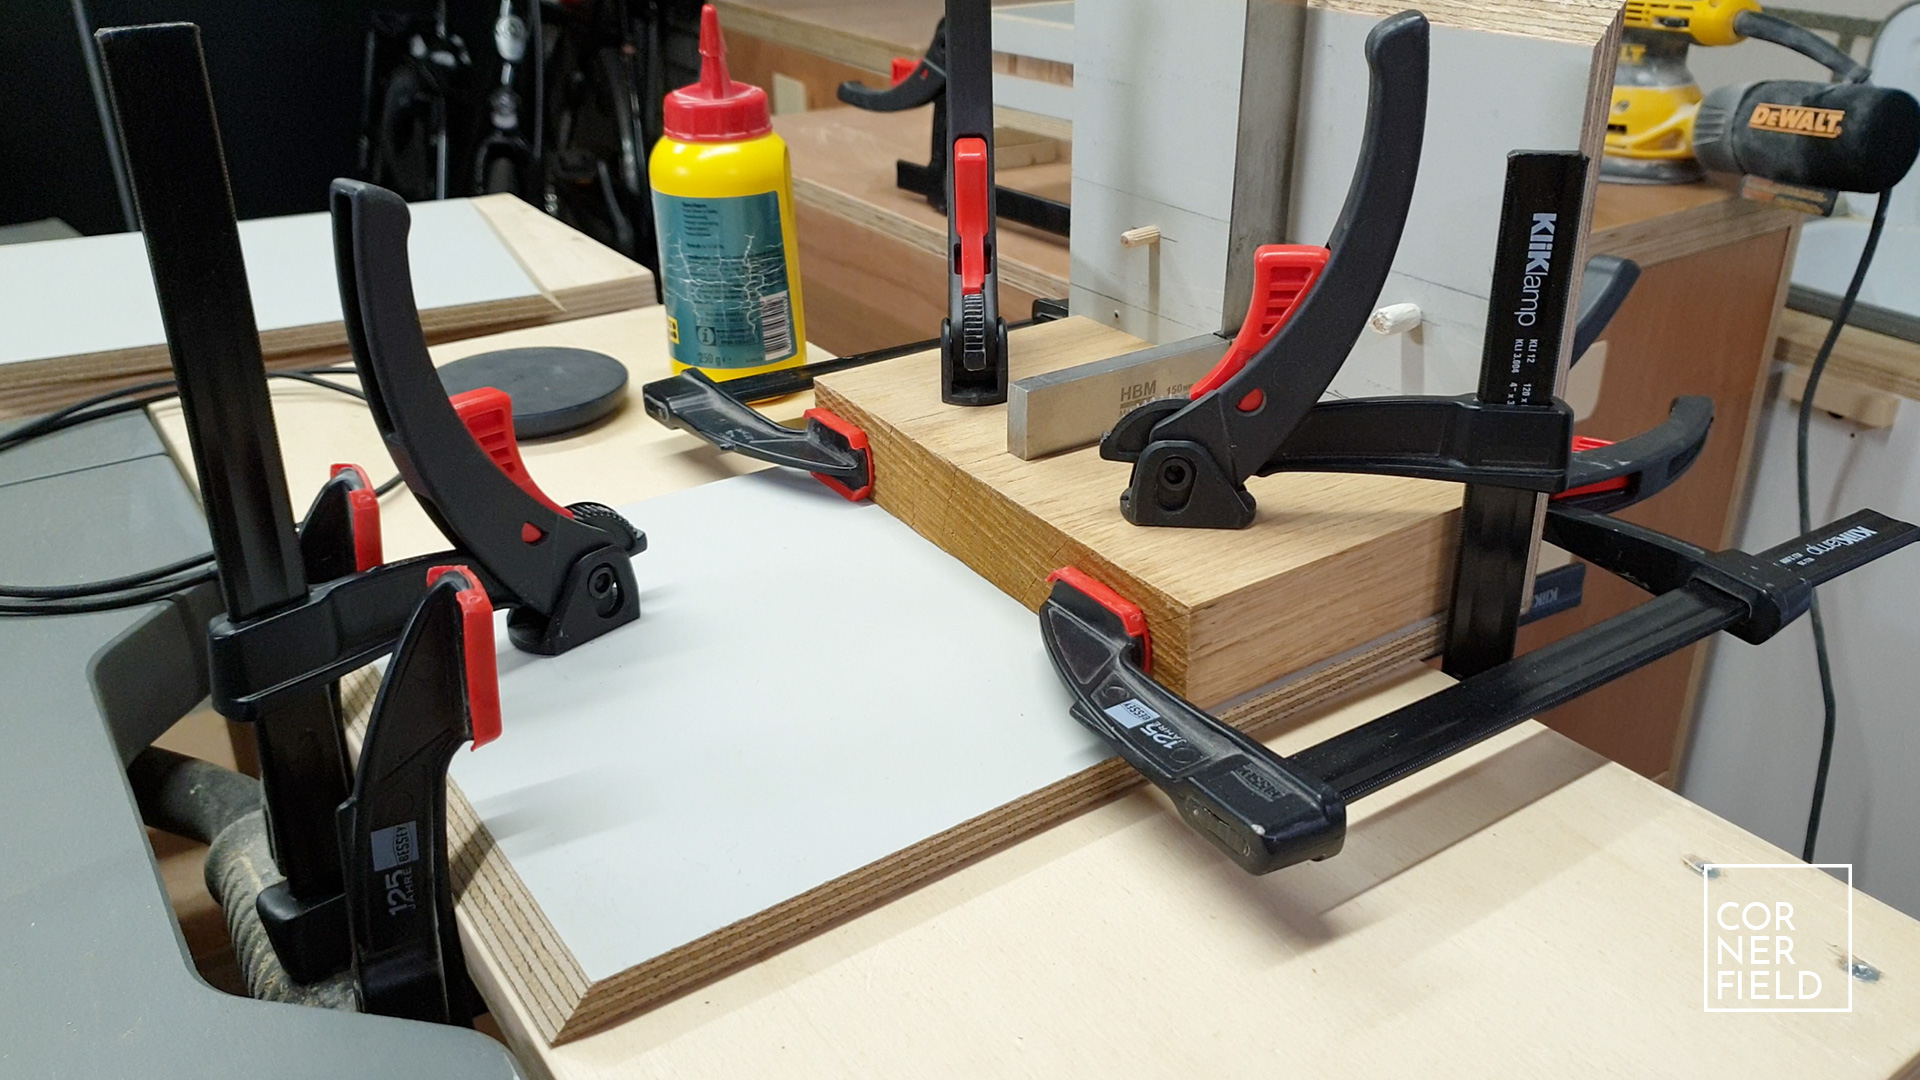
The build for this project is pretty straightforward. I used plywood to make the top cabinet with the drawer and solid oak for the legs. First I cut the material I would need to rough size using my table saw and cross-cut sled. Next, I cut slots in the centerpieces of the leg assembly. This is so I can mate the two legs, later on forming a cross. For the legs themselves, I needed to cut angles on both sides. I landed on a 21-degree angle. To make these cuts safely I cut a scrap to the corresponding 69 degrees to support the piece on my cross-cut sled. To join the leg assembly together I’m using dowels. I use my dowel jig to make the holes for the dowels.

Cabinet & shelf
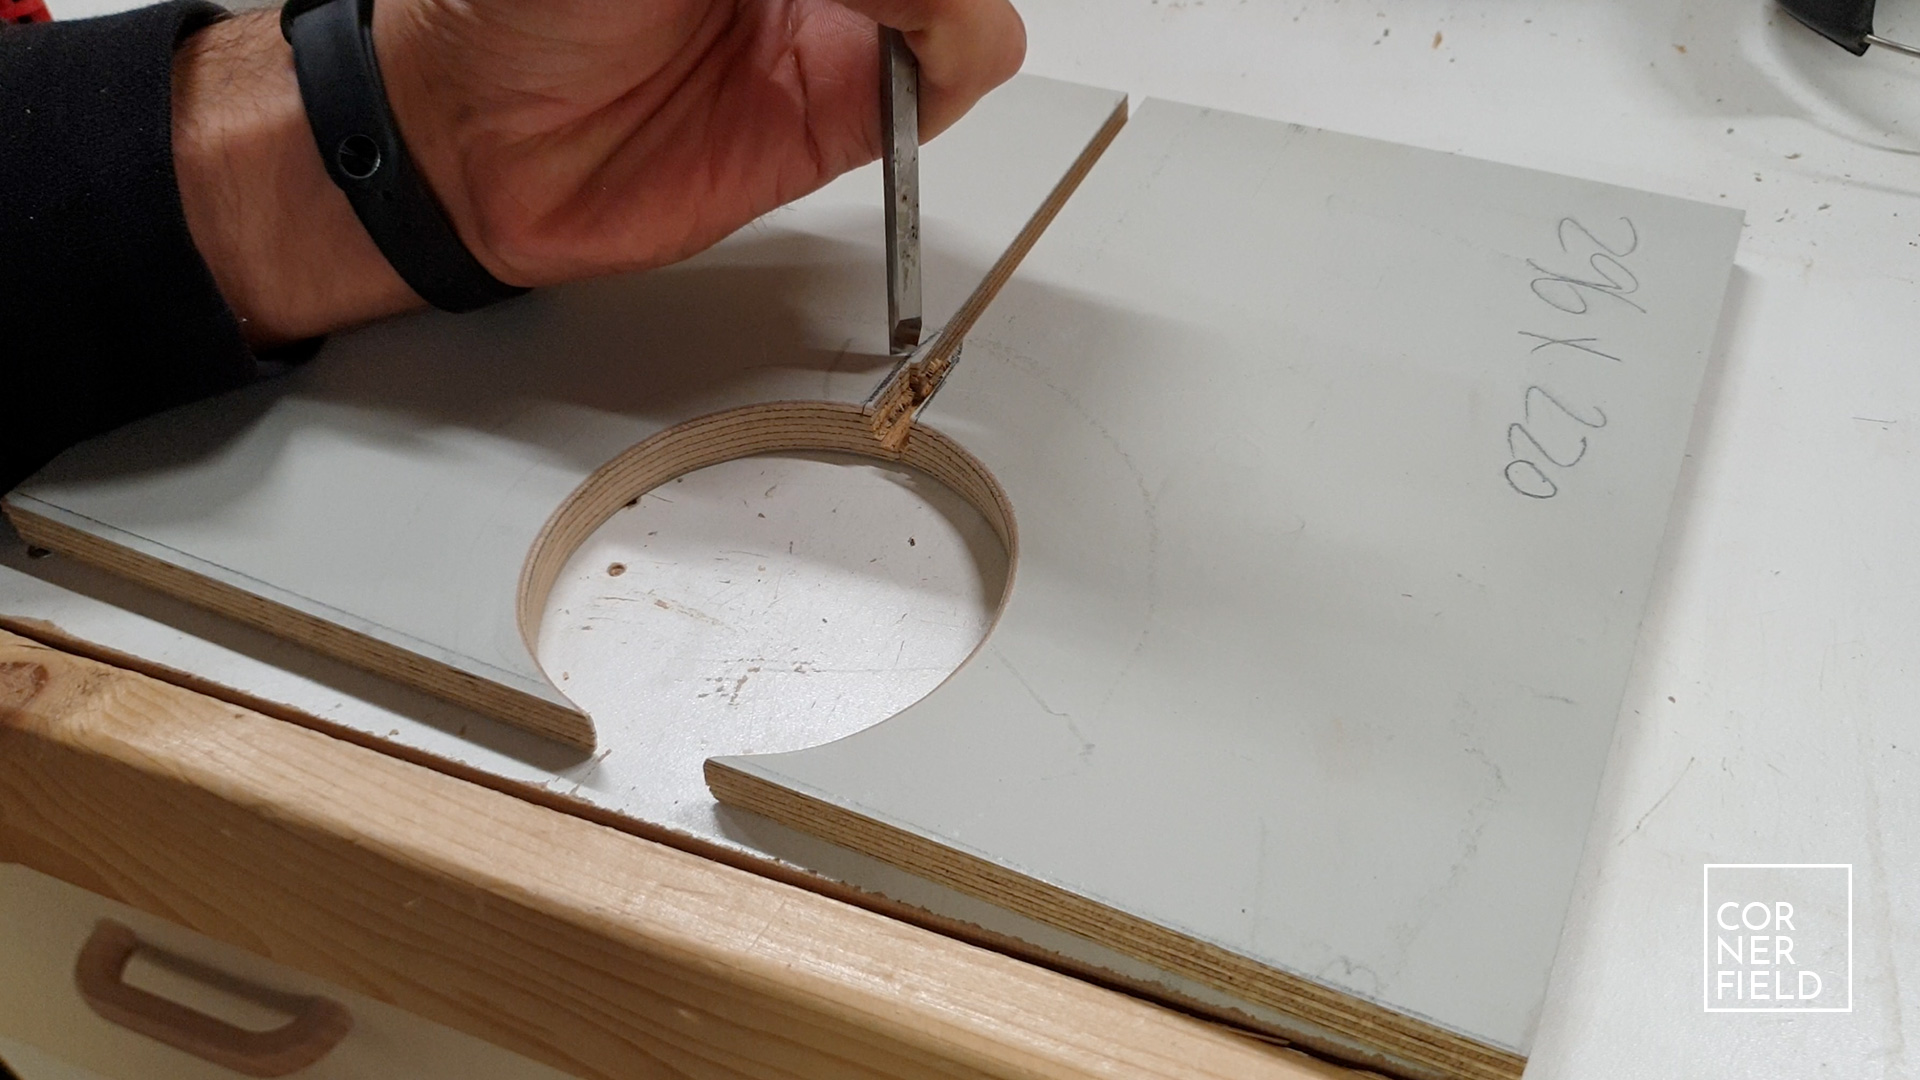
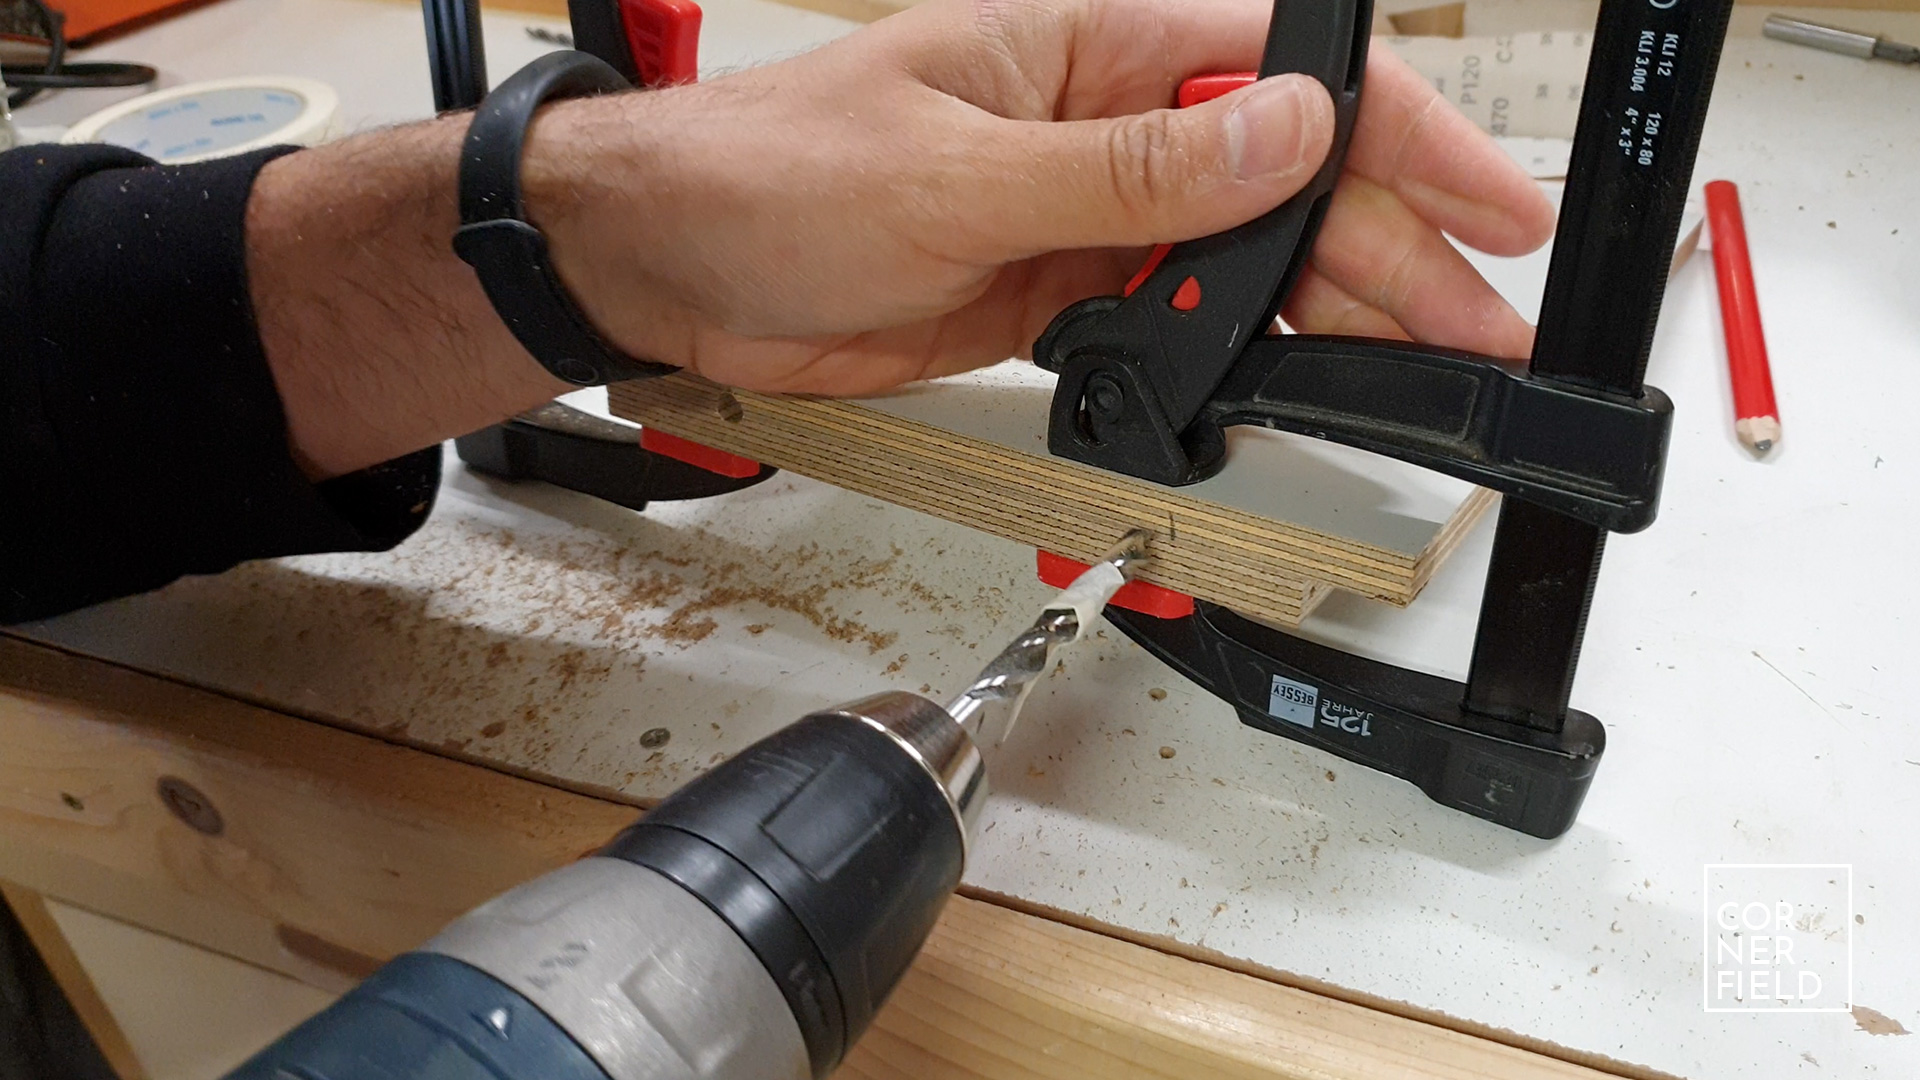
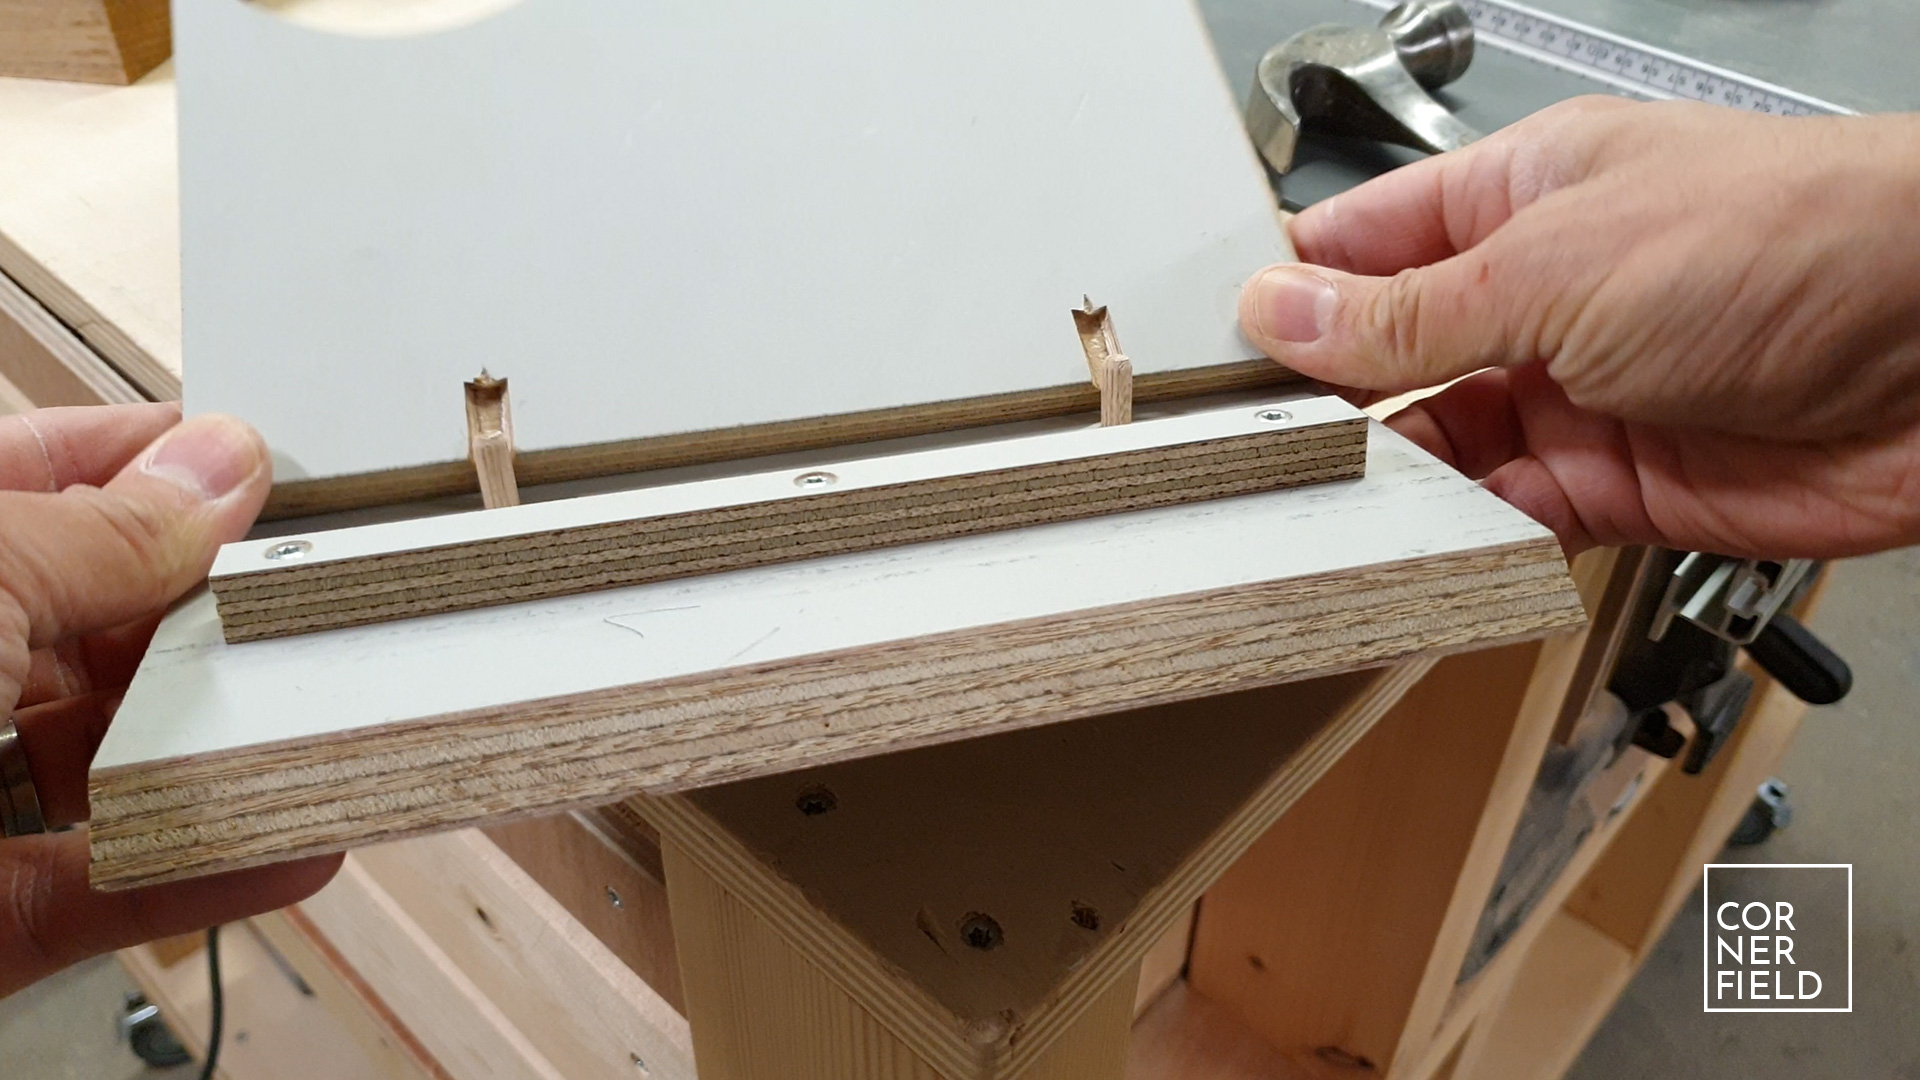
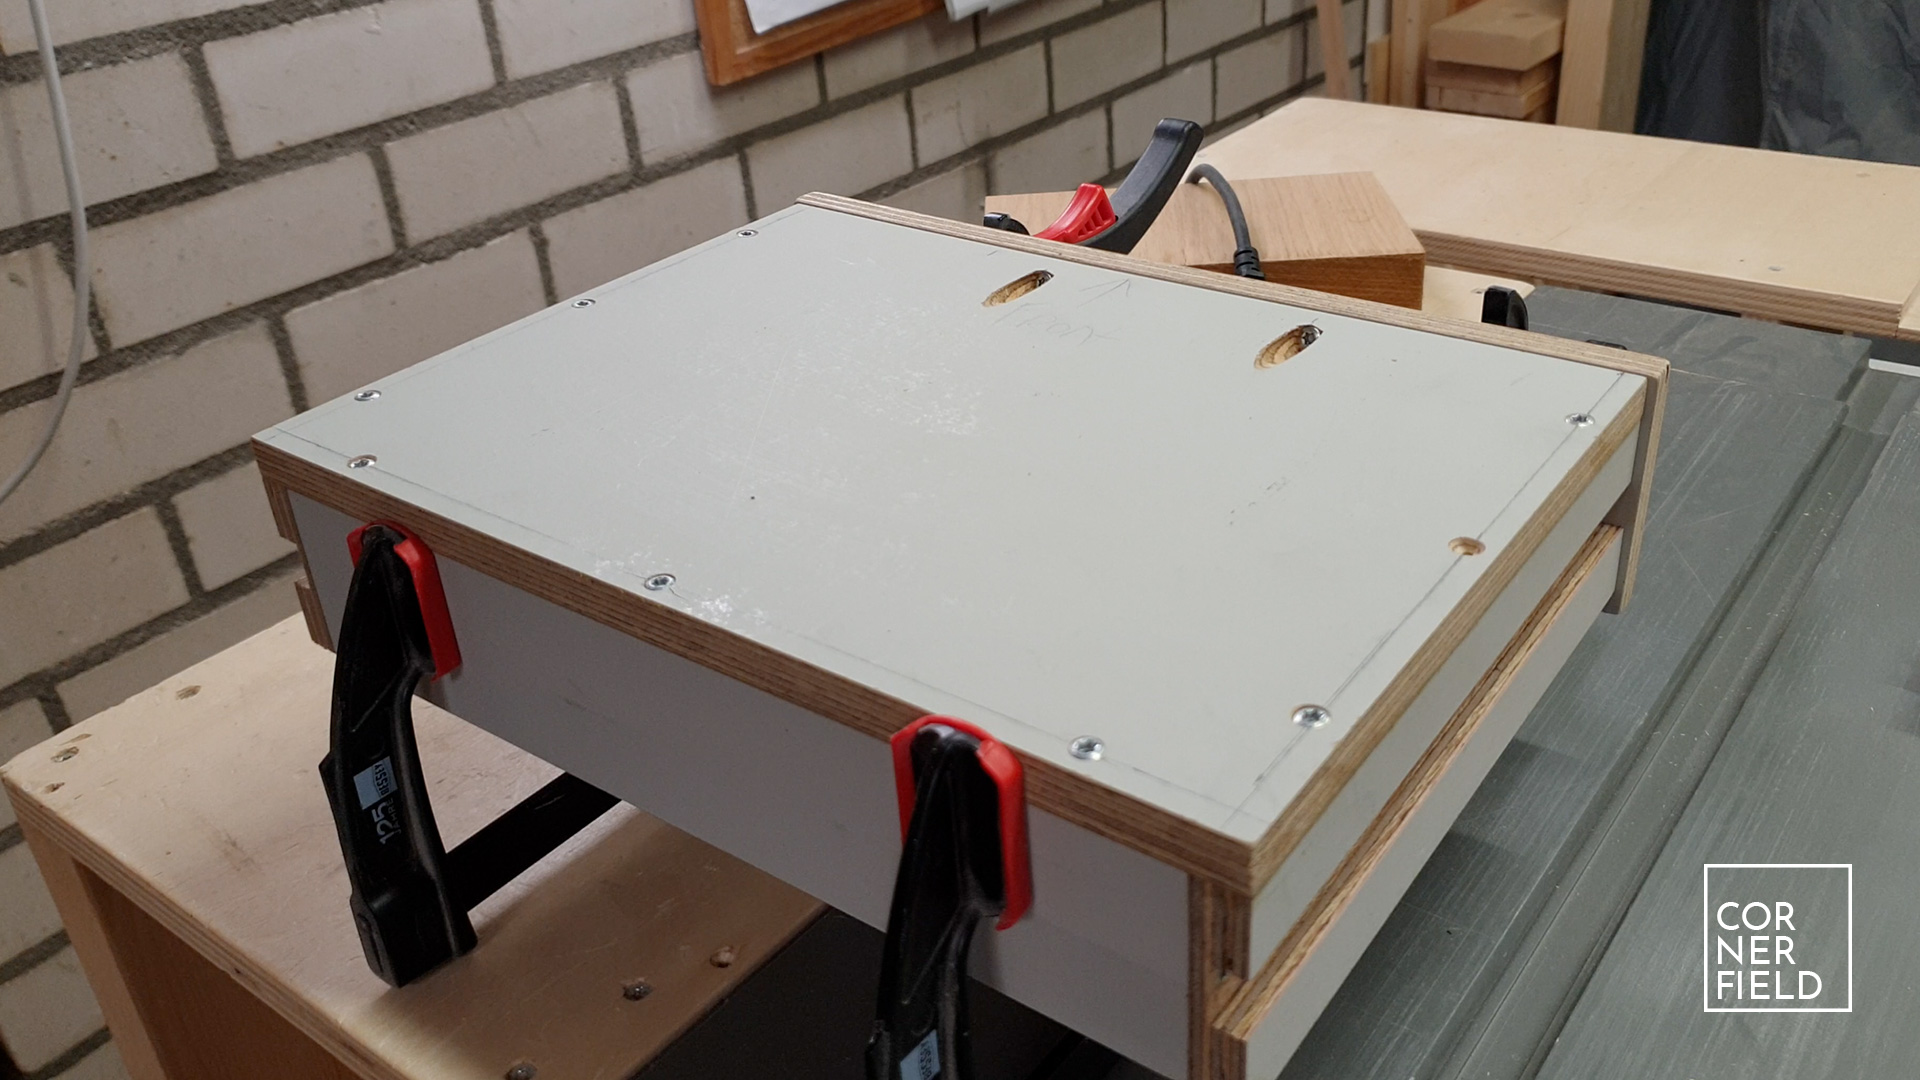
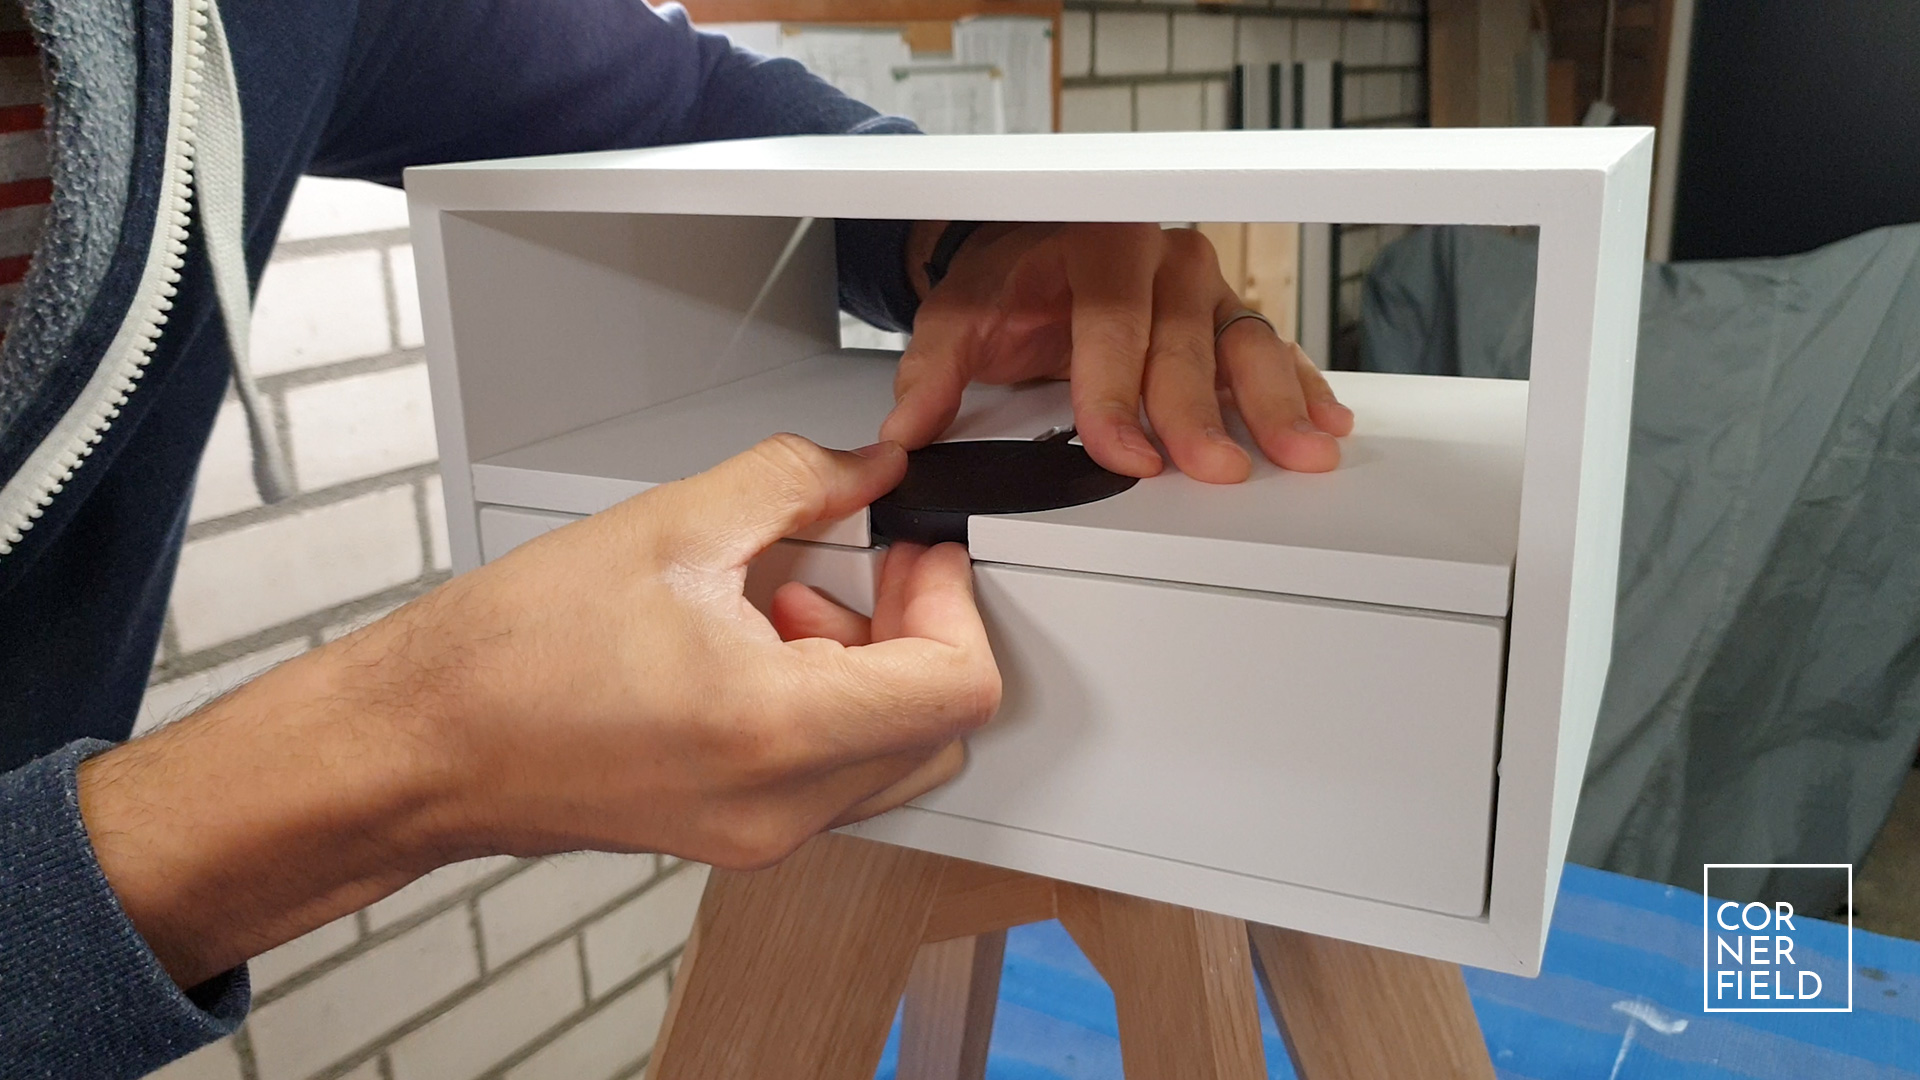
With the leg assembly complete I move on to making the cabinet, drawer, and shelf with built-in charger. Starting with marking the size of the charger on the shelf and cutting that out using my jigsaw. I decided that making the charger fit just right was the best of fastening it in the shelf. Especially since the thickness of both the wood and charger is similar. For the wire, I use my table saw and a chisel to cut away just enough material. To support the shelf I’m putting in dowels in the side of the cabinet. The shelf itself will get partial holes in the side to fall into the dowels. I’m doing this so I can easily swap the shelf later.
Drawer & assembly
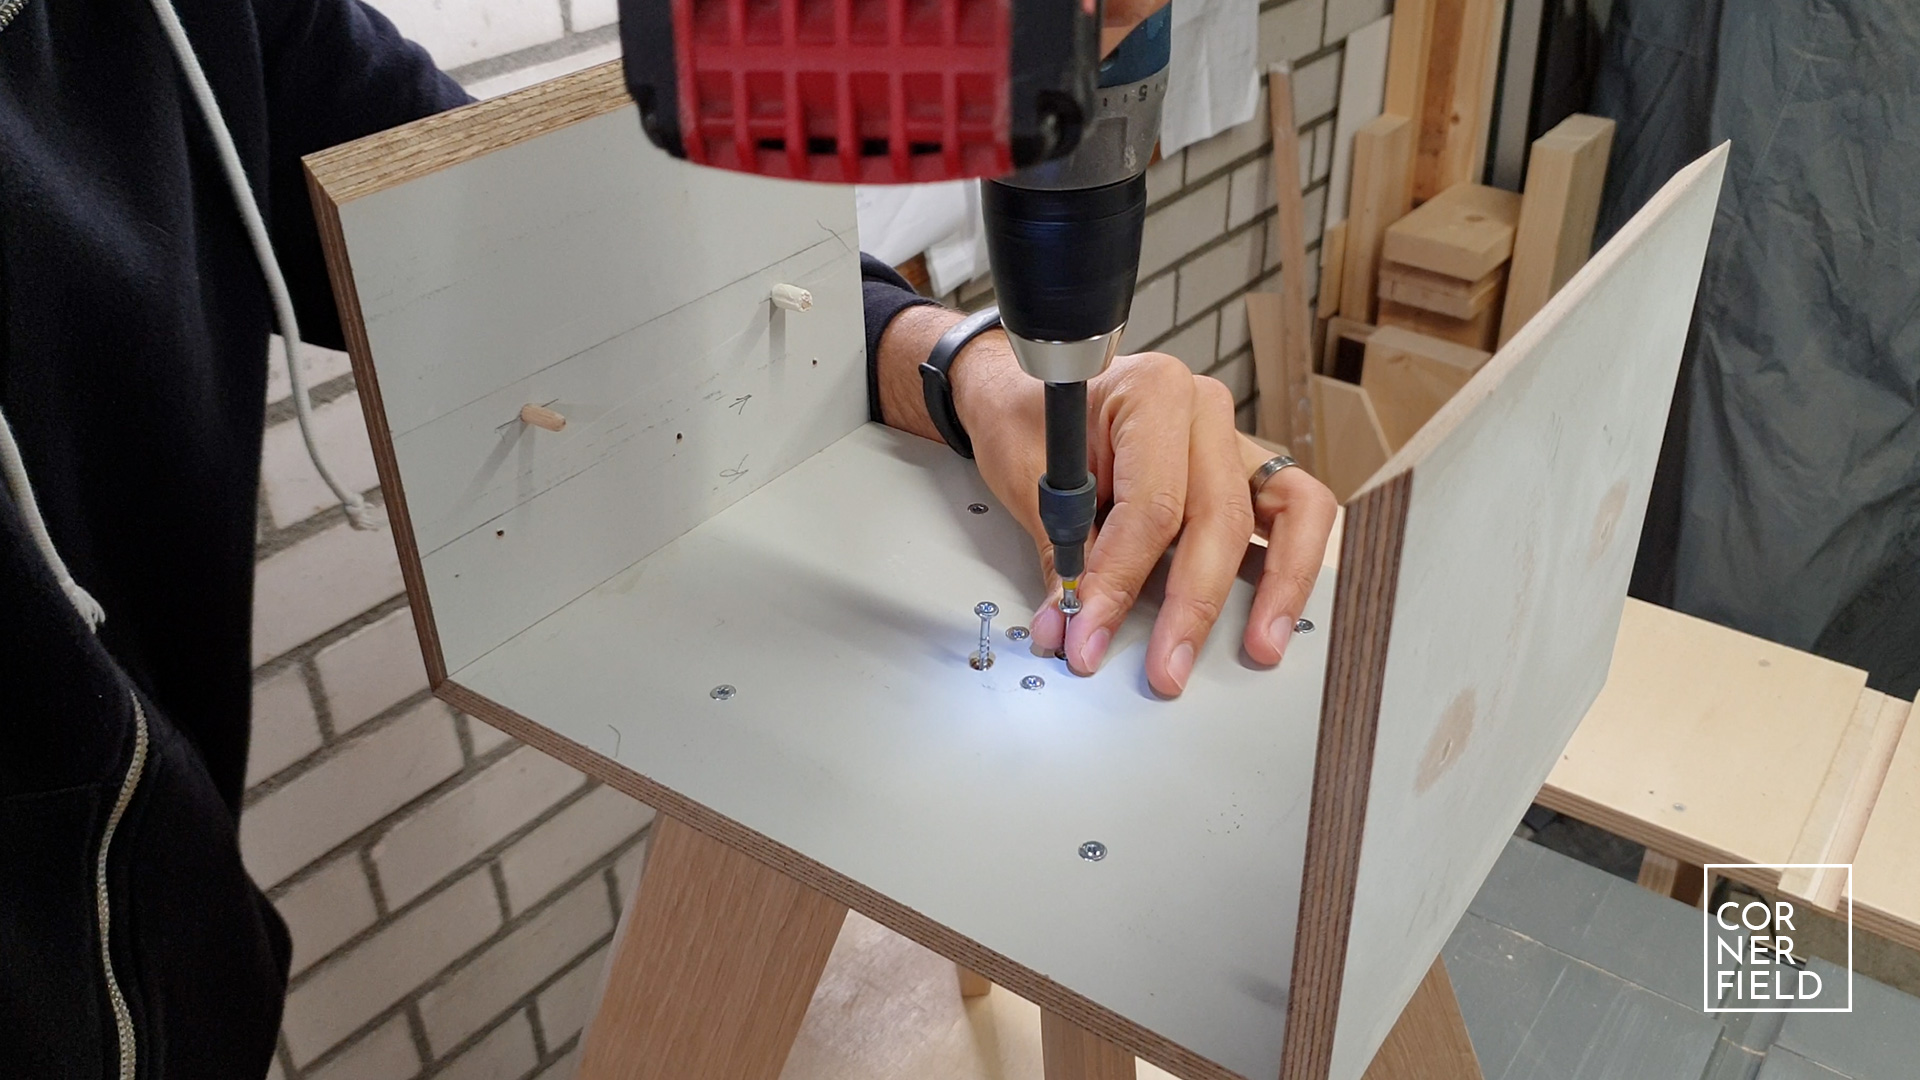
The drawer in the nightstand is a simple, straightforward box. It’s very small and will never have heavy items in it, so you can make it as simple as you want. As runners, I’m using scraps of wood and cutting slots in the side. Both the slot and runner will be waxed to ensure a smooth operation. The box that holds the drawer and shelf is mitered and simply glued together. Looking back I could have simply screwed 4 boards together and filled the screw holes. That would have made the glue-up much easier. Before gluing on the top I made sure the legs are fastened from the inside. Since this will be much harder to do with the top glued on.
Finish
Having the legs attached and the top glued on, I could apply my finish. The legs get a few coats of beeswax and the cabinet is painted a matt white finish.


Result
I had a lot of fun building this project because it was relatively quick to complete and the result is pretty awesome looking. I’m not sure about the position of the wireless charger and how it will be to use it. I guess I will have to find out as I start using it. Should there be any changes to the cabinet I will be sure to update this article and let you know.
Links & Download
If you want to build something similar I’ve linked my original 3D model below as a download.
SketchUp 3D-model
Instagram 1 | 2 | 3 | 4 | 5 | 6
Hope this post has inspired you to make something!
And don’t forget to follow your excitement 

Add comment